ByteDelight produces and sells thousands of devices annually.
From time to time we get in a faulty device, and because of that we can see some trends in what’s causing these faults.
With DivMMC EnJOY! or other interfaces we offer, almost all of the faults users have encountered, were caused when using a ZX Spectrum +2A/+2B/+3.
The cause of almost all of these faults has been the power supply, or how it is used, which is explained on this page.
Causes of faults
At this moment we have strong indications that faults with power supplies of the ZX Spectrum +2A/+2B/+3, are caused by either:
1. An original non-serviced power supply that has developed faults
We’ve read several experiences from other users on Facebook who have had faults with these original PSU’s, like e.g. 8V on the 5V rail.
These and other faults are caused by parts that need to be replaced in these 30 year old power supplies.
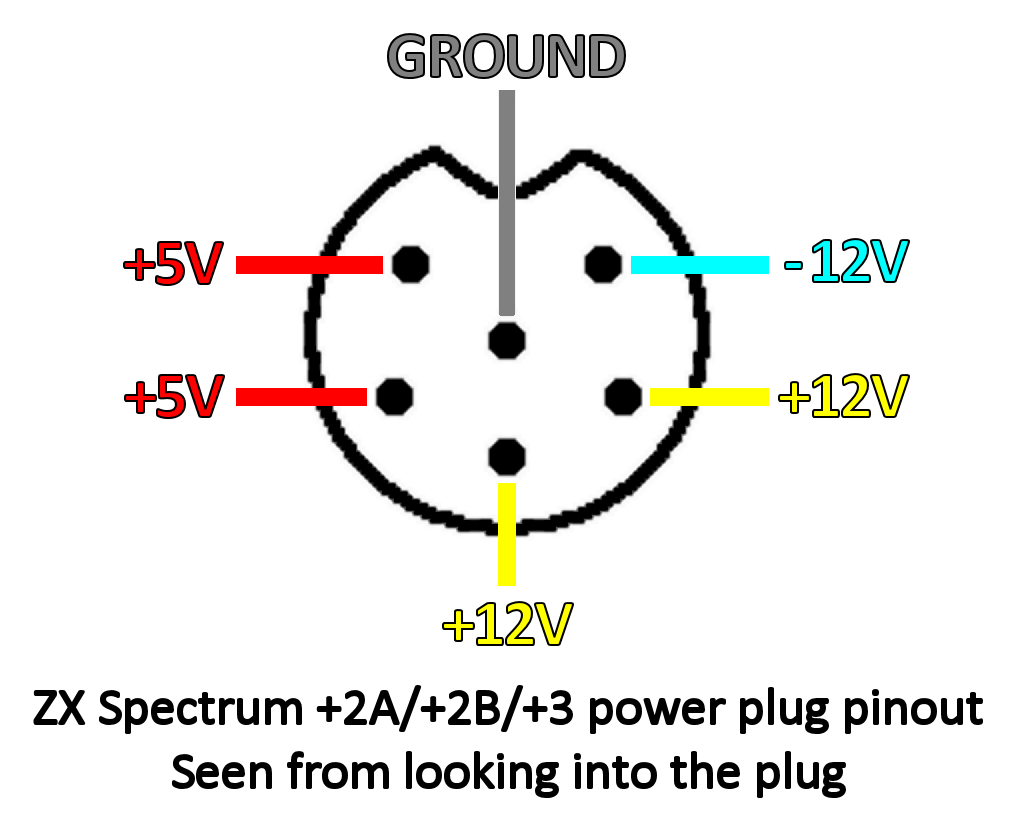
One thing you could do as a precautionary check, is measuring the output voltages on the 6 pin DIN power plug.
If you have a multimeter, keep the ground probe to the ground pin, and the voltage probe to one of the voltage pins shown here:
Be very careful not to create a short while measuring!
If you’re not able to service the original power supply yourself, you could ask us or Ian Gledhill (Mutant Caterpillar Games) for repair service, or obtain a replacement power supply – see the info underneath.
Please read along for other causes of faults with these power supplies.
2. The way of connecting and disconnecting a ZX Spectrum +2A/+2B/+3 power supply
Some background:
Amstrad originally sold the ZX Spectrum +2A, +2B and +3 in the UK.
In the UK the mains outlets and power strips have switches at each outlet.
So users could just leave the power supply plugged into the mains power and into their ZX Spectrum all the time – they just turned the mains switch to power on and off.
Most other countries do not have switches on the mains outlets.
Many users will instead just attach and unplug the 6 pin DIN plug from and to their ZX Spectrum – like I did for years myself!
Some then leave the power supply on mains power all the time, or use just one main switch to power the whole setup including TV etc. on and off.
However, this can be a cause of faults: with the 6 pin DIN plug for power it’s not certain which pin is being connected first.
Other (proper) multi-voltage power supplies have a connector where the ground connection is made first, before any of the voltages is connected.
The connector Amstrad used makes this impossible.
The result can be (we’re still investing this at the moment of writing, but we’re quite sure this is a cause of faults) that the voltages are connected before the ground-connection has been made, destroying parts inside the ZX Spectrum or add-ons.
So we have to instruct users (which should have been in the +2A/+2B/+3 manual):
ALWAYS DISCONNECT MAINS POWER (230V)
before connecting the 6 pin DIN power plug
to the ZX Spectrum!
Once the DIN power plug is plugged in,
you can power on the power supply.
In other words:
Do NOT connect or disconnect the 6 pin DIN power plug
to your ZX Spectrum +2A/+2B /+3
WHEN THE POWER SUPPLY IS POWERED ON!
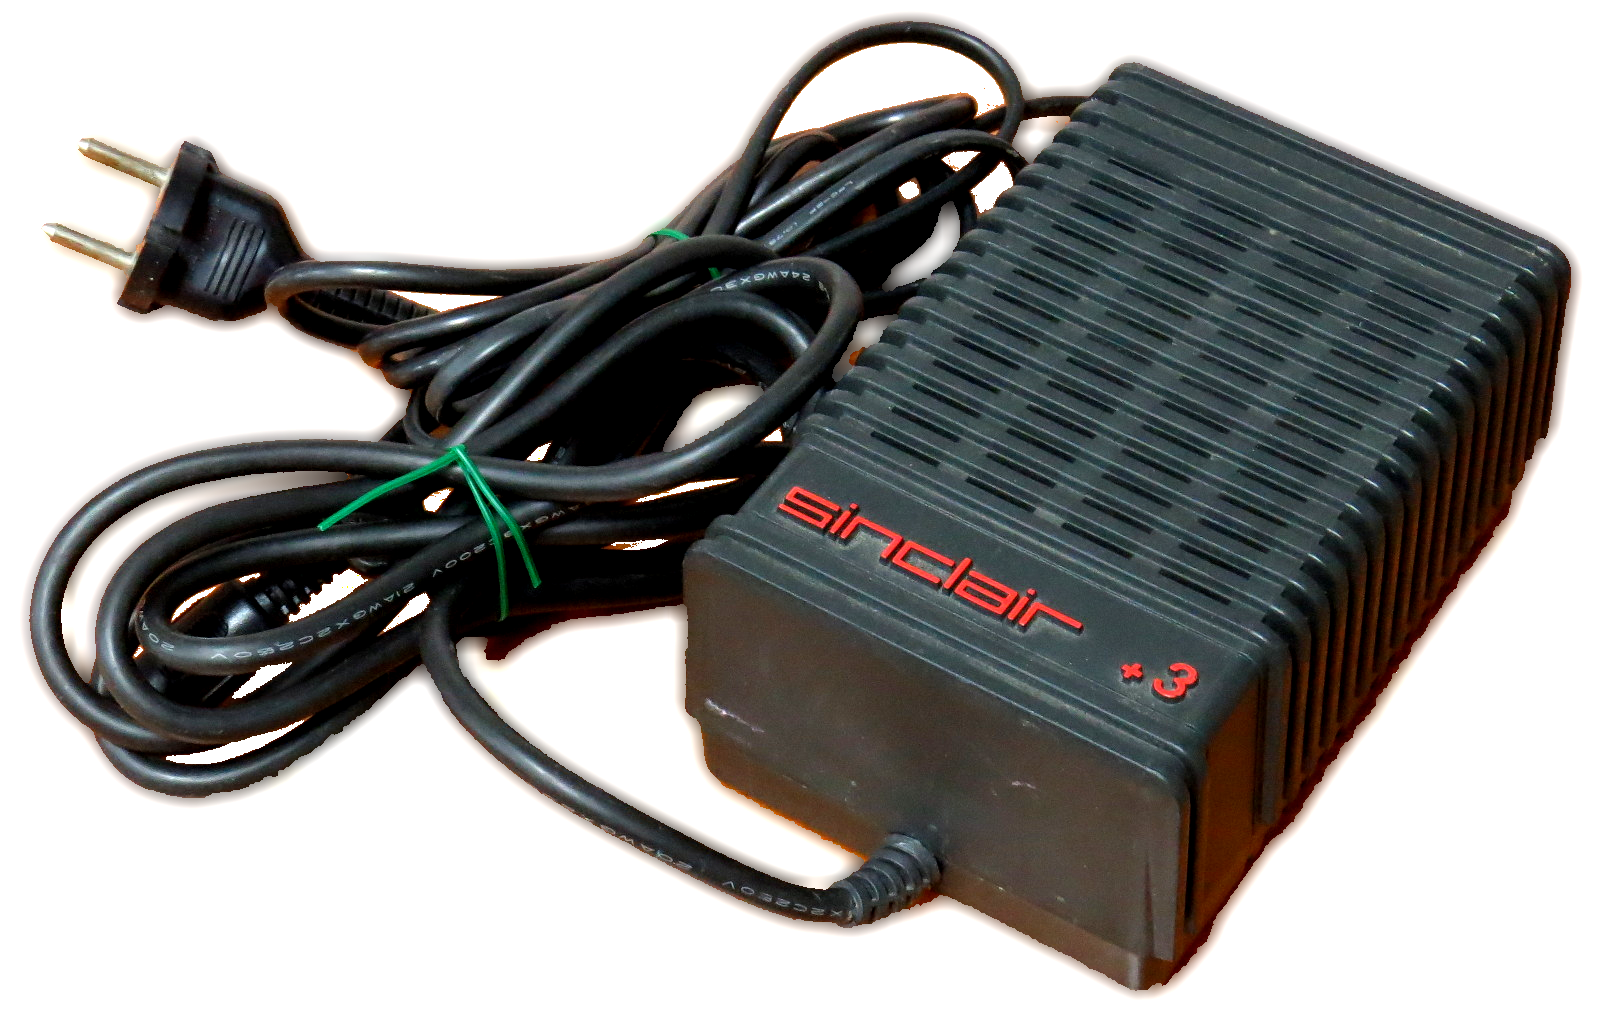
Power supply replacements
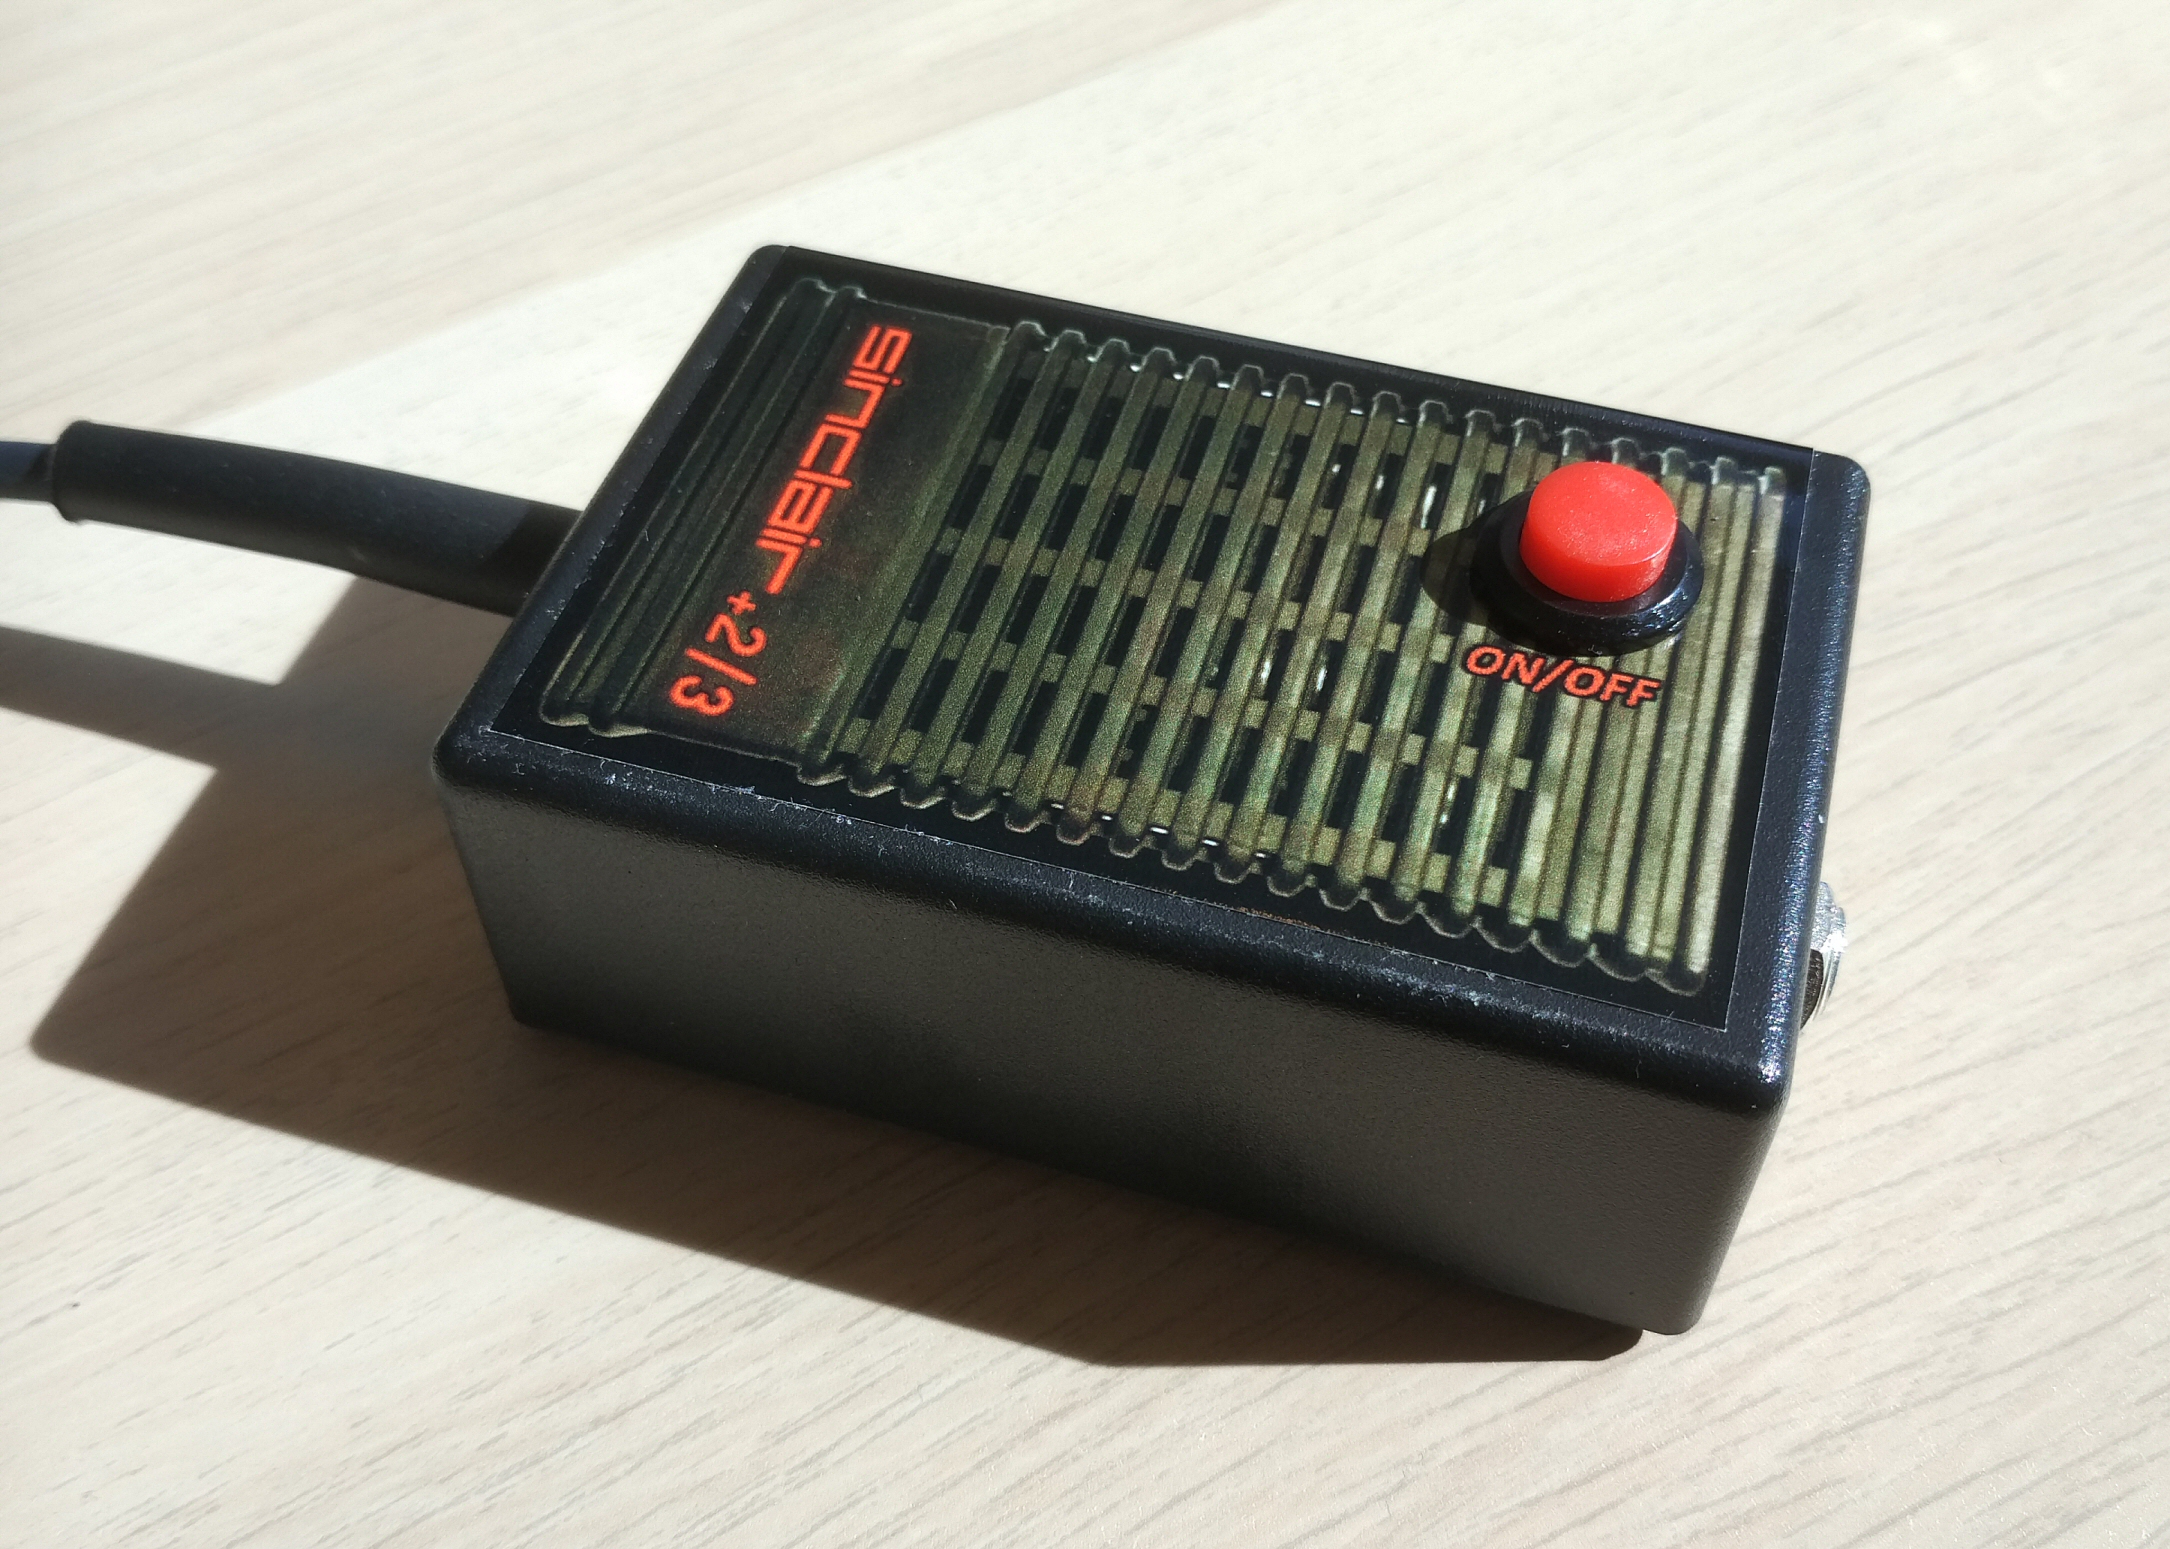
For faulty power supplies we have developed a replacement PSU with ON/OFF switch.
We have been looking for good quality parts, especially the 12V wall mount power supply unit included.
Our power supplies will not cause screen or audio distortion, and are made of top quality parts, from reliable suppliers.
Our replacement power supply will work perfectly on any ZX Spectrum +2A / +2B or +3*.
You can find this in the webshop – click this link to get to the webshop category.
* Our replacement power supply feeds +5V and +12V only, not the -12V which is only used for the RS232 and keypad ports.
Warranty of your defective ByteDelight product
We will repair your device that you ordered at ByteDelight.com if it has developed a fault caused by one of the above reasons.
However we want you to make sure the causes for faults will be taken away by following the instructions above.