ZX-HD HDMI interface + Rasperry Pi Zero – complete set

RASPBERRY PI ZERO 2 NOT YET SUPPORTED

The Raspberry Pi Zero 2 is NOT yet supported!
The ZX-HD requires a Raspberry Pi Zero or Raspberry Pi Zero W
(with or without pre-soldered pin header)

ZX-HD header grey

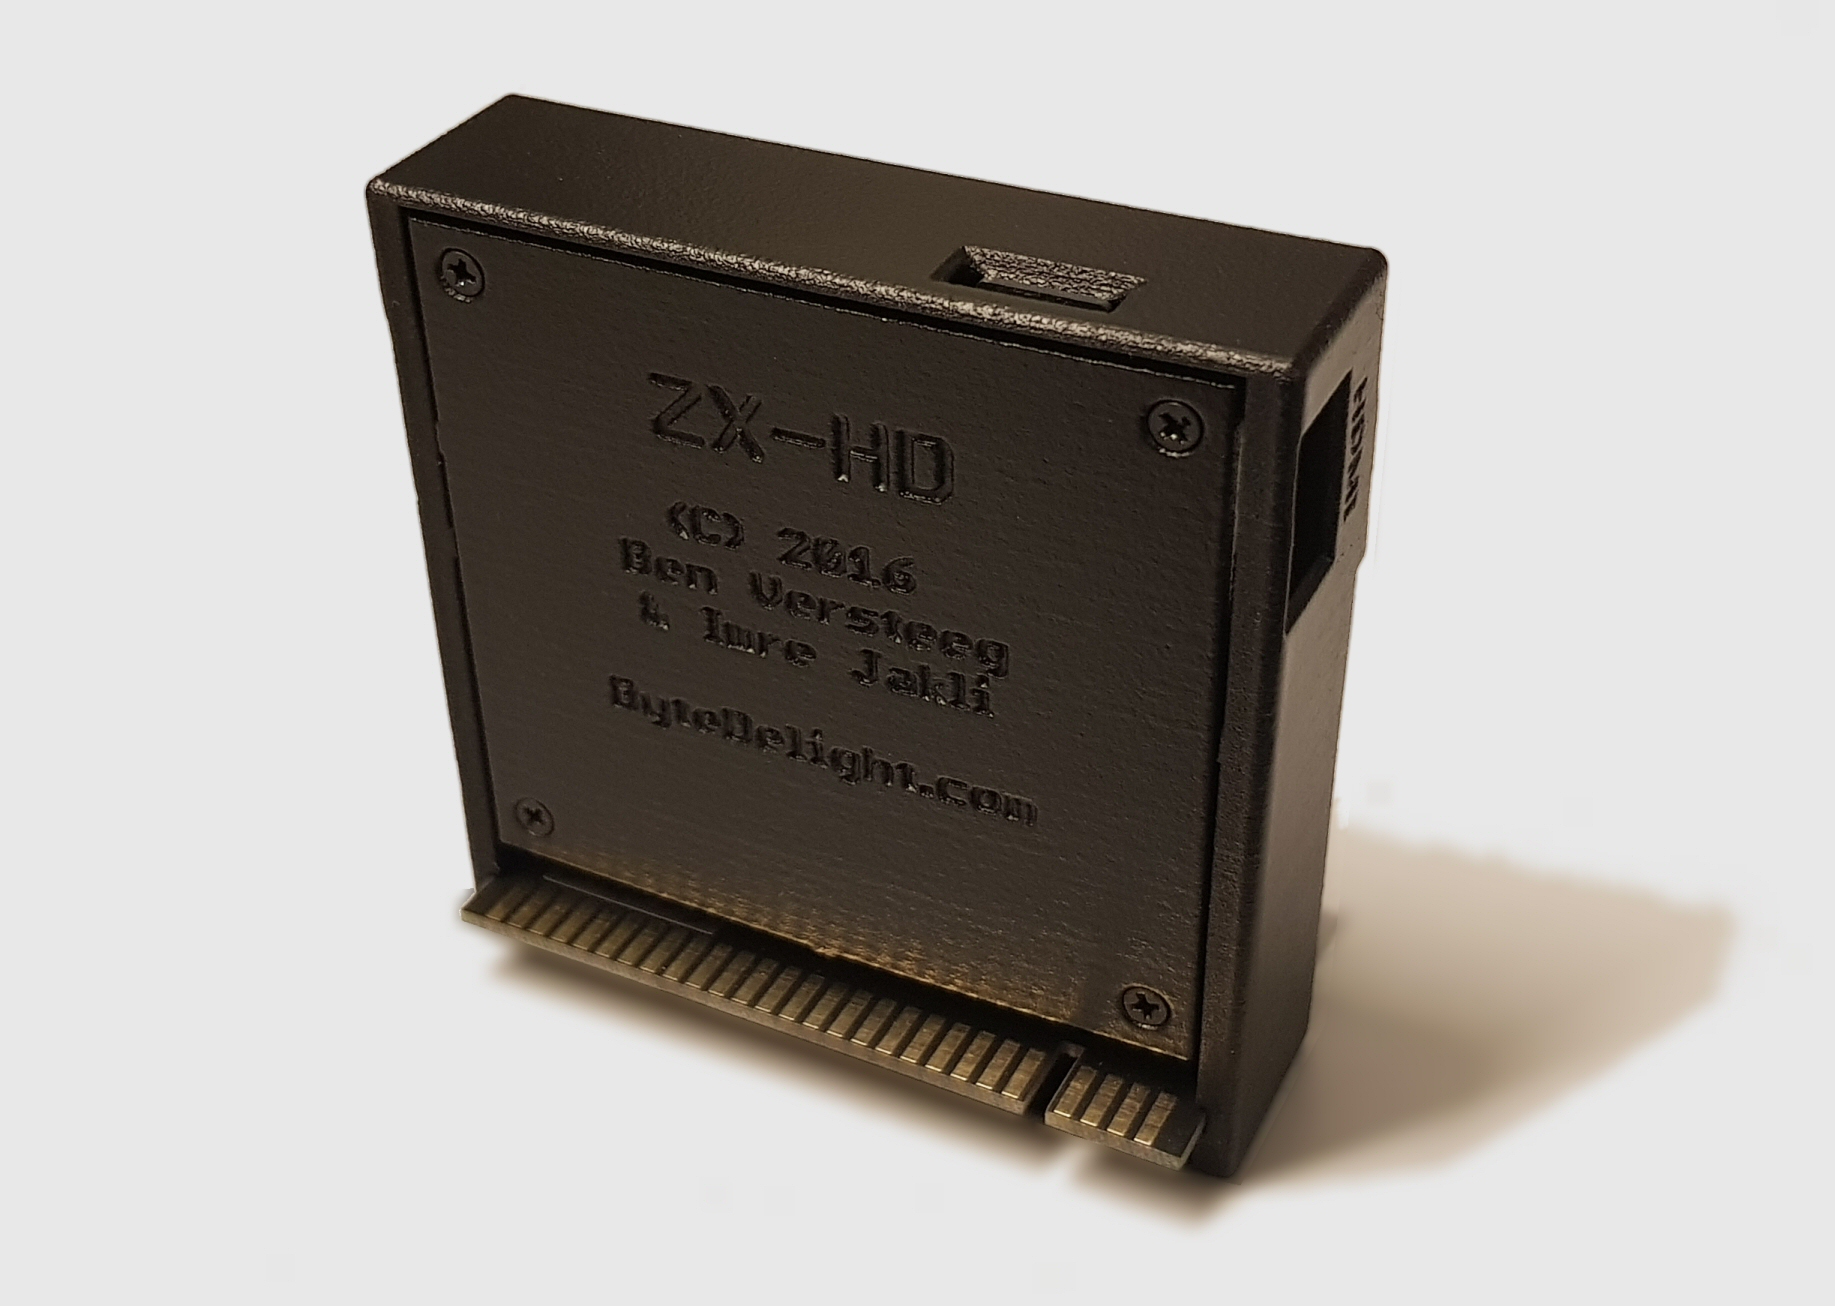
The ZX-HD: the first HDMI interface for the ZX Spectrum
– with ULAplus™!

Complete with quality 2m HDMI cable!

No soldering required!
To save on shipping, you need to finish the very easy assembly steps, described underneath

Reviews of the ZX-HD:

Why a Raspberry Pi?

The ZX-HD requires a Raspberry Pi Zero / Zero W / Zero WH to work.
The Raspberry Pi Zero 2 is not supported yet!

We have 2 product offers: with and without Raspberry Pi Zero.
The product offer without is for customers who already have a Raspberry Pi Zero.
But you need a Raspberry Pi Zero to use the ZX-HD.

Features

– Connect your ZX Spectrum to a modern TV through HDMI – no more composite video or antenna!
– No need to modify your ZX Spectrum!
– Games with 64 colours on your ZX Spectrum with ULAplus™ !
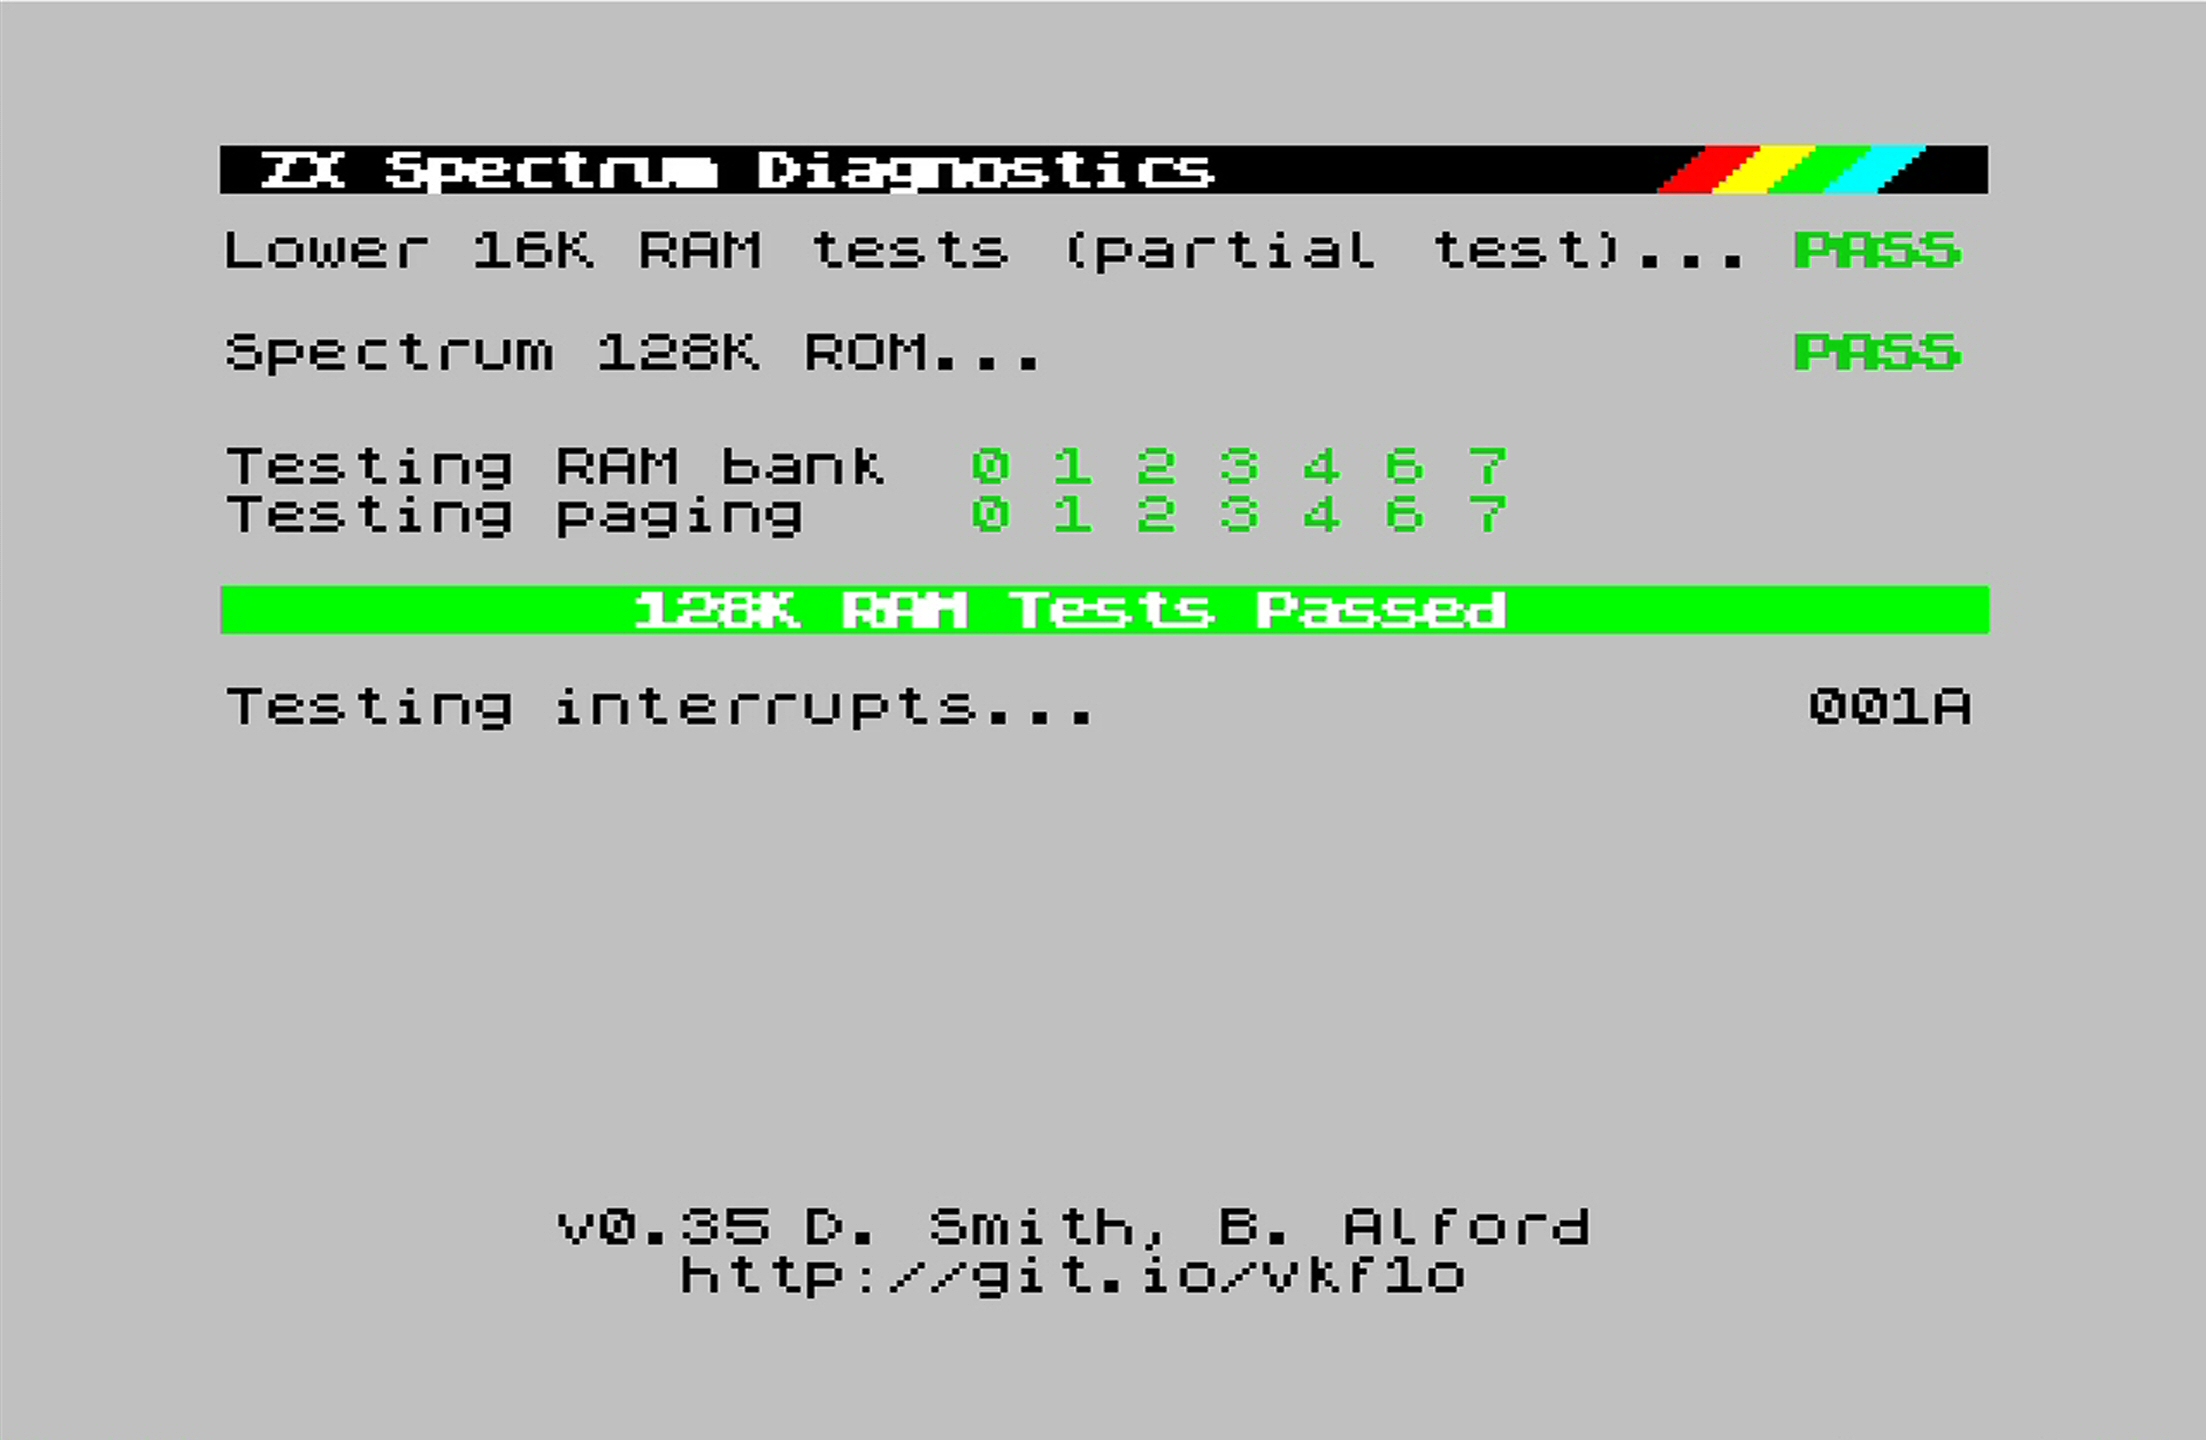
– ZX Spectrum 128 video memory support: works with any software that uses both video buffers!
– Synchronous to ULA timing – software with border and multicolour effects run as they should!
– Colours have been thoroughly calibrated to keep the unique feel of the ZX Spectrum
– Throughput edge connector for other devices

Compatibility

Does the ZX-HD work with other devices, such as a DivMMC EnJOY!, DivMMC Future, PlusD, or anythine else?
Yes, the ZX-HD is ‘fully transparent’, so it should not have any influence on other devices connected at the same time.

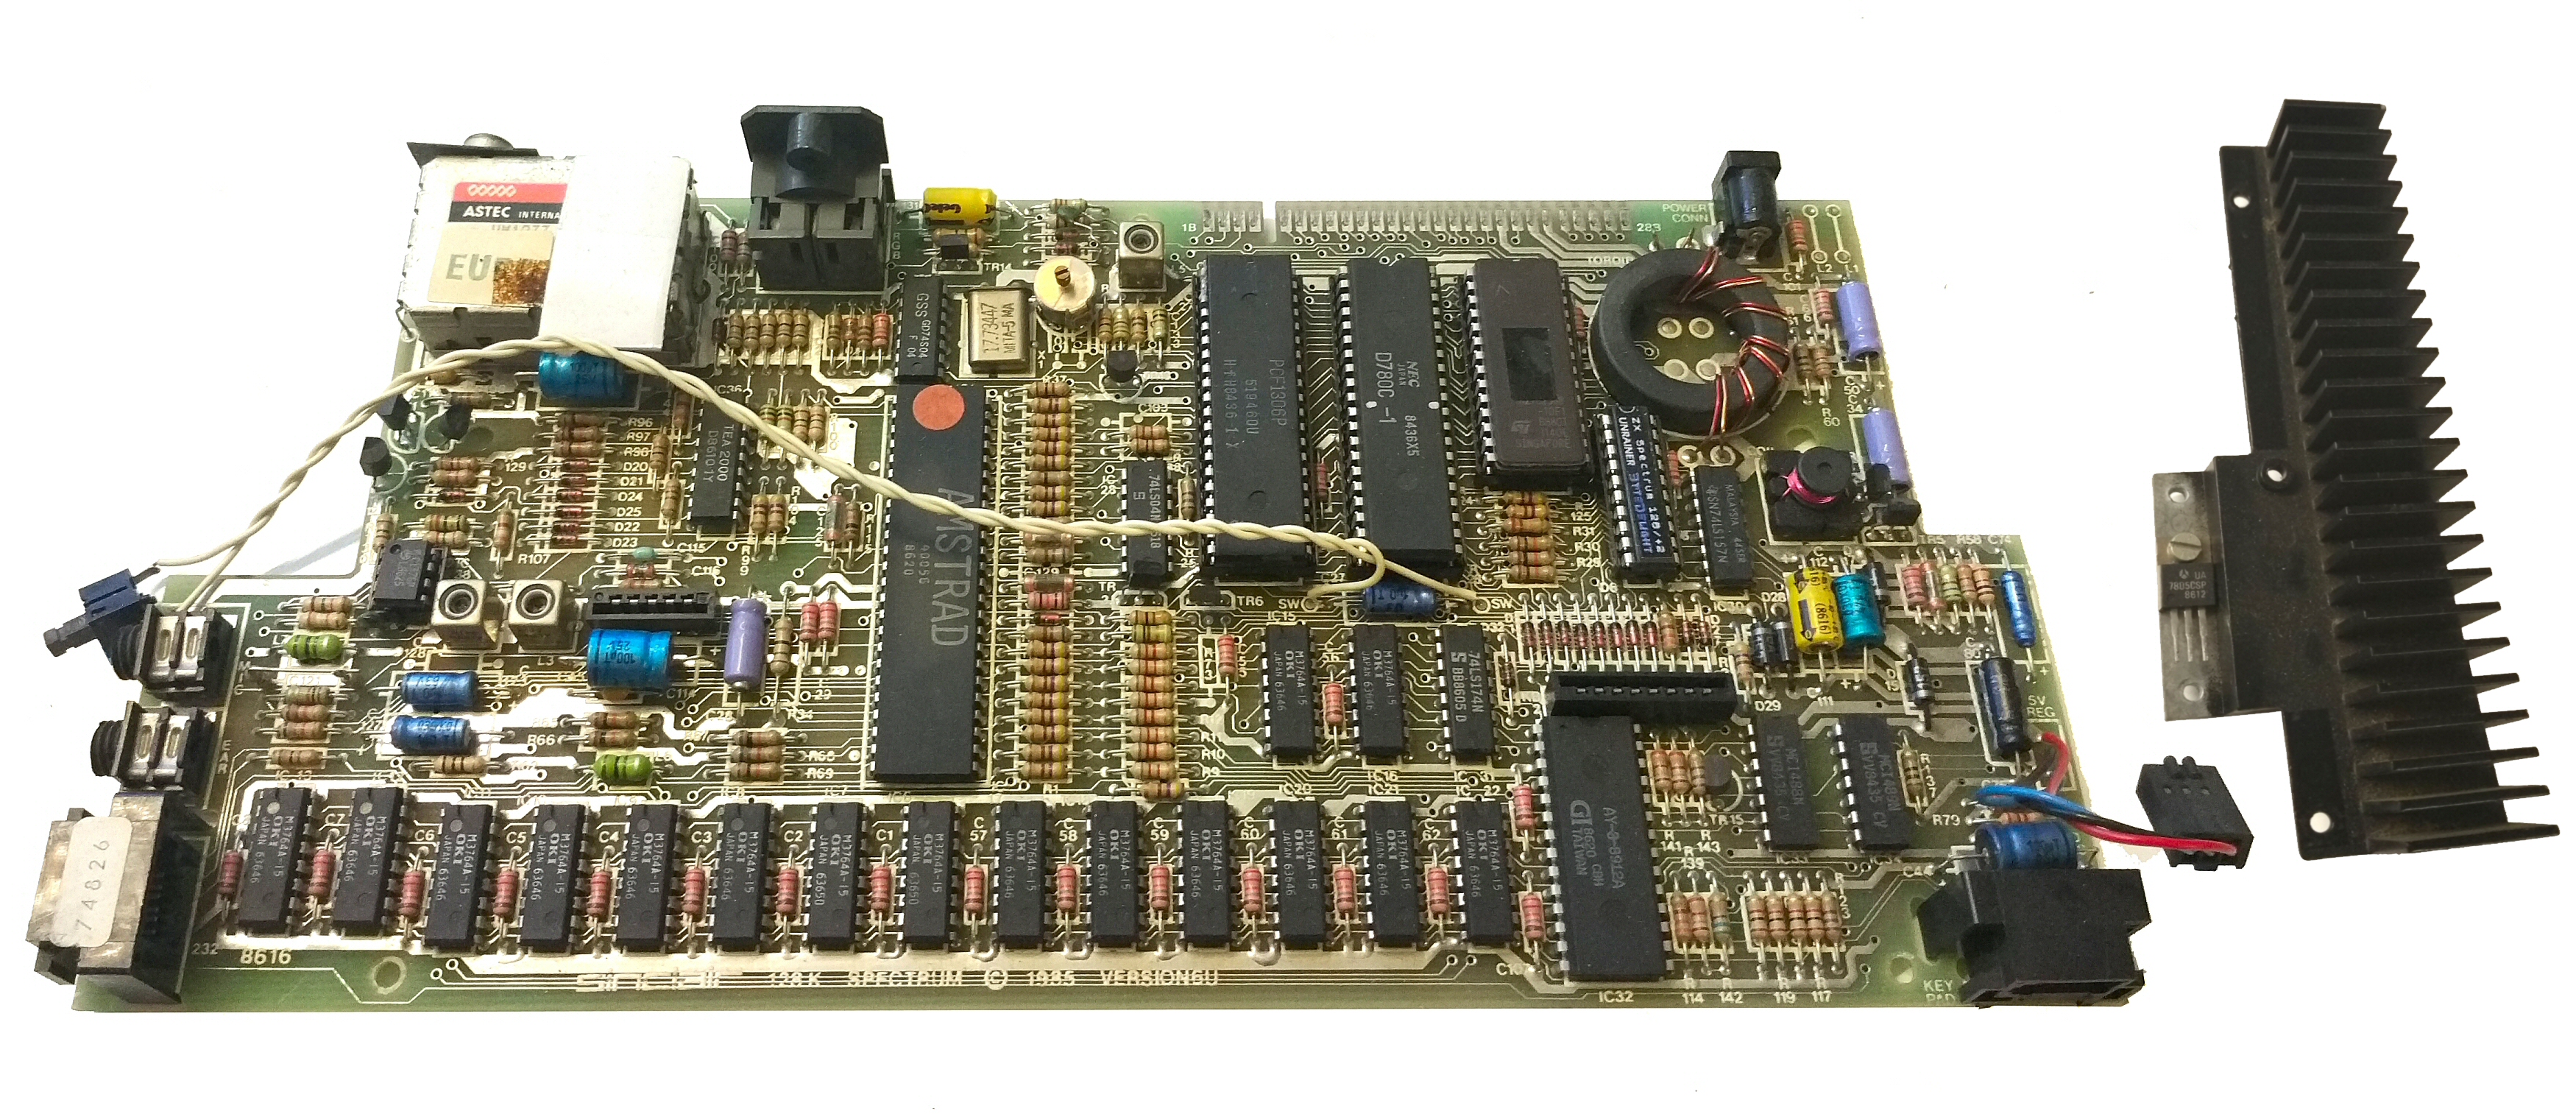
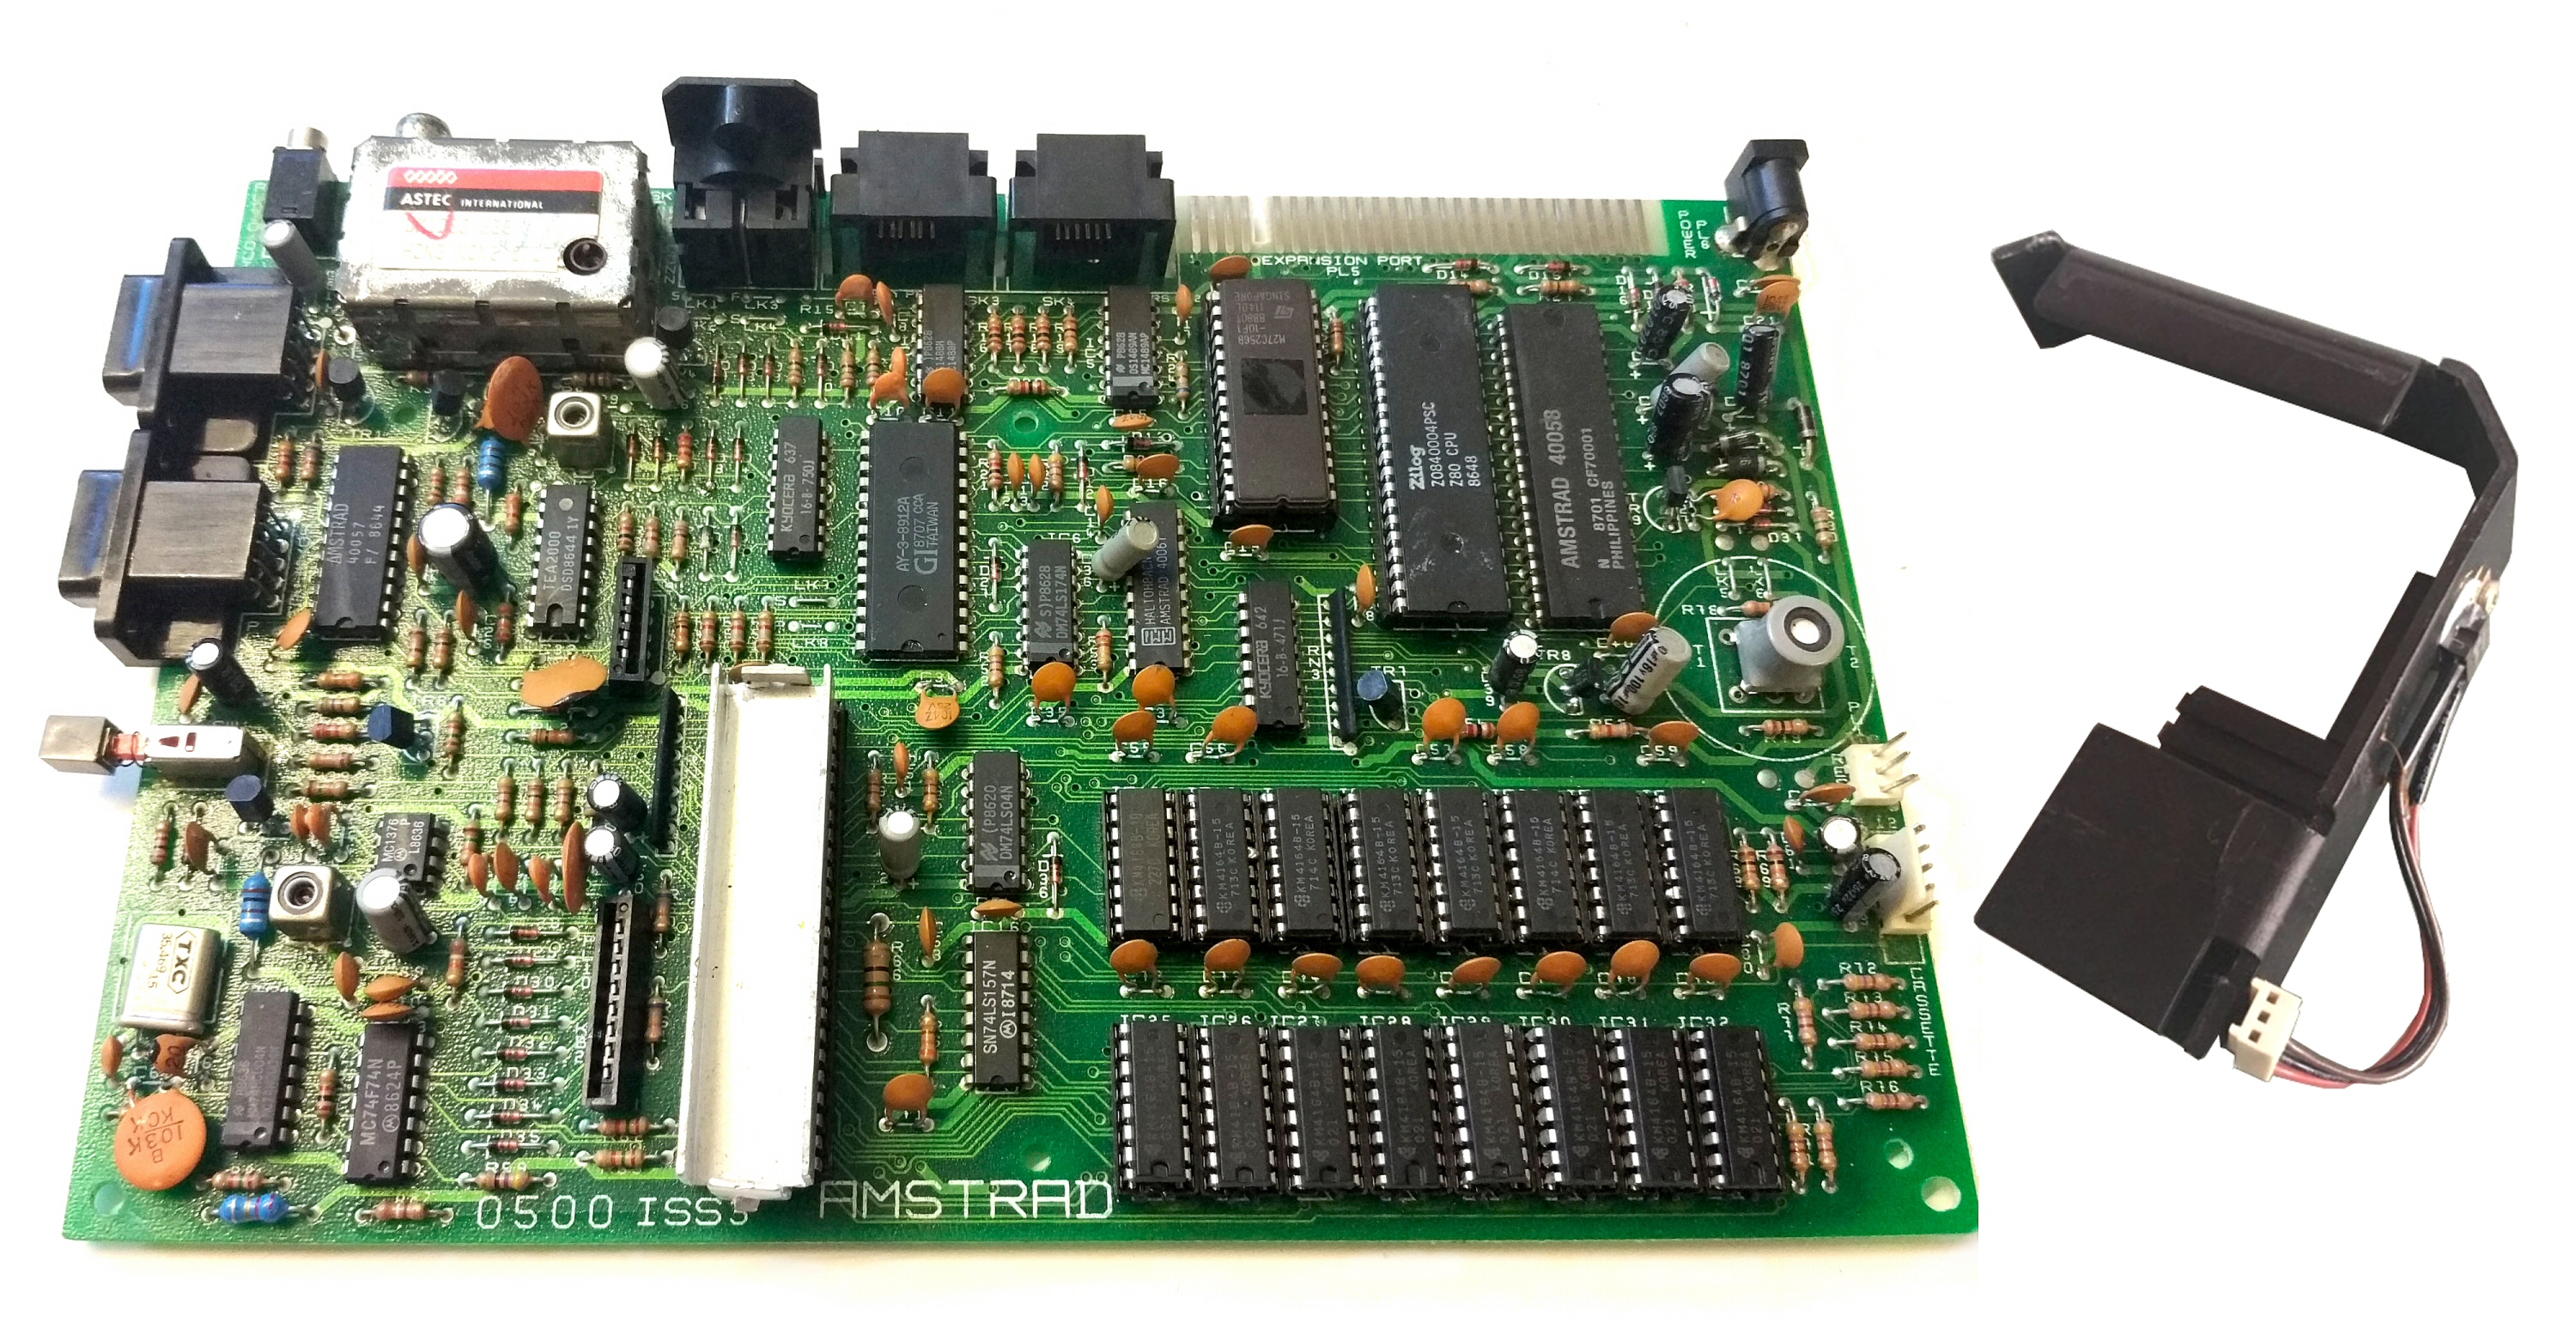
The ZX-HD is fully compatible with all Sinclair ZX Spectrum models:
ZX Spectrum 16K, 48K, 48K+, 128K, +2, +2A, +2B, +3, Harlequin kits and some clones.

Works great with the DivMMC EnJOY! PRO series SD card interfaces (check the webshop)!

Check this compatibility chart for more information.

This ZX-HD product offer includes:

– Raspbery Pi Zero
– Professionally custom 3D printed ZX-HD case with rainbow label!
– Micro SD card + SD adapter, containing the ZX-HD firmware
– Mini-HDMI to HDMI cable
– Printed manual – the latest version of the manual is found on the ZX-HD page (click)

Easy assembly

All parts needed to assemble and complete the ZX-HD are included.
The ZX-HD has been designed as an easy to assemble kit to be able to ship it in a letterbox, and save on shipping.
All you need is a small Phillips / cross-recess screwdriver, as is explained in the included manual.

Shipped with registered and insured service.


The ZX-HD has a throughput edge connector, to be able to connect another add-on:

Duopack Real Dutch Stroopwafels – the big ones!

Some people seem to like these more than their ZX Spectrum goodies 😉

If you can’t get enough of these and you’re not satisfied with the mini’s I add to orders, get some of these!


Repair and refurbishment service for your ZX Spectrum 128K+ ‘toastrack’ board

Send in your own ZX Spectrum 128K+ toastrack mainboard for fixed price repair and refurbishment

Shipping costs specified are for return postage.

The refurbishment service excludes:

  • Replacement of the ULA chip in case it is not fully funcitonal

The refurbishment service includes:

  • Necessary repairs
  • All new high quality Vishay electrolytic capacitors
  • Adding a heatsink to the ULA chip if it doesn’t have one already
  • Replacing the original 7805 regulator with a new 78S05 2A regulator
  • Composite video quality improvement
  • Unrainer modification (see the unrainer mod kit (click) for more info)
  • Fully tested with:
    • Diagnostic cartridge
    • DivIDE interface
    • DivMMC EnJOY! interface
    • Tape loading

1 year warranty.
Shipped by registered and insured service.

Send us your machine to repair & refurbish

After ordering this service, please send your mainboard + heatsink with 7805 regulator (!) to:

ByteDelight.com
Iserelaan 6
5627NL Eindhoven
The Netherlands

Please add a note with your name and address.

Make sure to take care of the packaging of the mainboard: if possible use anti-static material and bubbelfoil to protect against physical damage.

Again: please send the heatsink with 7805 voltage regulator along with mainboard!

Repair and refurbishment service for your ZX Spectrum +2 (grey model) board

Send in your own ZX Spectrum +2 (grey model) mainboard for fixed price repair and refurbishment

Shipping costs specified are for return postage.

The refurbishment service excludes:

  • Replacement of the ULA chip in case it is not fully functional

The refurbishment service includes:

  • Necessary repairs
  • All new high quality electrolytic capacitors
  • Adding a heatsink to the ULA chip if it doesn’t have one already
  • Replacing the original 7805 regulator with a new 78S05 2A regulator
  • Composite video fix and quality improvement
  • Unrainer modification (see the unrainer mod kit (click) for more info)
  • Fully tested with:
    • Diagnostic cartridge
    • DivIDE interface
    • DivMMC EnJOY! interface
    • Tape loading

1 year warranty.
Shipped by registered and insured service.

Send us your machine to repair & refurbish

After ordering this service, please send your mainboard + heatsink with 7805 regulator (!) to:

ByteDelight.com
Iserelaan 6
5627NL Eindhoven
The Netherlands

Please add a note with your name and address.

Make sure to take care of the packaging of the mainboard: if possible use anti-static material and bubbelfoil to protect against physical damage.

Again, send the heatsink with 7805 voltage regulator along with mainboard!


DivMMC EnJOY! PRO ONE *case kit*

If you bought a DivMMC EnJOY! PRO ONE without case, but you’re thrilled by photos of the DivMMC EnJOY! PRO ONE with case, fortunately you can order the case separately.

This case is NOT for the old (discontinued) DivMMC EnJOY! ‘Black Edition’ or ‘DUO’ or any other DivMMC version such as the PRO MINI, PRO MINI *lite*.

MATERIAL USED

The cases are professionally custom 3D printed.
They have two light-guides that show led activity, two button caps for reset and nmi and a professionally printed rainbow sticker with information for the DIP switch configuration on the side.
The screws at the bottom sink into the holes of the bottom plate, so no damage is caused on your desk.

All necessary parts as described above are included with the delivery of the case.
And an added easy assembly manual will help you complete your DivMMC EnJOY! PRO ONE in the blink of an eye!

ZX Diag Cart – DIY kit

ZX Diag Cart – DIY kit

Update 6 March 2022: added link to community 3D printable frame for the ZX Diag Cart!

The ZX Diag Cart will visually show all kinds of details of your ZX Spectrum, which is both looking cool and useful at the same time!

It will make diagnosing defects a lot easier:

  • Quickly check if voltages are present
  • If there is a dataline ‘stuck’
  • If the M1 line is working…

If you are thinking of repairing your own ZX Spectrum (any model, including many clones), this is the tool you must have!

DIY kit

The kit contains:

  • The circuit board with SMD parts already assembled
  • All parts in separately labeled bags with their part numbers for easy matching
  • IC’s and sockets on anti-static foam
  • The manual and DIY build guide

Hardware features

Autodetection of ZX Spectrum model

The ZX Diag Cart automatically detects to which ZX Spectrum model it is connected, so it can control the ROM signals on ZX Spectrum 16/48K, 128K+, +2, +2A or +3, and many clones.

LEDs

The ZX Diag Cart has 20 LEDs showing these groups of information:
– Control signals status, indicated by the blue LEDs
– Data lines status, indicated by the red LEDs
– Power lines status, indicated by the green LEDs

The speed of change of the LEDs is limited by a clever timing circuit, so it’s easier to see what signals are acting and which are stable

Slider switch

Slide it to the right to have the blue LEDs show the status of the data lines present on the edge connector.
Slide it to the left to have the blue LEDs show stages of the diagnostic software.

ROM1/OE jumper

This jumper is for compatibility with the Brazilian clones that use this line for audio.
When using a Brazilian ZX Spectrum clone (TK90X and TK95), disable the jumper (store it on one of the pins).
Enable this jumper for original ZX Spectrum models and other clones.

J1 jumper option – FLASH/SPECTRUM

When a jumper is present on pins 1-2, it will enable the integrated diagnostics software.
When a jumper is present on pins 2-3, it will have the ZX Spectrum boot as normal.

J2 jumper option – M1 Ignore / Normal

When a jumper is present on pins 1-2, it will ignore the M1 line in case it’s not working properly.
When a jumper is present on pins 2-3, it will use the M1 line.

Of course, when the M1 line of the Z80 CPU is failing, the Z80 CPU must be replaced!

Integrated Diagnostic Tools

The ZX Diag Cart comes with the ZX Spectrum Diagnostics software, developed by Dylan Smith and Brendan Alford:

If lower ram fails, the software also shows border effects to indicate bad chips:

The manual containst much more information about how to debug such a situation.

The basic diagnostic tool tests:

  • ZX Spectrum Internal ROM
  • ZX Spectrum lower RAM
  • ZX Spectrum upper RAM
  • ZX Spectrum RAM paging*
  • Interrupts

*With 128K models

There are more features that you can launch with a key-press directly after powering up – this is shown on screen.

Needed to assemble the kit

If you ordered the kit, you additionally need these tools to assemble it:

  • Solder wire
  • Soldering iron
  • Side cutter to cut the legs of parts
  • Coffee or tea – and a beer for when you’re finished

SMD parts

The SMD parts have already been soldered on with the DIY kit.

Firmware upgrade instructions available

Follow the intructions on this page to upgrade your Diag Cart to the latest firmware:

ZX Diag Cart upgrade instructions

3D print design for frame

Richard shared this wonderful frame, to print yourself, if you prefer this instead of the rubber feet: https://www.prusaprinters.org/de/prints/138684-zx-diag-cart-case


Photos

ZX Diag Cart – Assembled

ZX Diag Cart – Assembled – Plug and play!

Update 6 March 2022: added link to community 3D printable frame for the ZX Diag Cart!

The ZX Diag Cart will visually show all kinds of details of your ZX Spectrum, which is both looking cool and useful at the same time!

It will make diagnosing defects a lot easier:

  • Quickly check if voltages are present
  • If there is a dataline ‘stuck’
  • If the M1 line is working…

If you are thinking of repairing your own ZX Spectrum (any model, including many clones), this is the tool you must have!

Hardware features

Autodetection of ZX Spectrum model

The ZX Diag Cart automatically detects to which ZX Spectrum model it is connected, so it can control the ROM signals on ZX Spectrum 16/48K, 128K+, +2, +2A or +3, and many clones.

LEDs

The ZX Diag Cart has 20 LEDs showing these groups of information:
– Control signals status, indicated by the blue LEDs
– Data lines status, indicated by the red LEDs
– Power lines status, indicated by the green LEDs

The speed of change of the LEDs is limited by a clever timing circuit, so it’s easier to see what signals are acting and which are stable

Slider switch

Slide it to the right to have the blue LEDs show the status of the data lines present on the edge connector.
Slide it to the left to have the blue LEDs show stages of the diagnostic software.

ROM1/OE jumper

This jumper is for compatibility with the Brazilian clones that use this line for audio.
When using a Brazilian ZX Spectrum clone (TK90X and TK95), disable the jumper (store it on one of the pins).
Enable this jumper for original ZX Spectrum models and other clones.

J1 jumper option – FLASH/SPECTRUM

When a jumper is present on pins 1-2, it will enable the integrated diagnostics software.
When a jumper is present on pins 2-3, it will have the ZX Spectrum boot as normal.

J2 jumper option – M1 Ignore / Normal

When a jumper is present on pins 1-2, it will ignore the M1 line in case it’s not working properly.
When a jumper is present on pins 2-3, it will use the M1 line.

Of course, when the M1 line of the Z80 CPU is failing, the Z80 CPU must be replaced!

Integrated Diagnostic Tools

The ZX Diag Cart comes with the ZX Spectrum Diagnostics software, developed by Dylan Smith and Brendan Alford:

If lower ram fails, the software also shows border effects to indicate bad chips:

The basic diagnostic tool tests:

  • ZX Spectrum Internal ROM
  • ZX Spectrum lower RAM
  • ZX Spectrum upper RAM
  • ZX Spectrum RAM paging*
  • Interrupts

*With 128K models

There are more features that you can launch with a key-press directly after powering up – this is shown on screen.

Needed to assemble the kit

If you ordered the kit, you additionally need these tools to assemble it:

  • Solder wire
  • Soldering iron
  • Side cutter to cut the legs of parts
  • Coffee or tea – and a beer for when you’re finished

SMD parts

The SMD parts have already been soldered on with the DIY kit.

Firmware upgrade instructions available

Follow the intructions on this page to upgrade your Diag Cart to the latest firmware:

ZX Diag Cart upgrade instructions

3D print design for frame

Richard shared this wonderful frame, to print yourself, if you prefer this instead of the rubber feet: https://www.prusaprinters.org/de/prints/138684-zx-diag-cart-case


Photos


How to program an (E)EPROM

This is not a product offer, but information of how to program (flash) an (E)EPROM.
As a business, we will not offer EPROMs with copyrighted software on them.

Introduction

If you need to program an (E)EPROM such as M27C128, M27C256, AT28C256, AM29F040B or something else, there are several options.

For many retro computing enthusiasts, owning a universal programmer is a big must!
These can program (flash) parallel (E)EPROMs, GAL devices, PIC devices, and much more.

However, if you only need to program a chip once in a while, you could ask someone to do it for you.

Why ‘(E)EPROM’?
An EPROM, such as M27C128, is erasable by UV light, and requires a UV eraser to wipe – these are often very cheap, and can be found on eBay or AliExpress.
An EEPROM, such as AM29F040B, is erasable electronically, by a programmer.

Order a universal programmer

At this moment, the best bang for your buck, is most probably the T48 Universal Programmer.
These work though USB, up to Windows11.

Available at eBay or AliExpress:

AliExpress is most often the cheapest option, for just less than €50 including shipping.

Ask us to offer them in the webshop

We might get into contact with the supplier of the XGecu Universal Programmers, and try to get the best price.
If you are interested in that, please let us know through the Contact form.

Ask a friend

Ask someone with a (universal) programmer to do it for you.
Many (expecially retro) tech enthusiasts will have one!

Ask on a forum

There are some places where you could drop your request, such as:

Check your favorite forum to find a topic, or post a similar request.

Look for an EPROM programming service

You could Google for ‘EPROM programming service’.
There are some, such as:

If you want a service to be added to this list, let us know through the Contact form.

Hope for a cheaper programmer in the future

There are some hobby projects for a cheap EPROM programmer, such as:

Most of the time you need some more digging into, to get these working.
Hopefully there will be some like these that will get into an easy to use, final product.

Google for more ideas.

ZX Spectrum 16K to 48K memory upgrade kit

This offer is for a kit to upgrade your ZX Spectrum 16K to 48K of memory.
For ZX Spectrum 16K board issues 2 and up (3, etc).

This kit consists of:

  • A set of 8 new 4164 RAM chips
  • 1x 74LS00 logic chip
  • 1x 74LS32 logic chip
  • 2x 74LS 157 logic chips
  • 2 small wires
  • An assembly manual

This kit assumes that the motherboard of your ZX Spectrum 16K has:

  • 8 unpopulated IC sockets for the memory upgrade
  • 4 unpopulated IC sockets for the required logic chips

Only  small wires need to be soldered.
The chips should be put into the IC sockets available on your board, without soldering.

All chips are tested in a real ZX Spectrum.
Brand and model change from time to time: we’ll ship what is in stock.

Read the manual here: ZX Spectrum 16K to 48K upgrade kit installation manual


Unrainer modification/fix for ZX Spectrum 128K ‘toastrack’ / +2 (grey model)

Unrainer fix to solve ‘raining effect’ with all ZX Spectrum 128K toastracks / grey +2.

What is it needed for?

A lot of (often Eastern-European) games and demos show the so-called ‘raining-effect’, which is caused by a glitch in one of the parts in the ZX Spectrum 128K ‘toastrack’ and the grey ZX Spectrum +2 models (not the black +2A or +3).
See the example pictures below.

Velesoft developed an upgrade to get rid of this problem – more information can be found at: https://velesoft.speccy.cz/zx/umbrella/umbrella.htm.

The replacement ‘unrainer’ chip

These chips have been programmed and tested.

You will have to remove the current PAL or HAL chip first – some (de)soldering skills are required for that.
A 20 pin IC socket is included – this is optional: soldering the replacement chip to the mainboard is fine as well.

One wire is needed as well – it will connect to the chip and the Z80 CPU.
I will include the wire with the package and add a small manual that shows where to connect the wire.

Manual

Read the manual here (click).
It’s not included with the package to save on shipment costs, for your benefit.

Mind the orientation of the chip!

The chips notch is aimed:

  • Upwards in a toastrack
  • Downwards in a +2

See the pictures of the chip locations below.


Before:

After:


Chip locations: