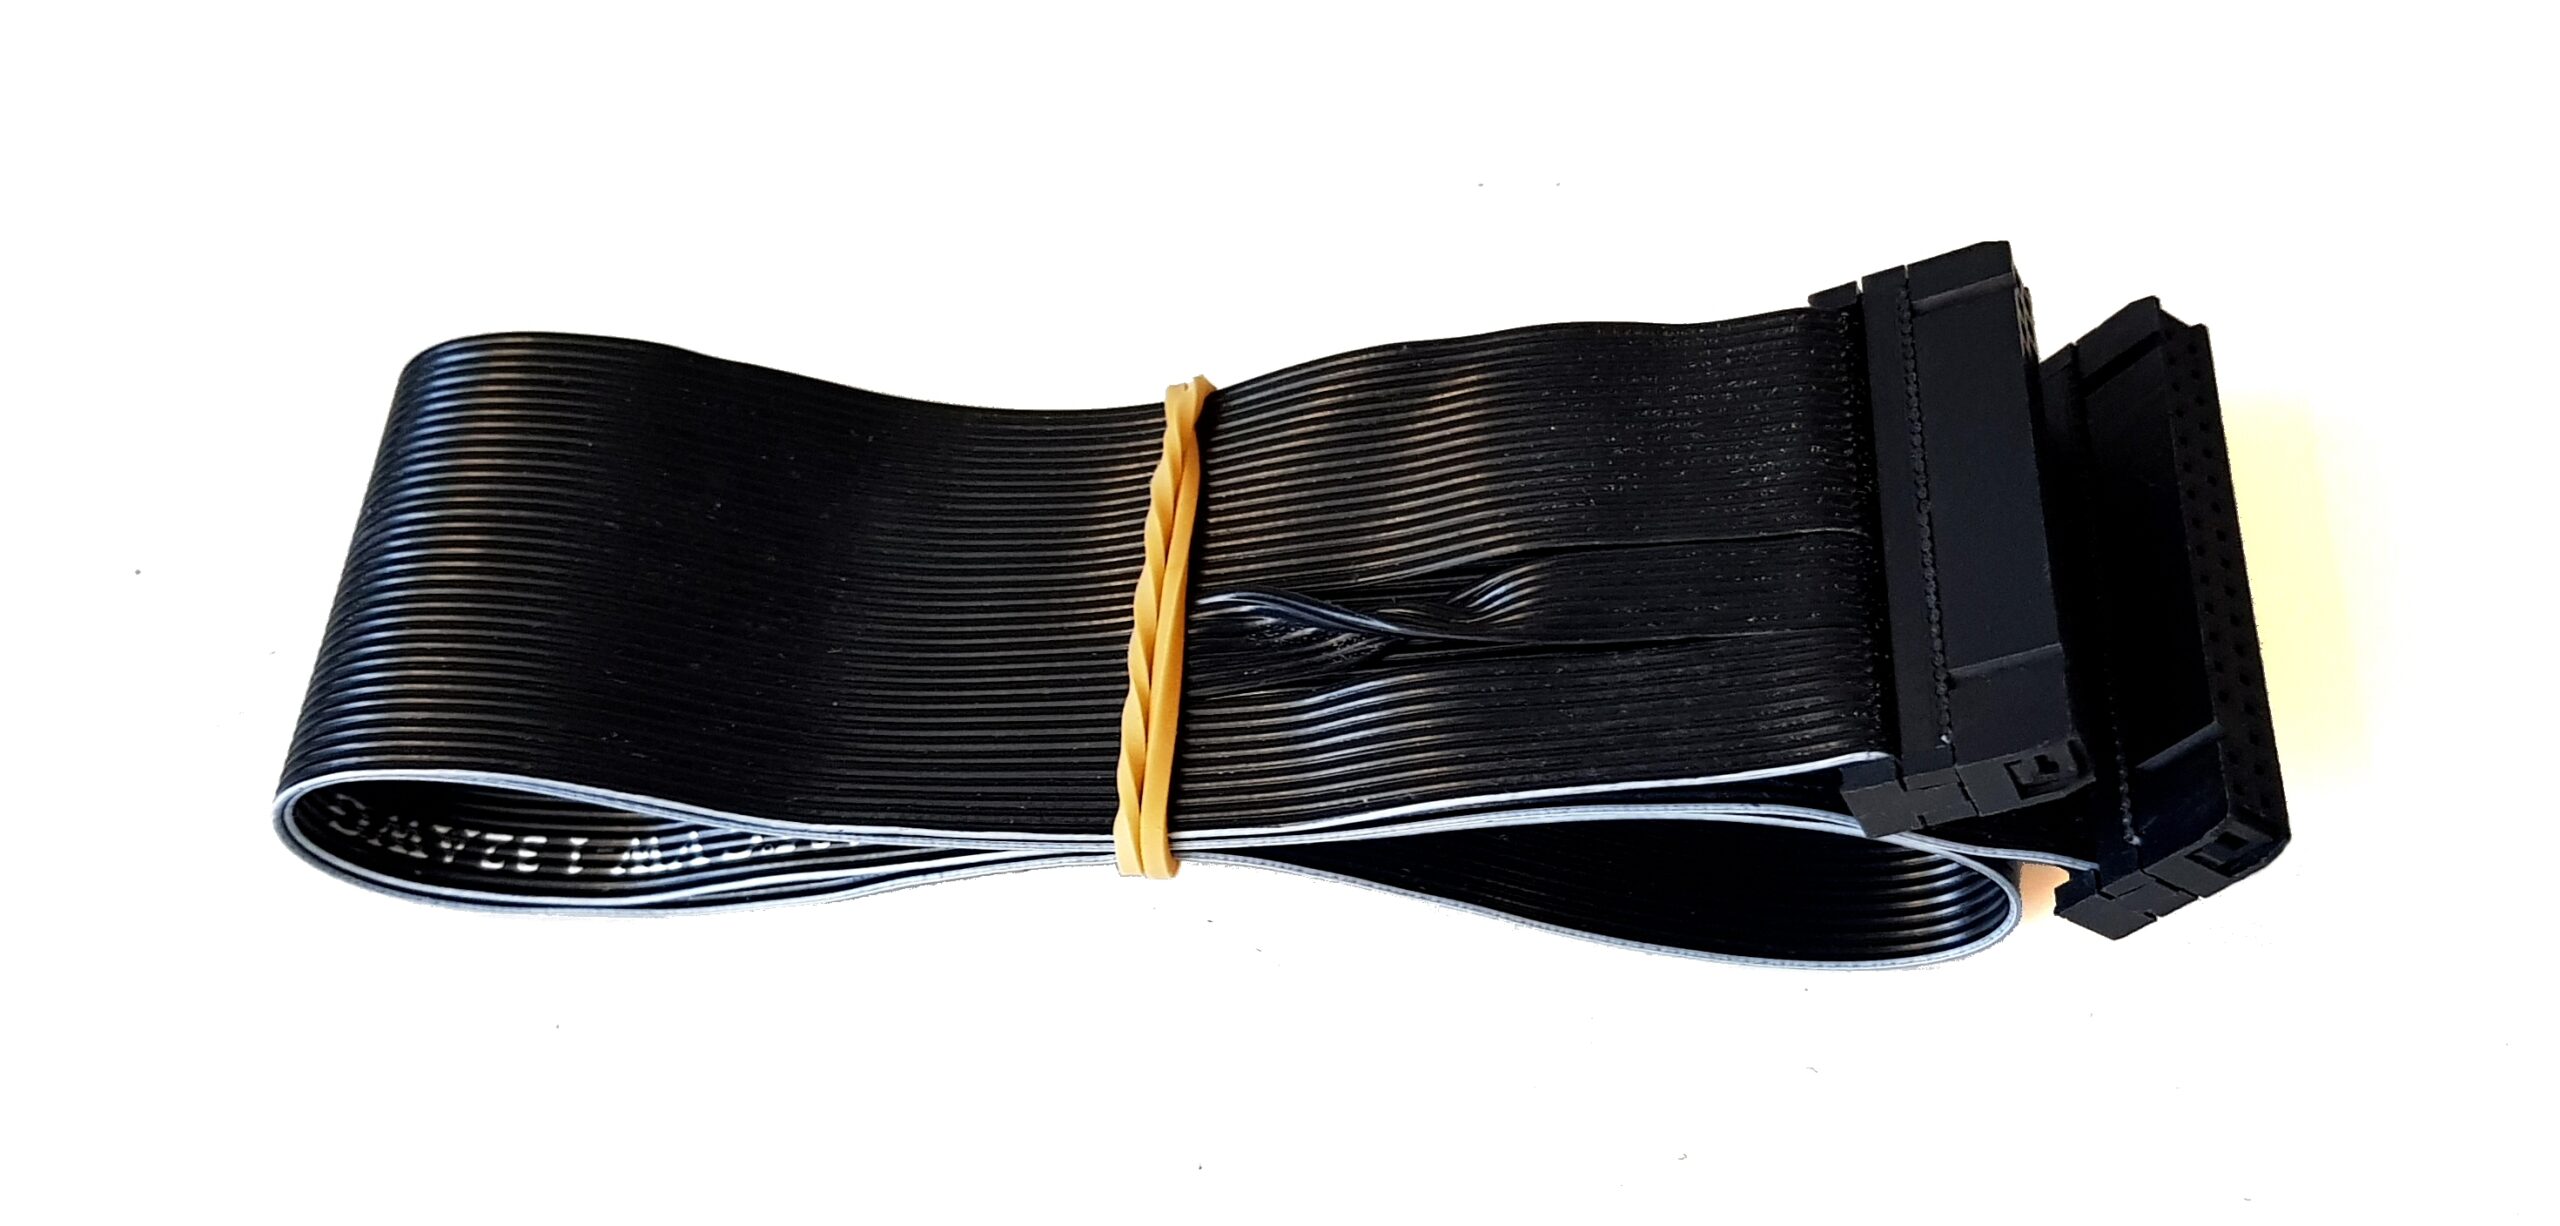
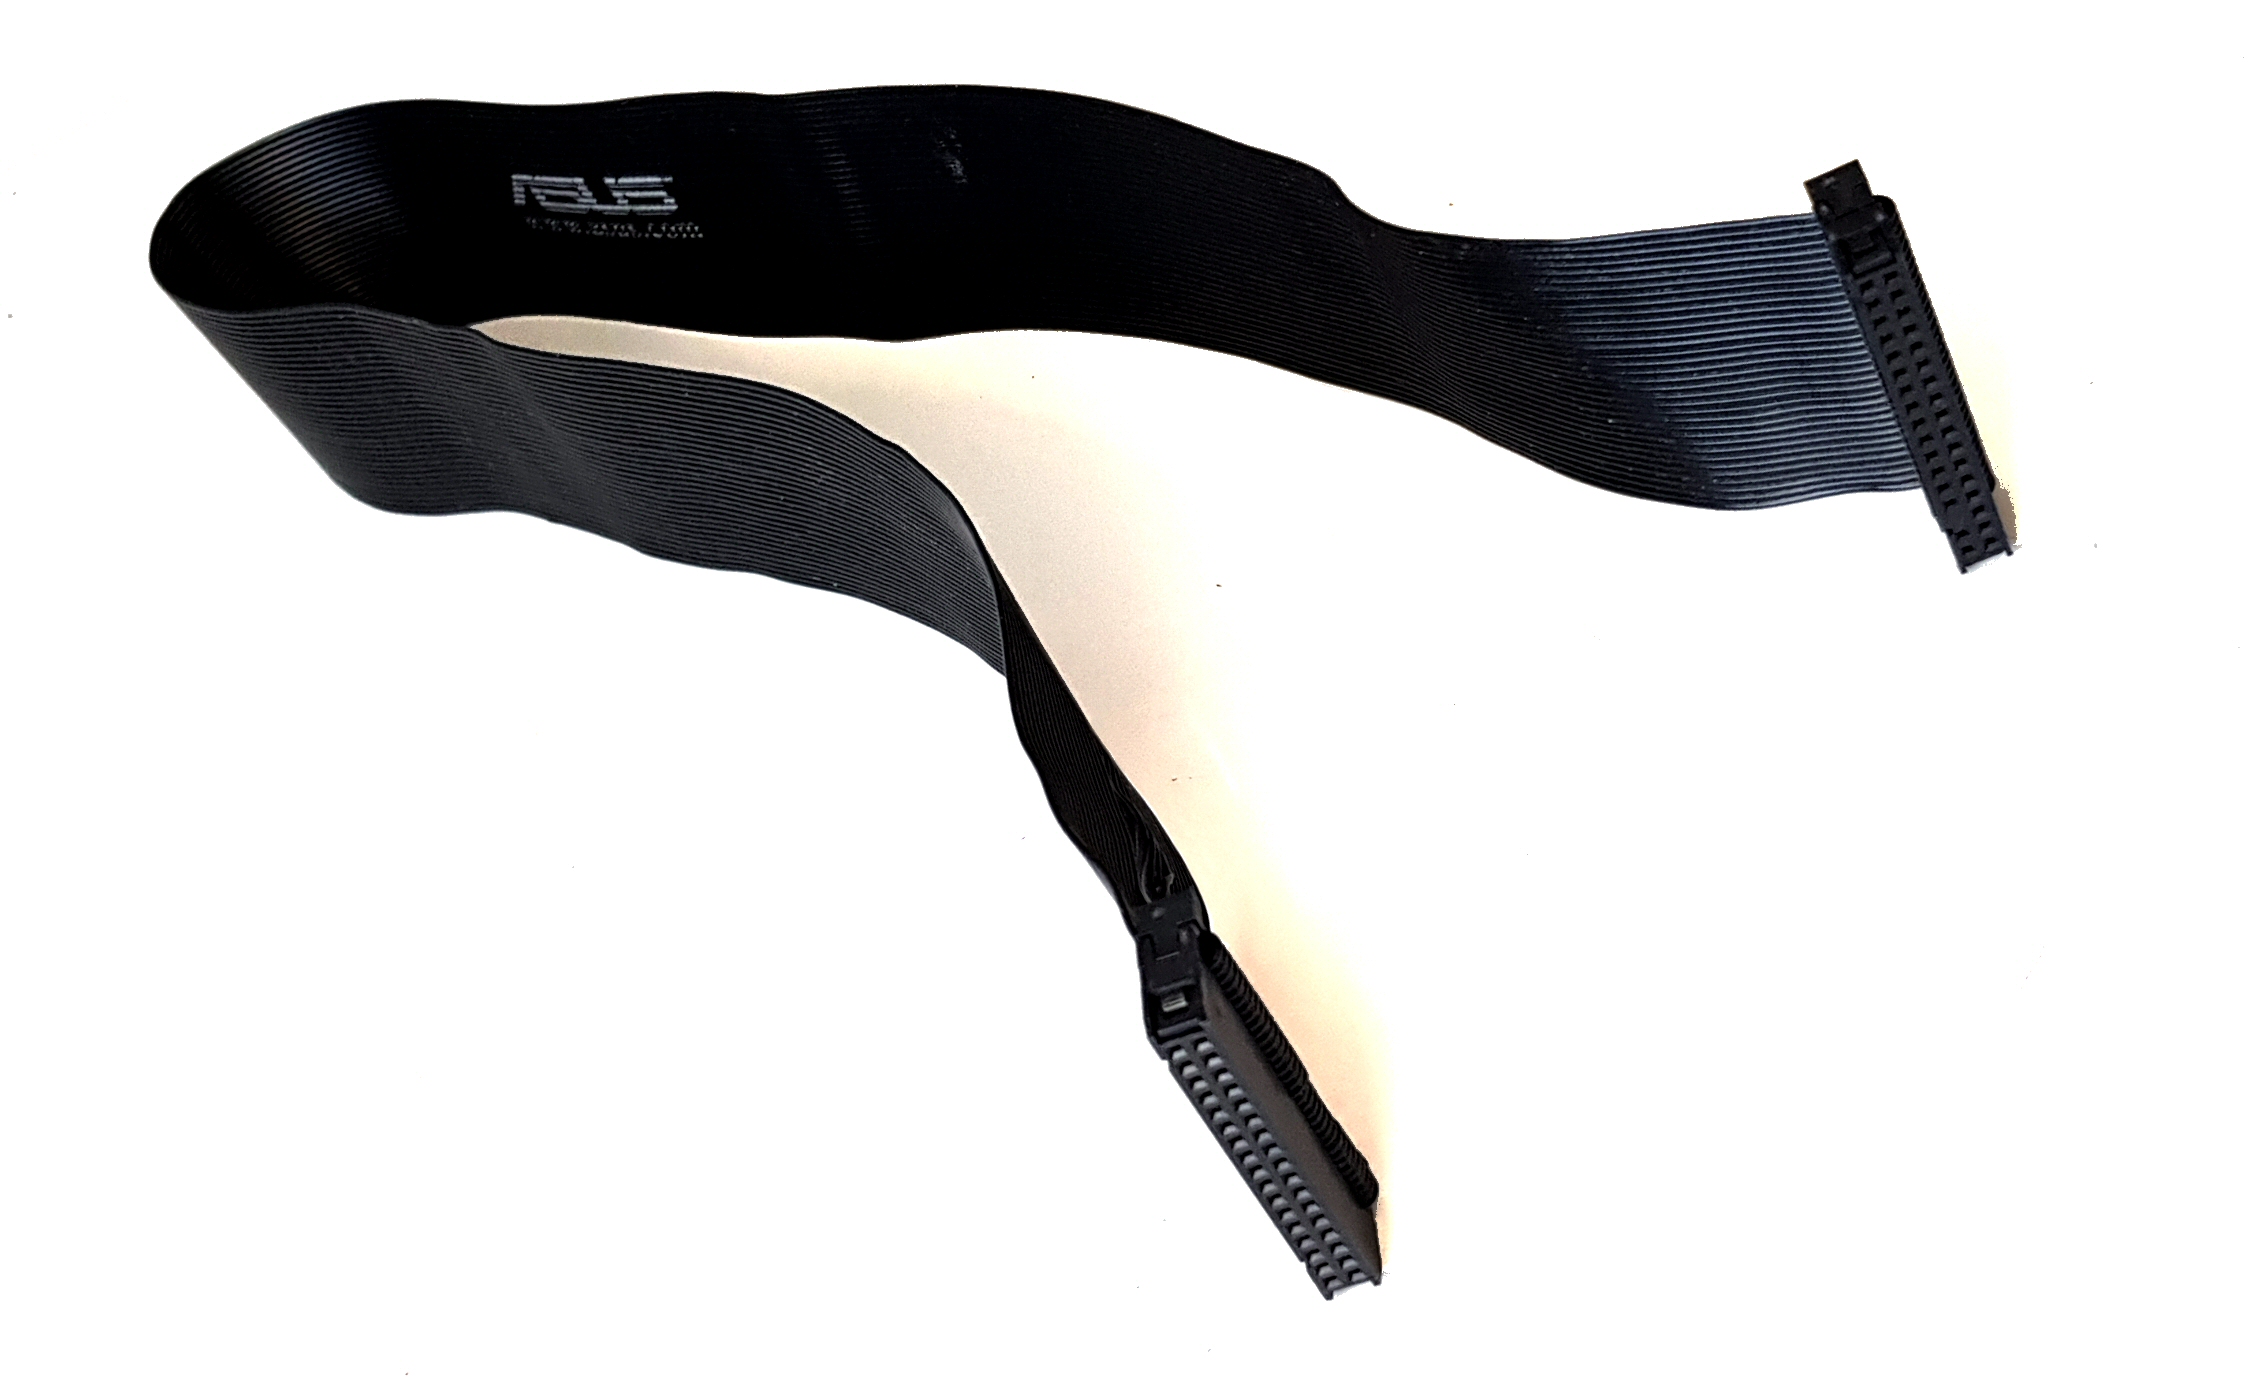
Contents: 1 piece PC floppy cable, with twist for IBM PC (not suitable for Shugart / retro computer compatible interfaces)
State: New
Length: Approximately 50cm
Contents: 1 piece PC floppy cable, with twist for IBM PC (not suitable for Shugart / retro computer compatible interfaces)
State: New
Length: Approximately 50cm


DivMMC EnJOY! PRO MINI interface not included!
Here is a link to the STL file, to print the case yourself, for free!
Head over to our ByteDelight 3D Print Designs page to grab ‘m!
Screw size: 2.6 x 12mm
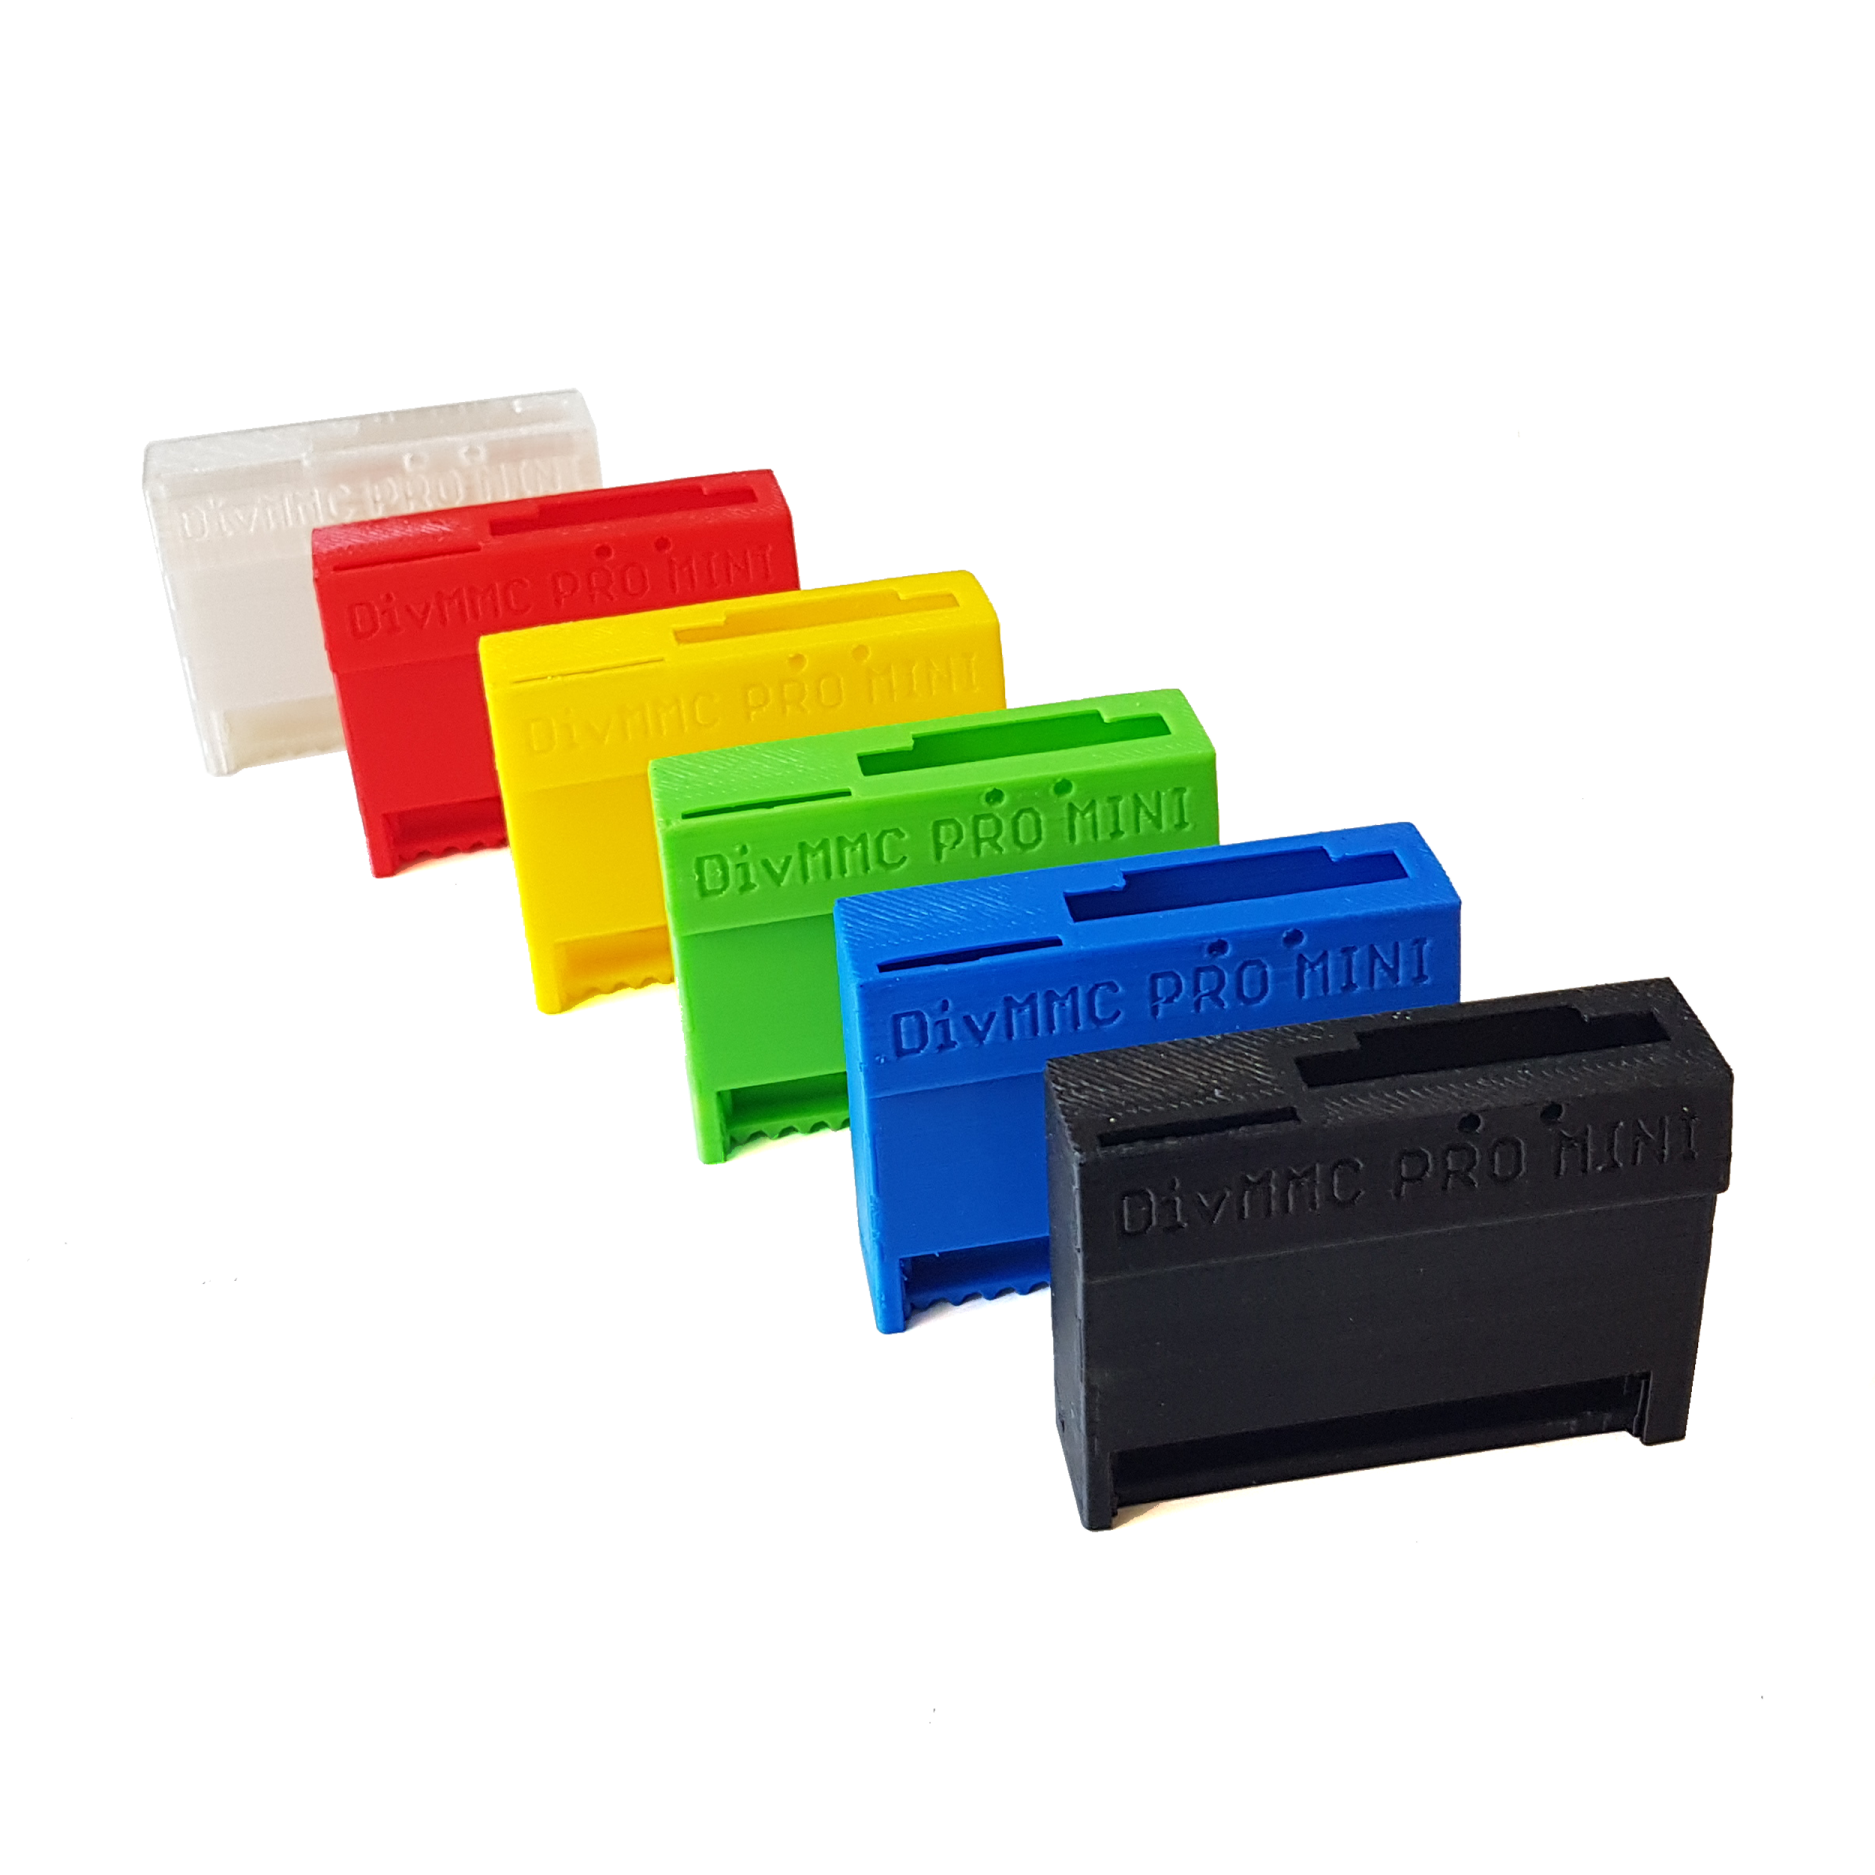
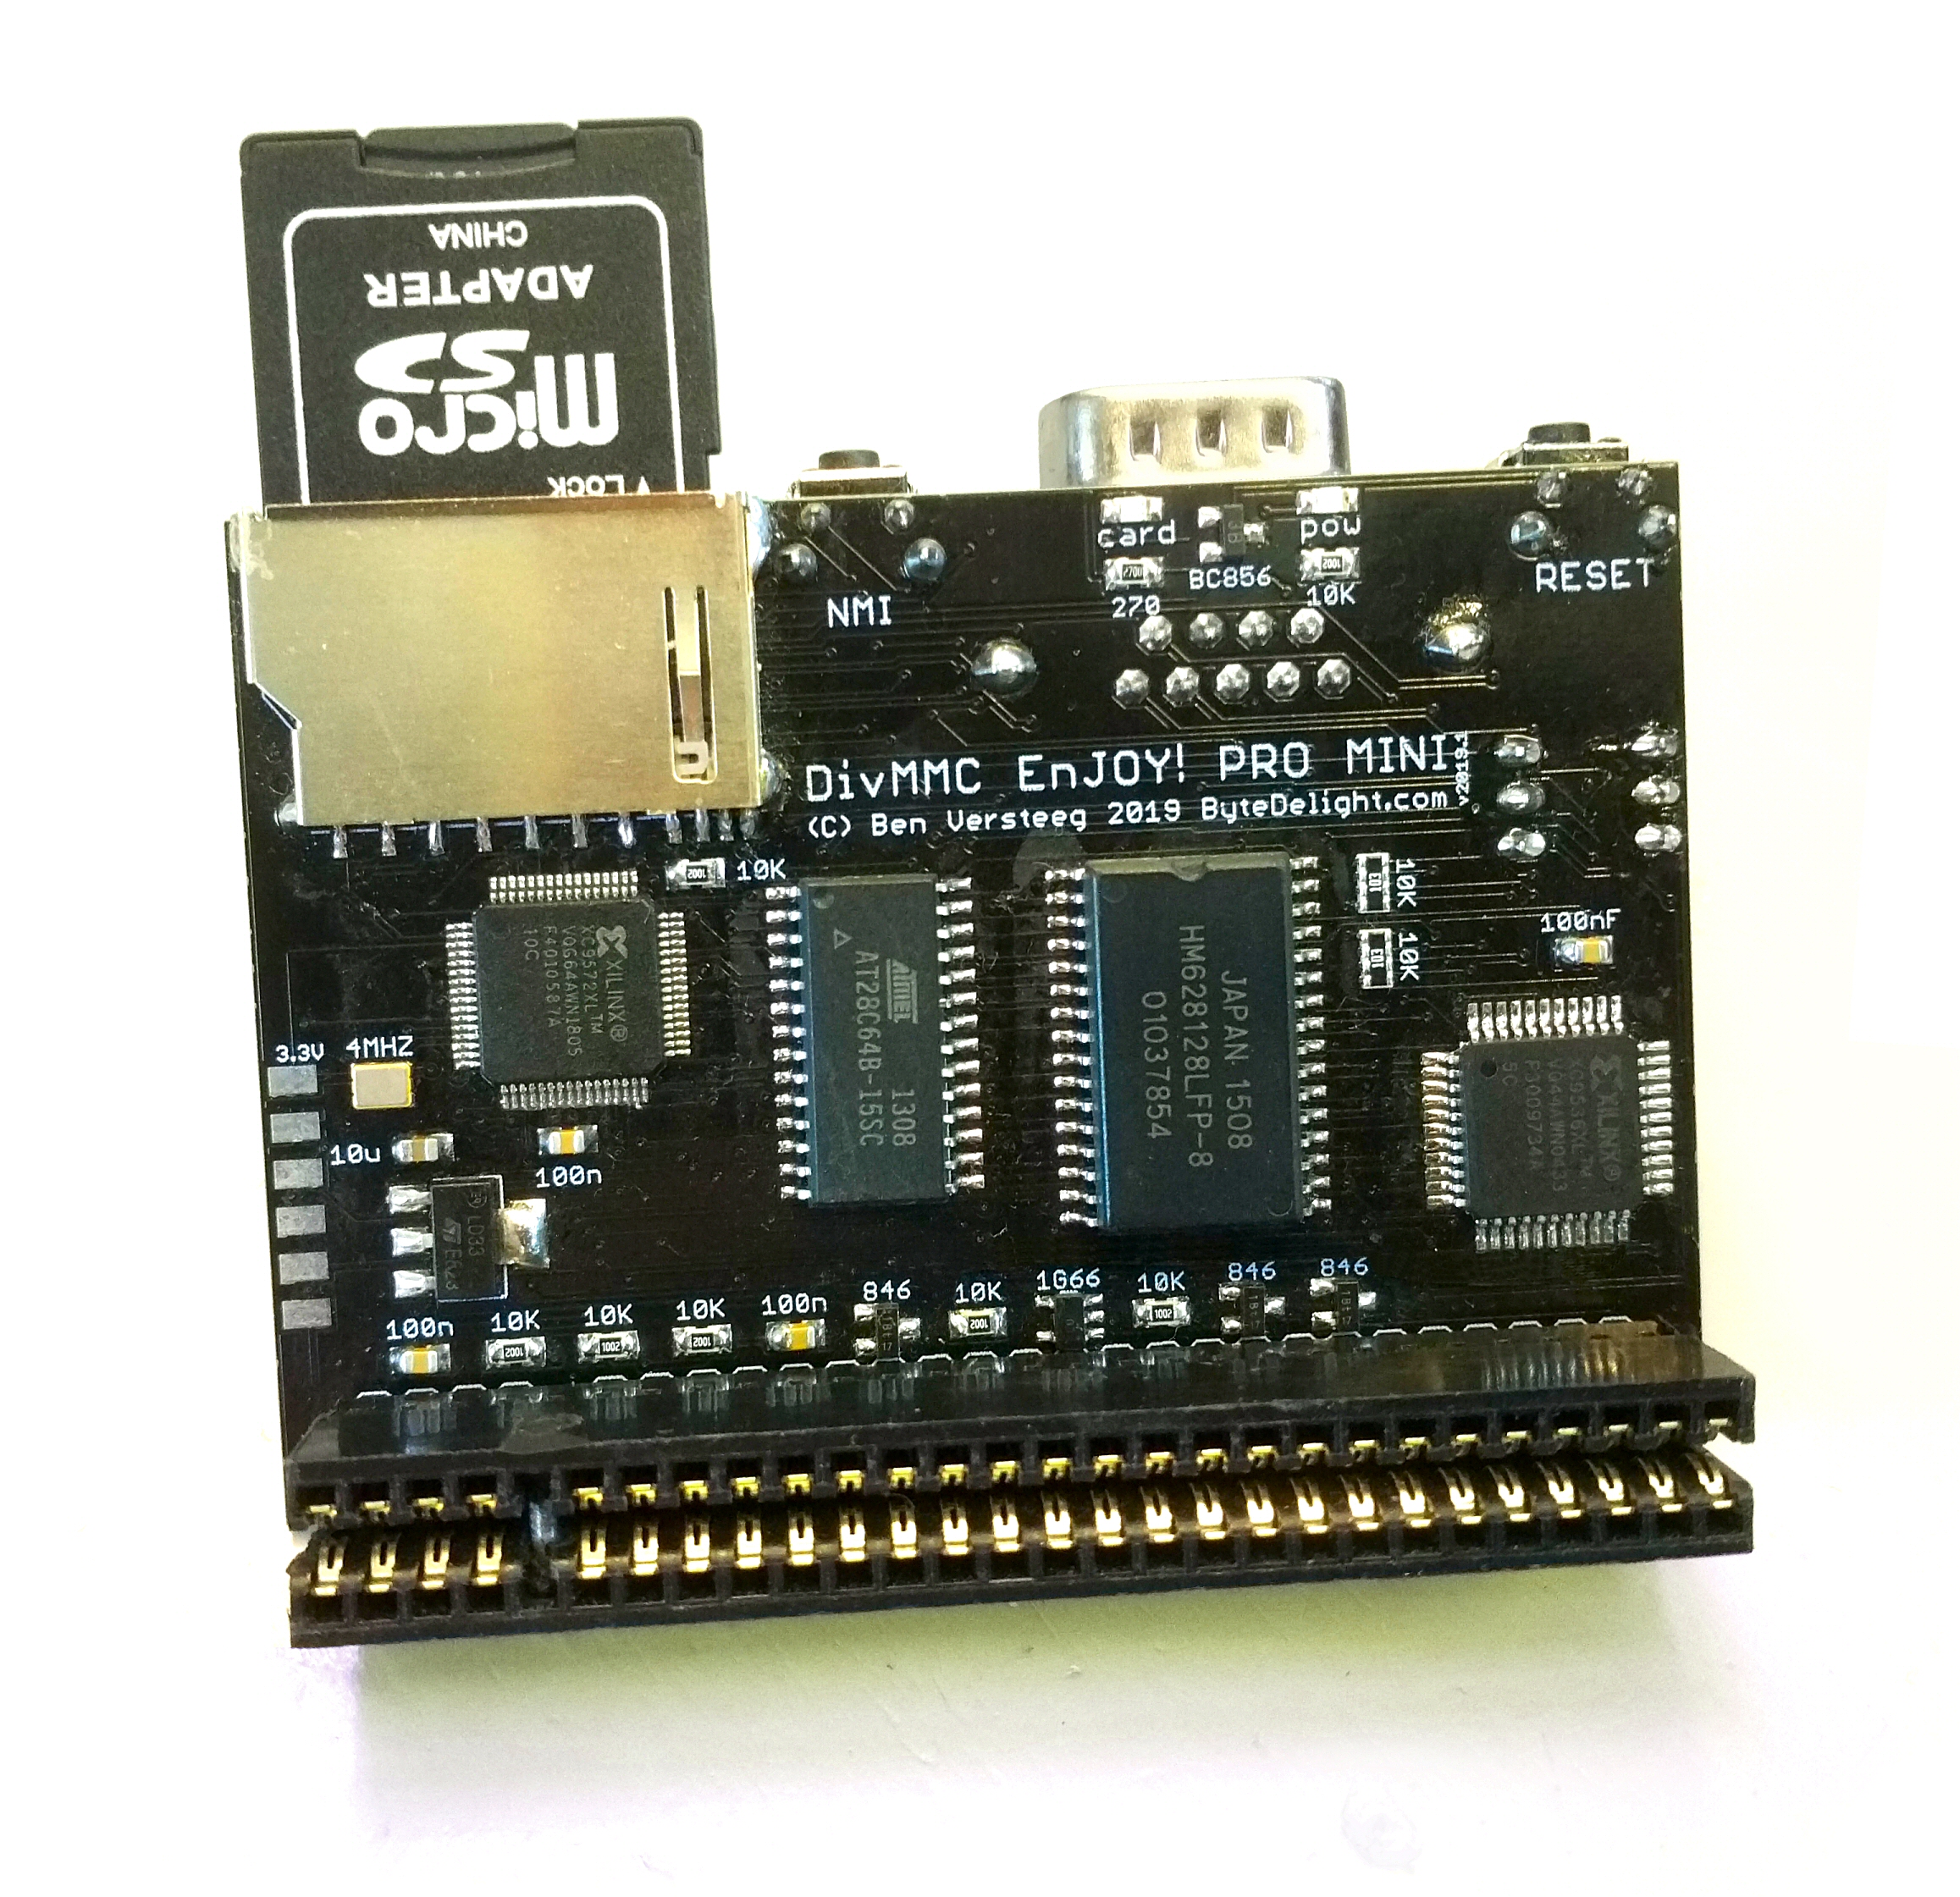
This case is designed for the DivMMC EnJOY! PRO MINI interface:
This case has not been designed, and thus will not fit the DivMMC EnJOY! PRO MINI lite interface.
The DivMMC EnJOY! PRO MINI interface is not included with this case kit!
These cases are printed on a 3D printed, using filament.
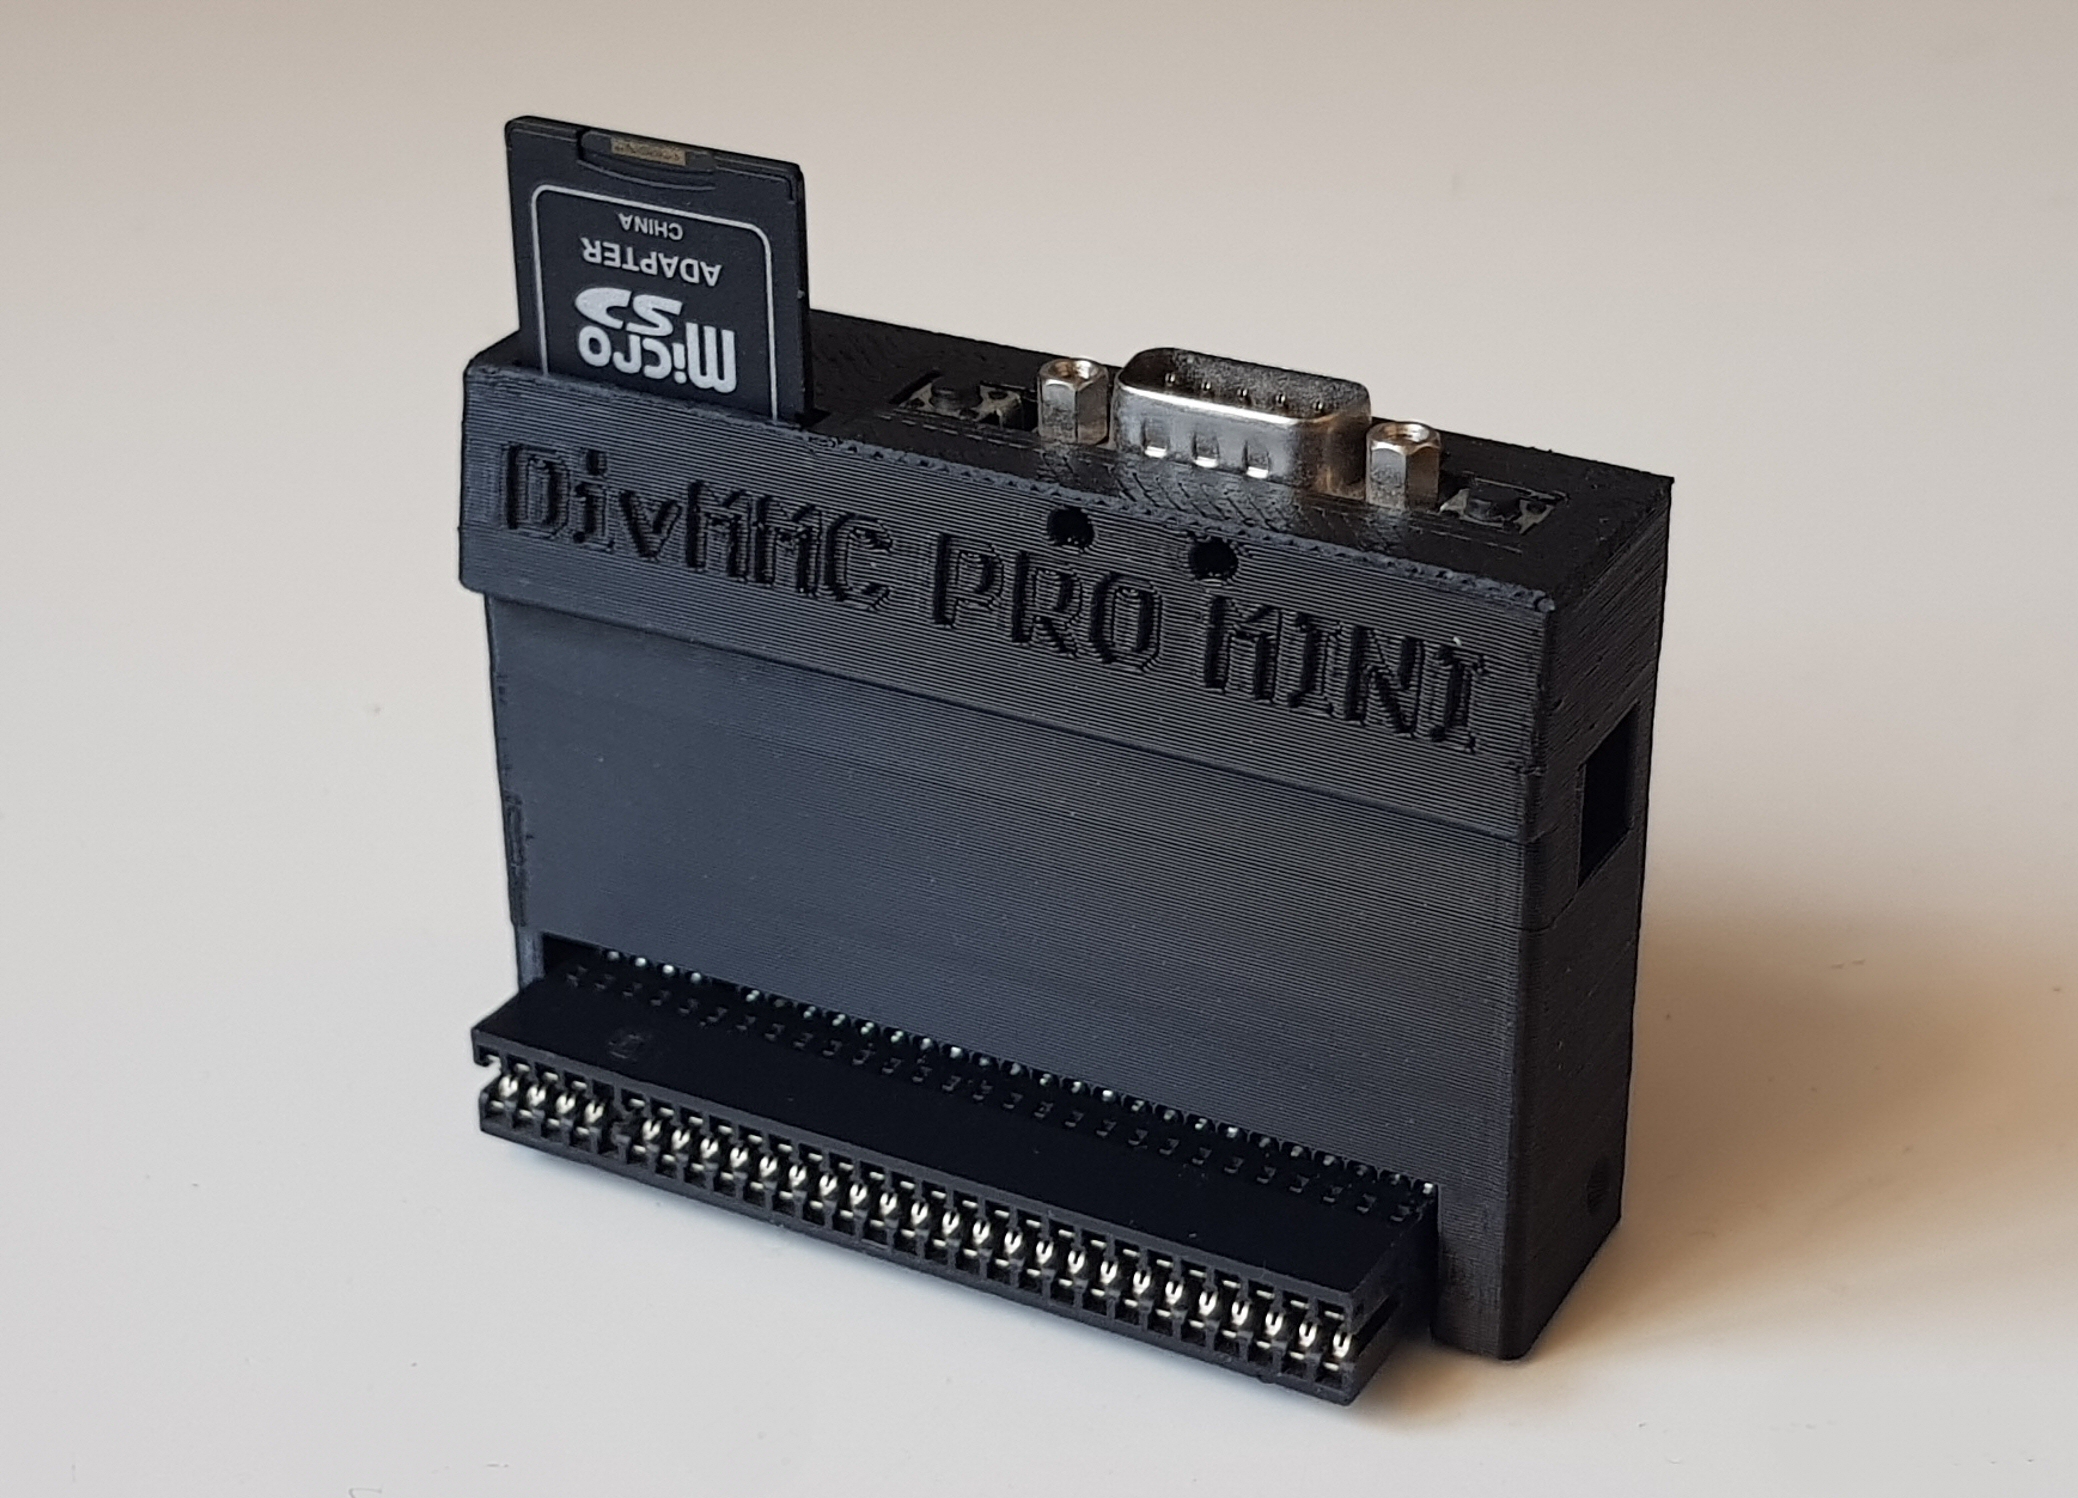
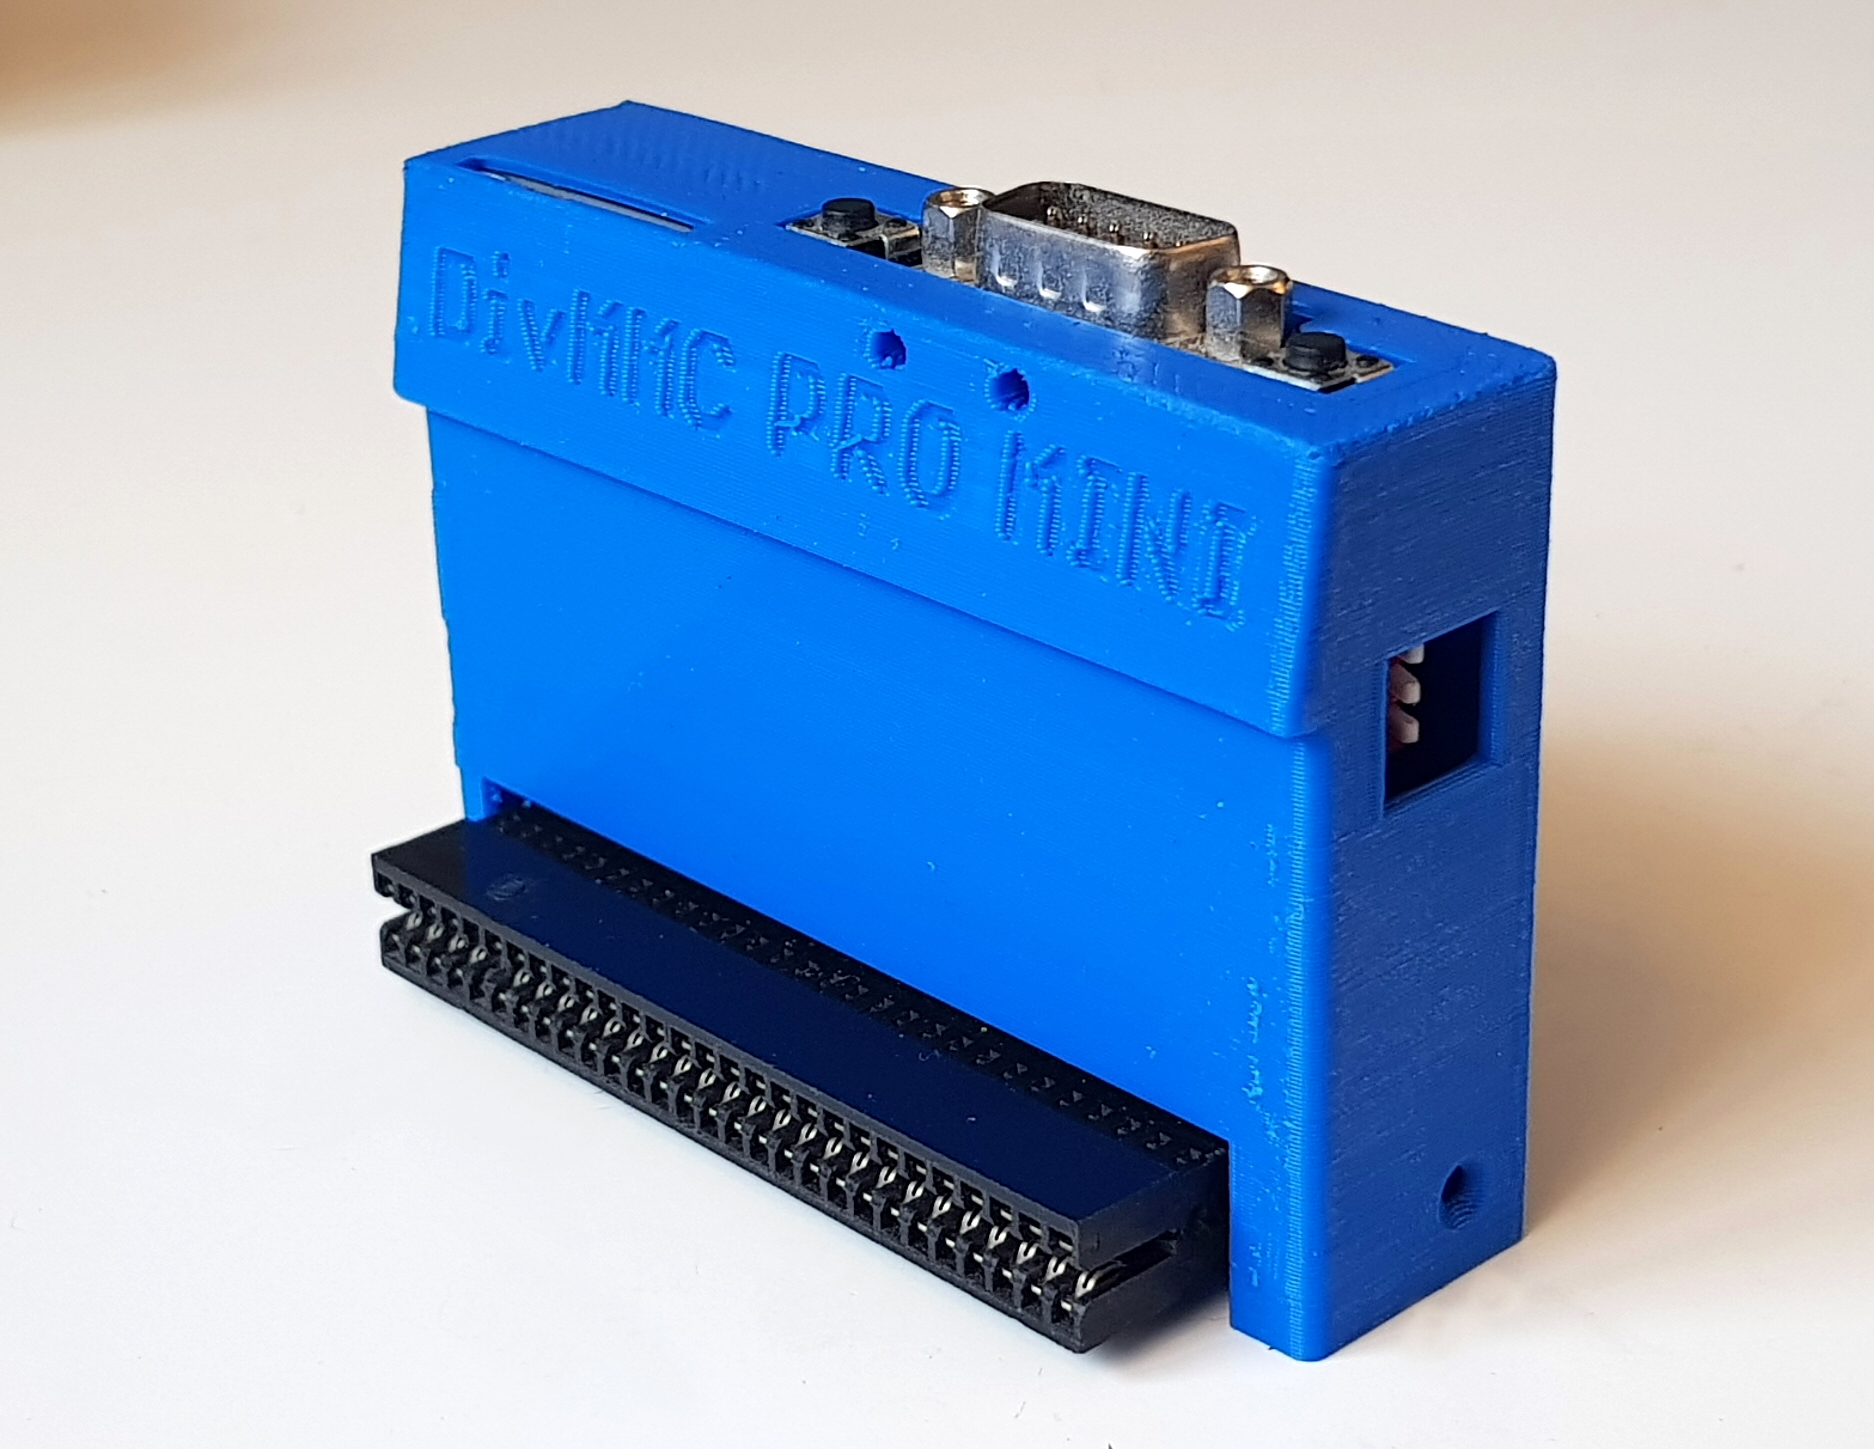
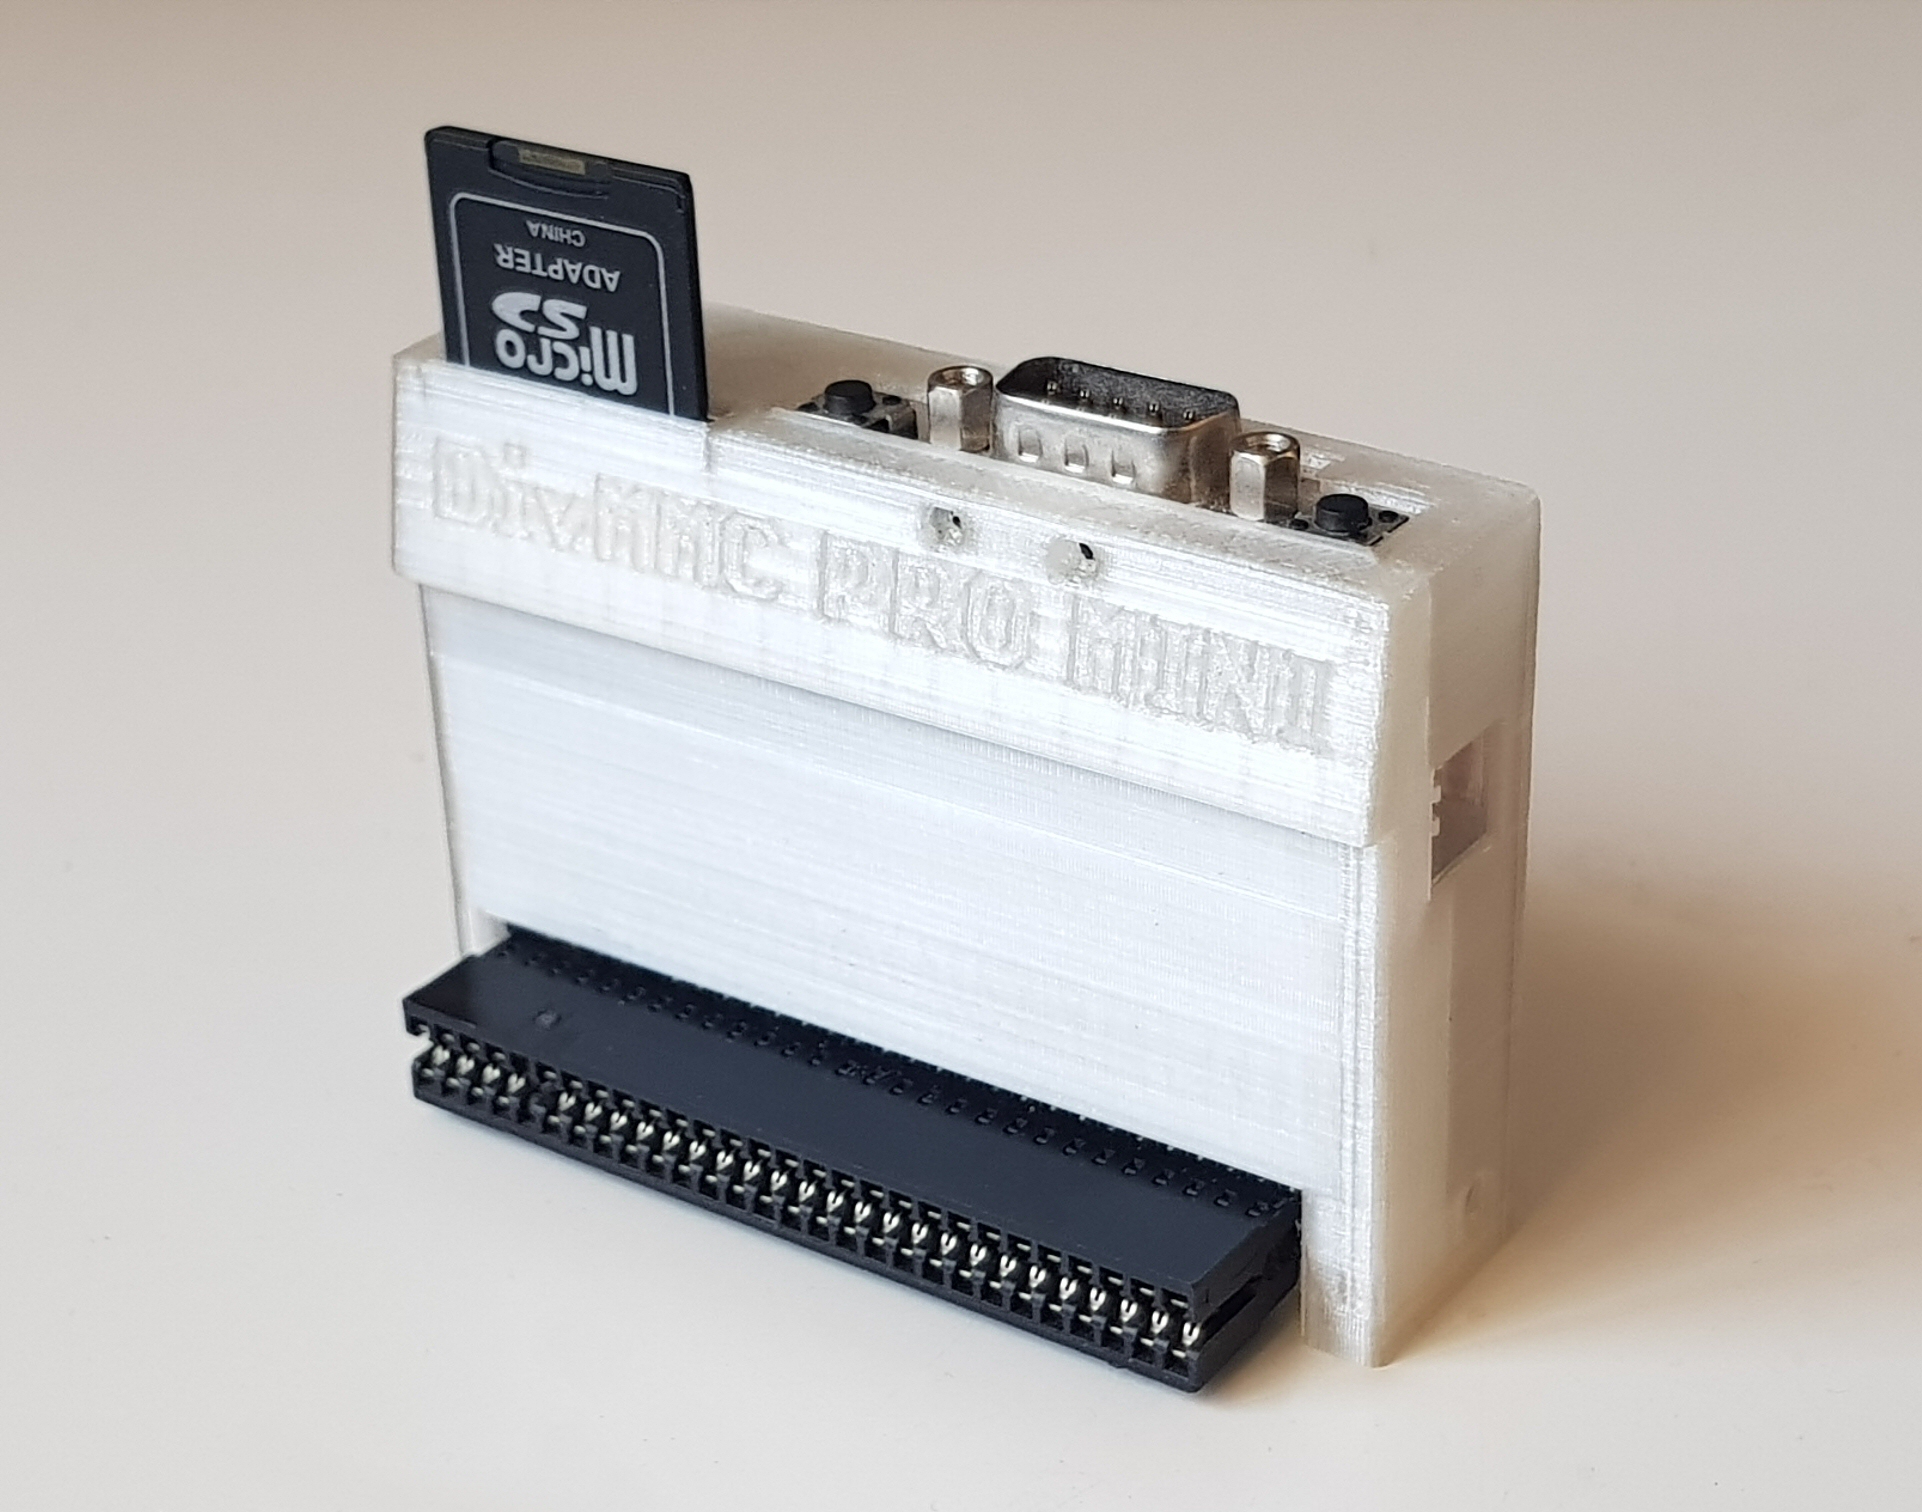
Currently we offer this DivMMC EnJOY! PRO MINI Case in these colours:
This DivMMC EnJOY! PRO MINI Case Kit comes with:
– The DivMMC EnJOY! PRO MINI Case, which exists of a top shell and a bottom plate
– 2 screws
– A printed copy of the assembly manual
The DivMMC EnJOY! PRO MINI interface is not included with this case kit!
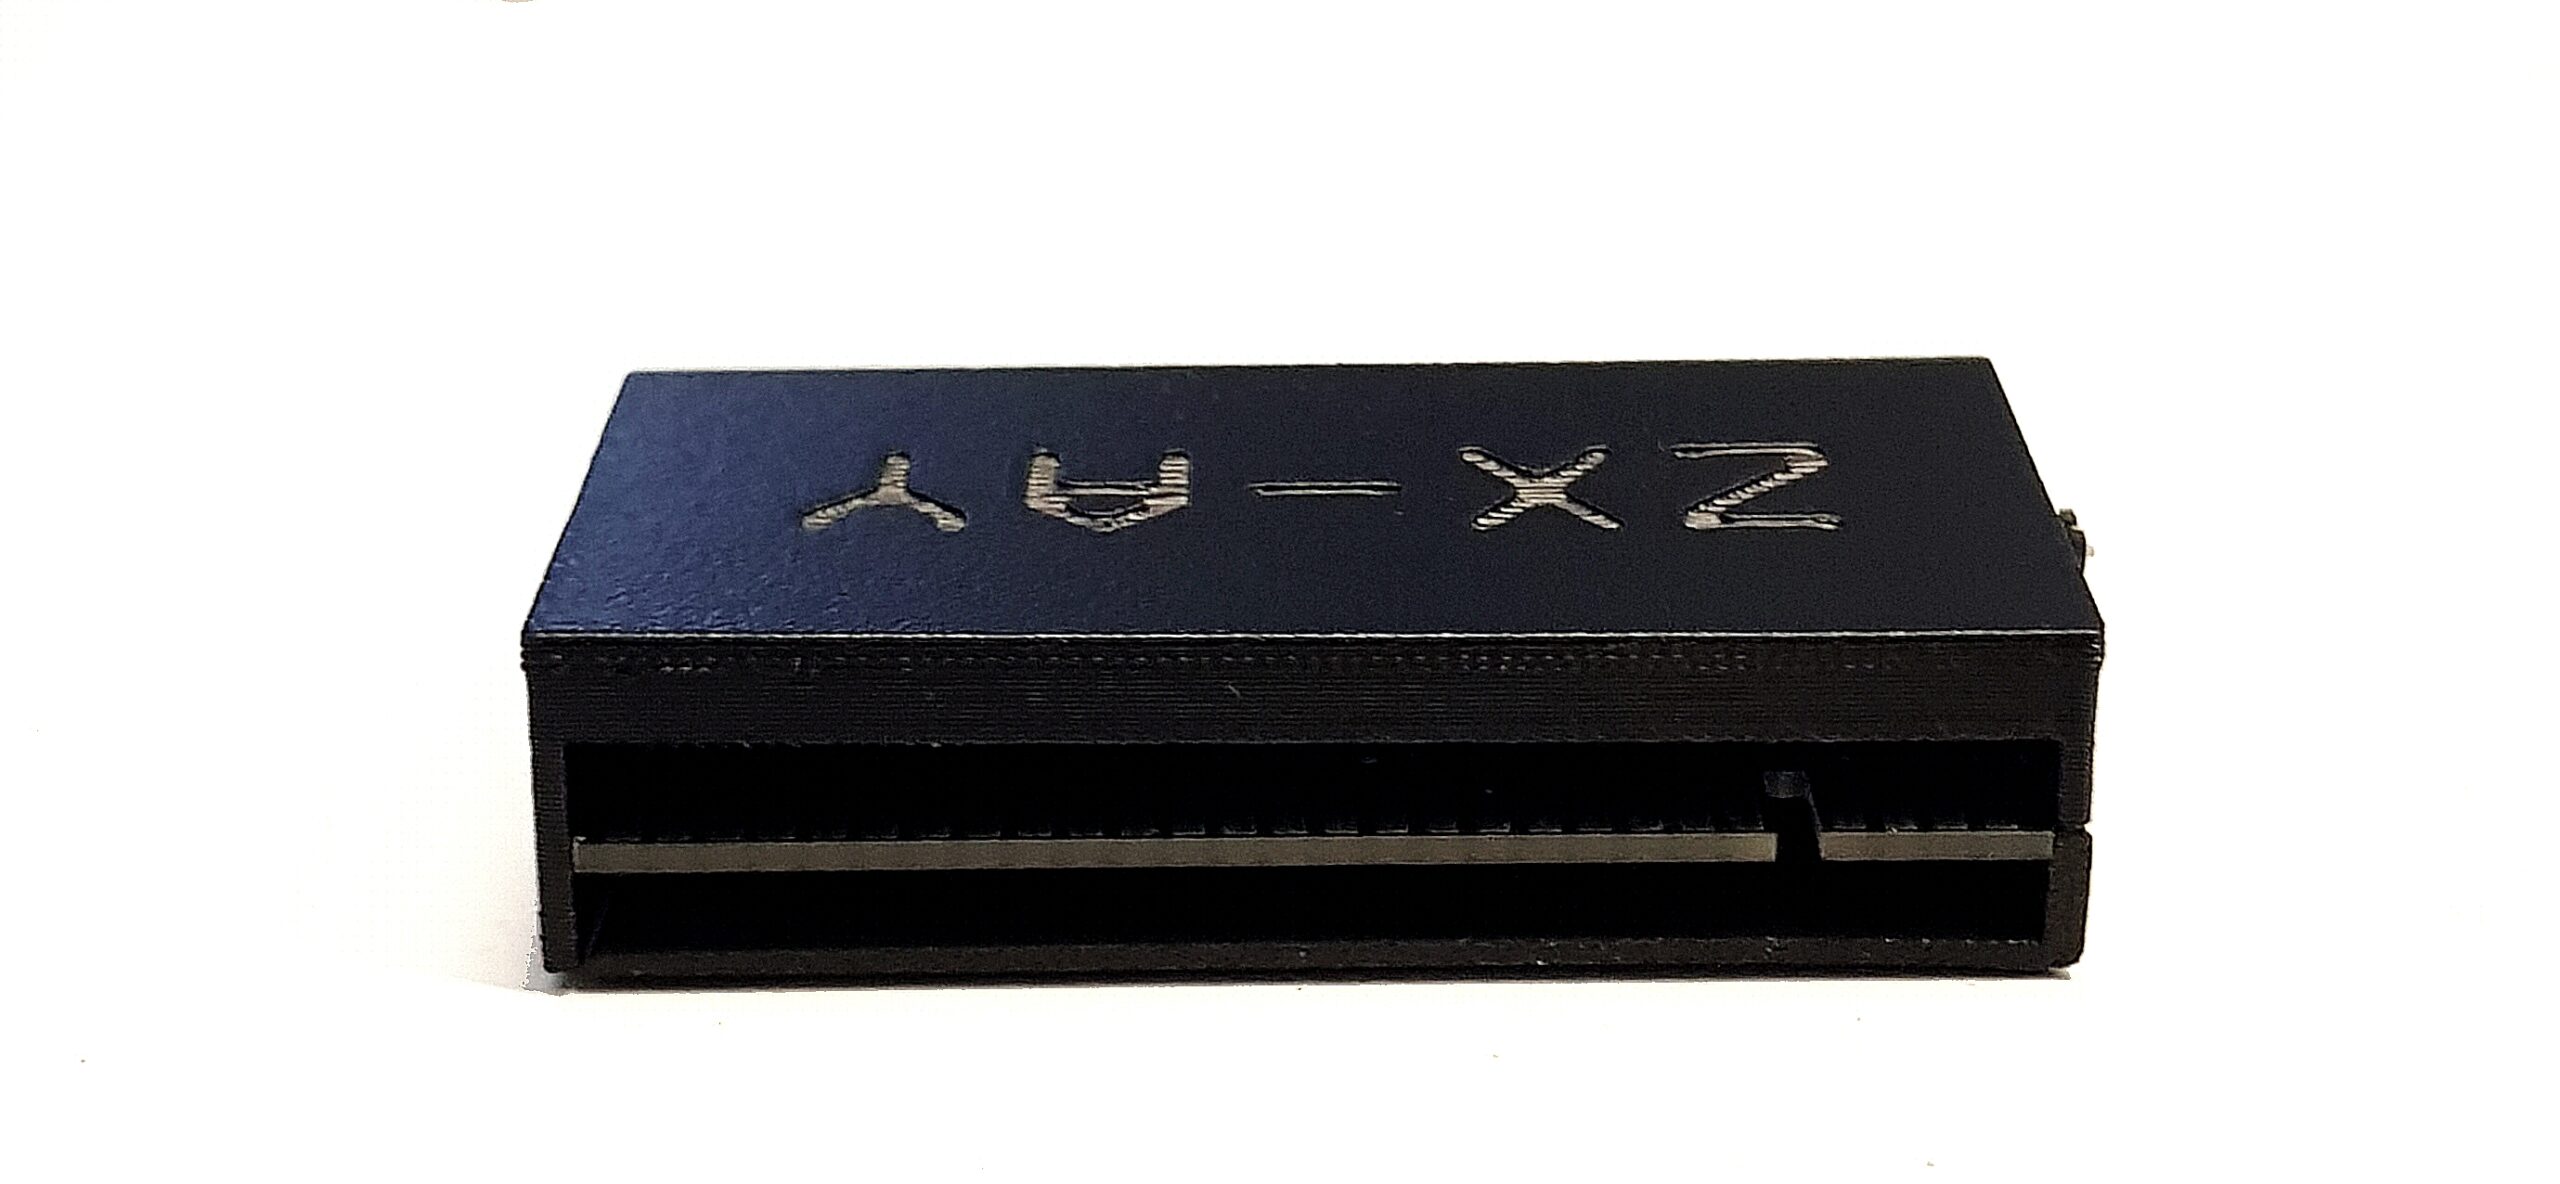
Make sure to read the Compatibility paragraph to know if your ZX-AY is compatible with this case!
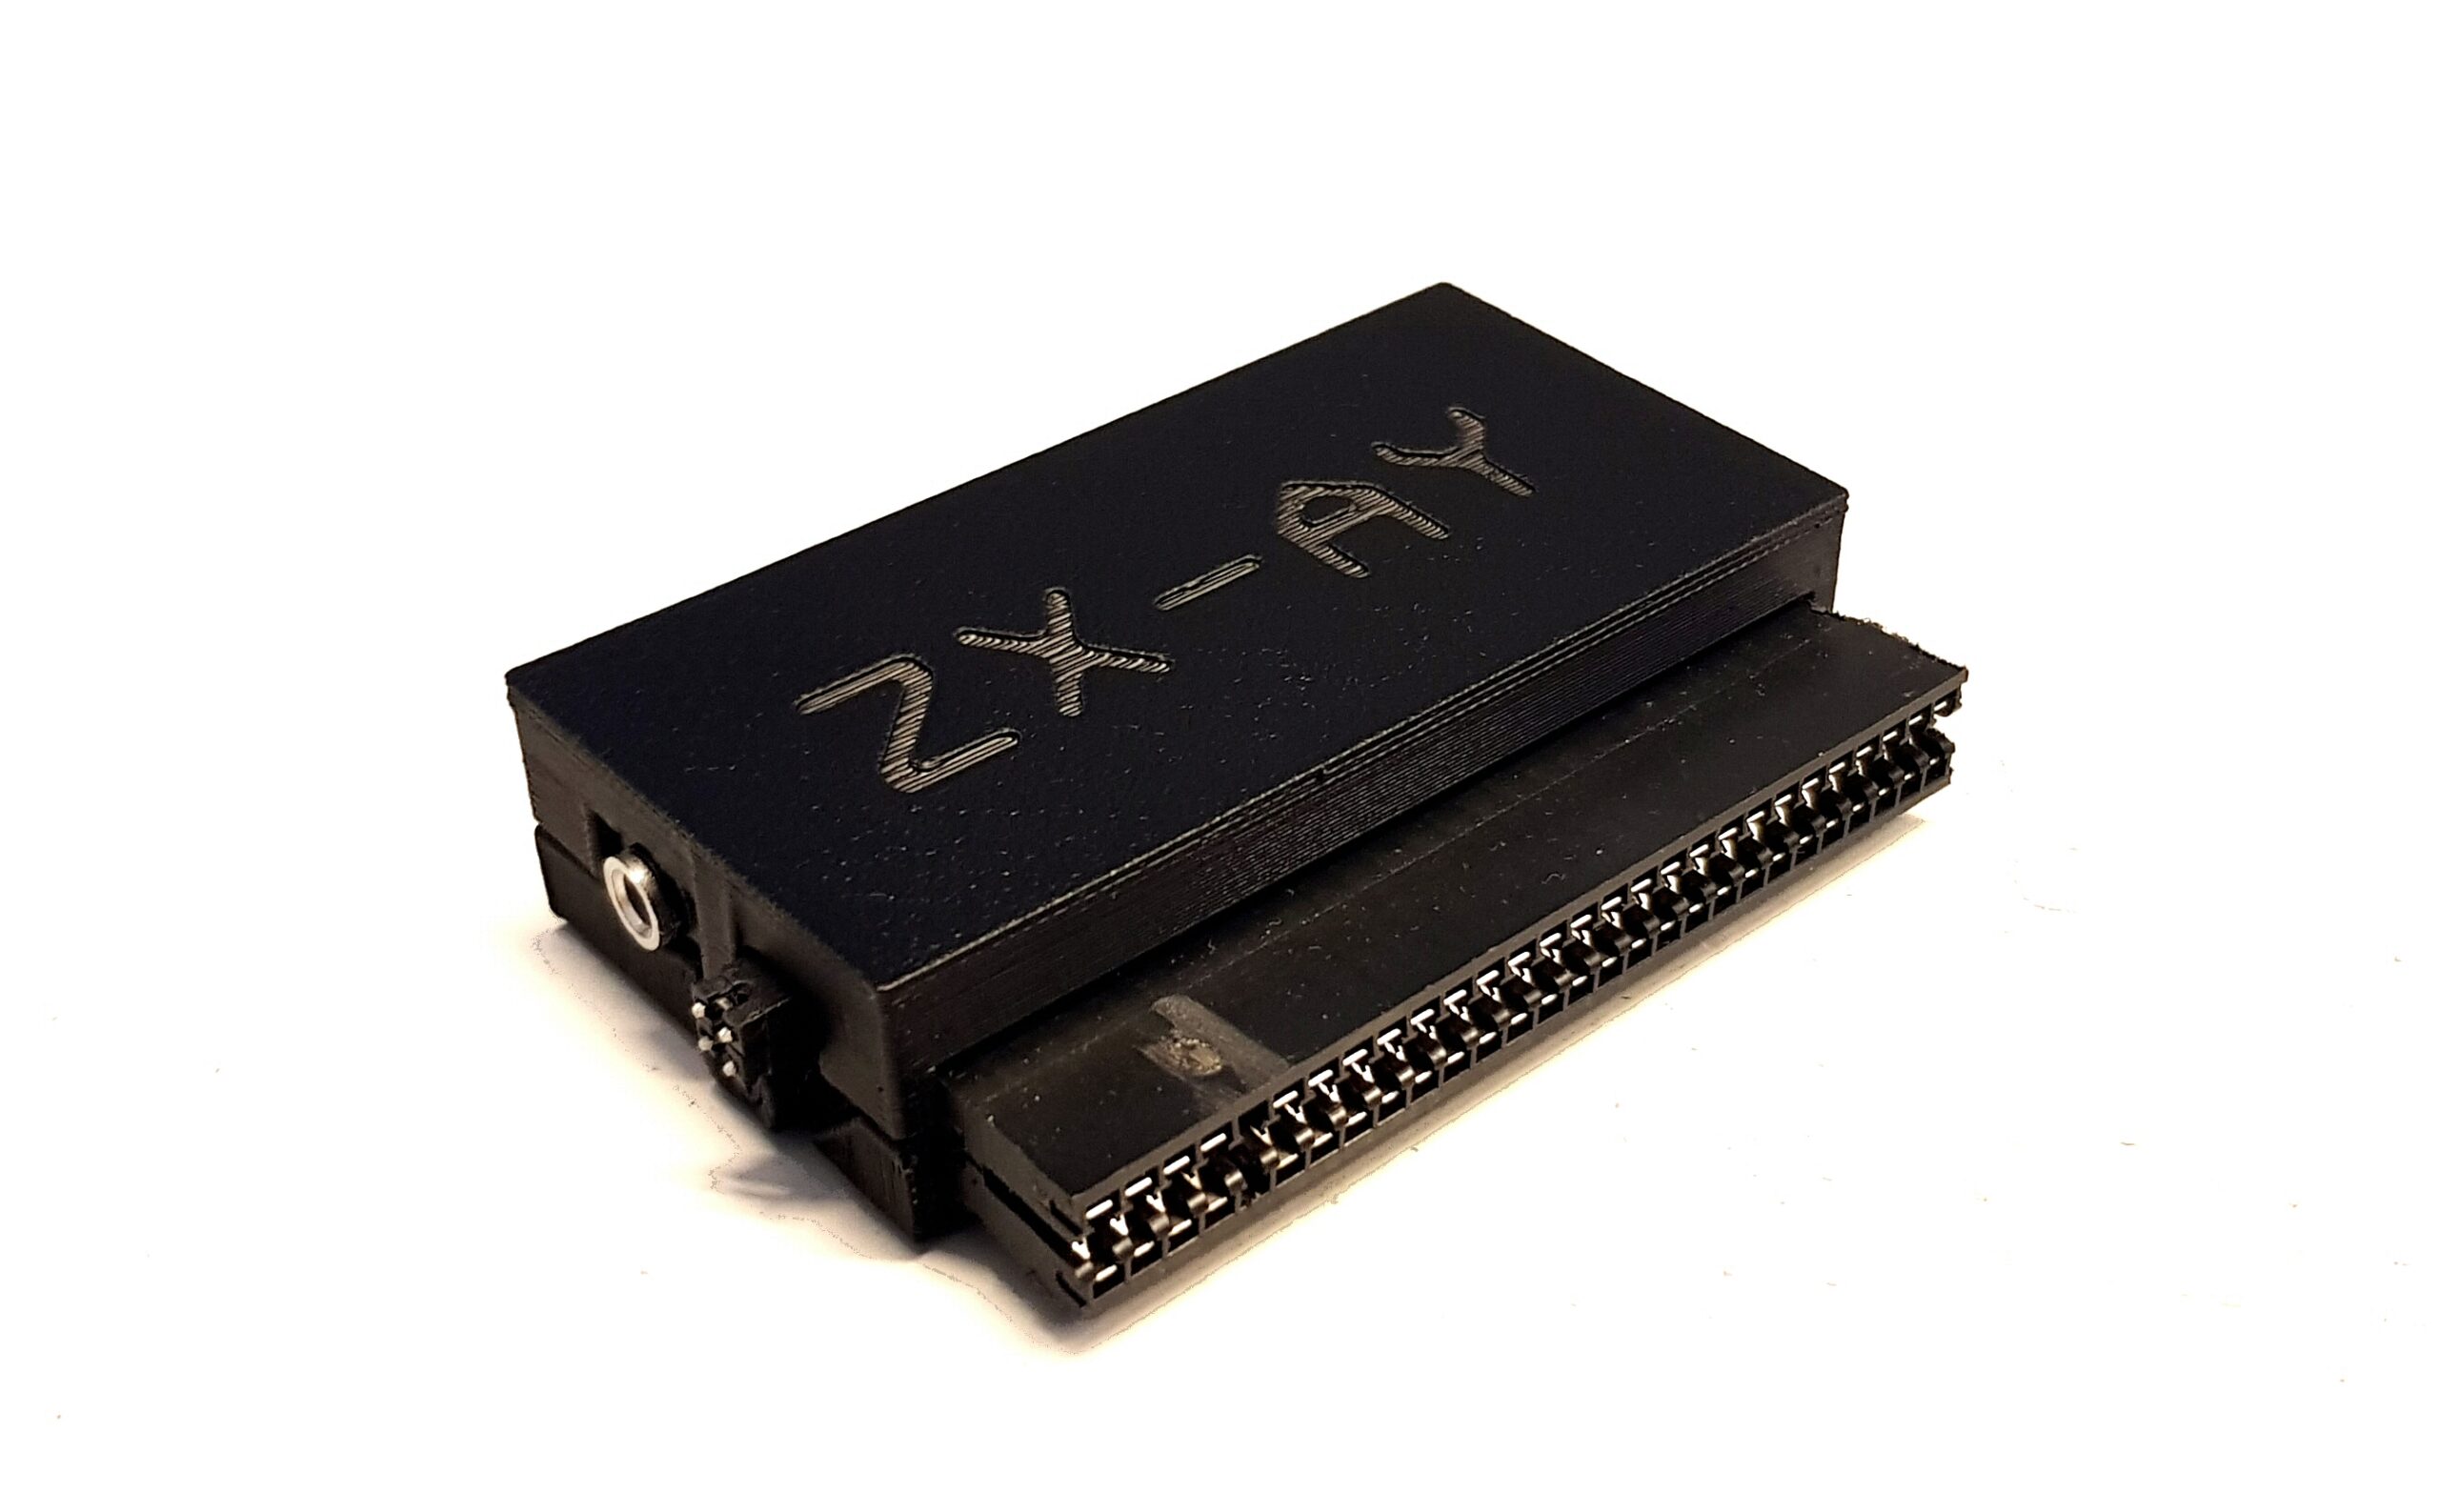
ZX-AY interface not included!
Some asked for a ‘pcb case’ kit for their ZX-AY that does not have a case yet, since we also offer the ZX-AY with a ‘pcb case’.
However, the ZX-AY version with that ‘pcb case’ has been slightly updated, like screw holes have been added.
The older ZX-AY that does not have screw holes, is not compatible with that ‘pcb case’.
Hence this case has been designed.
This ZX-AY Case Kit is compatible with the ZX-AY interface version, that does not have screw holes, as shown here: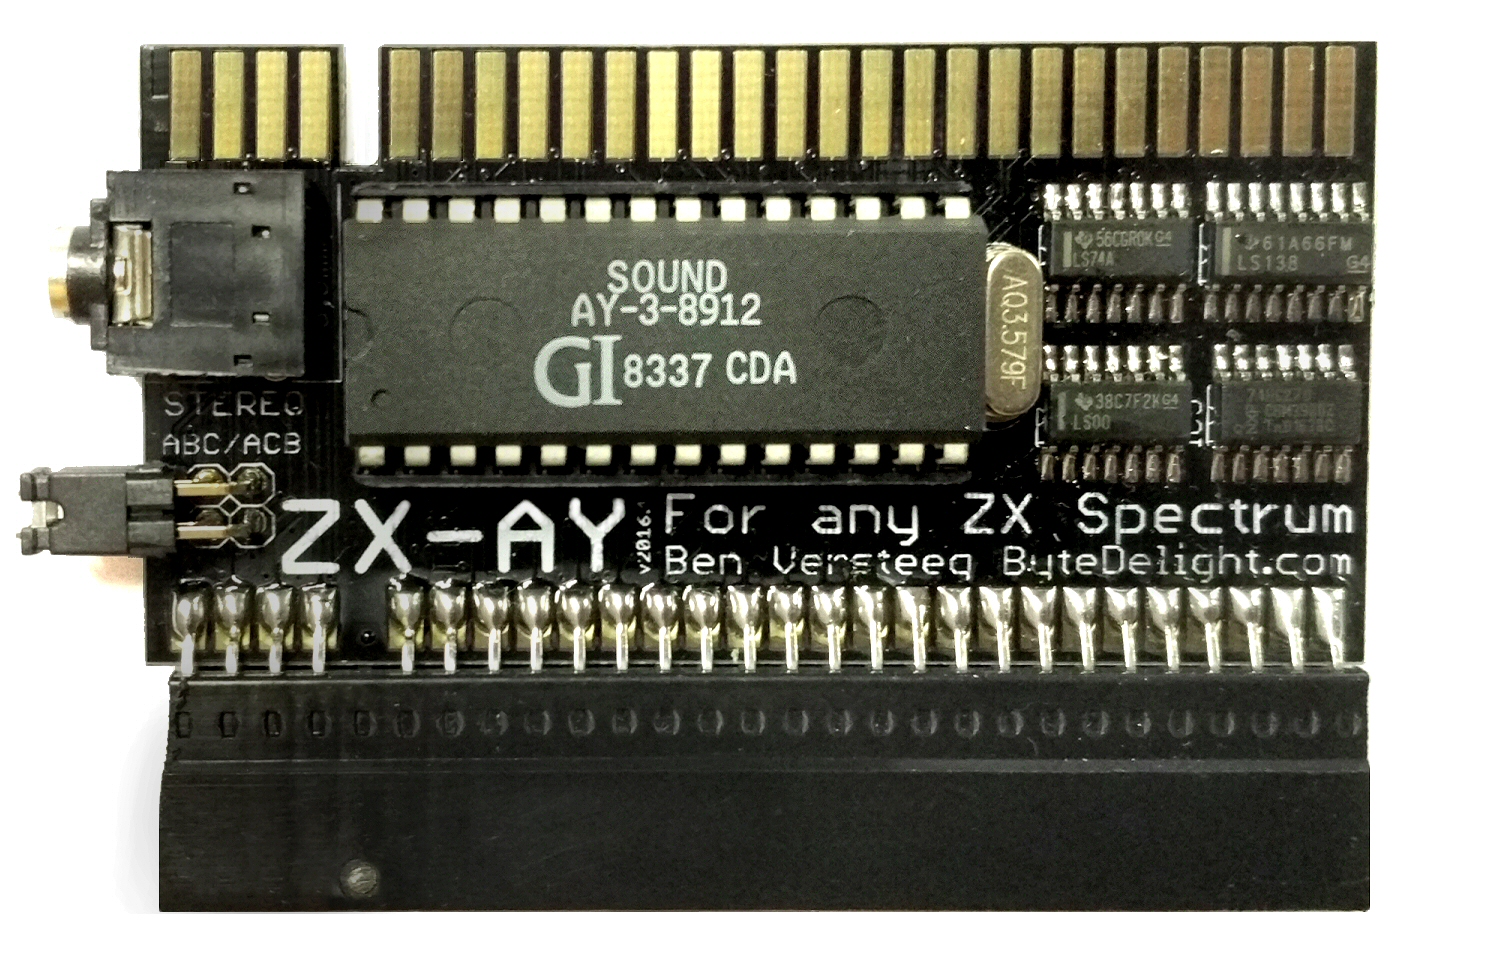 So this case will not fit the ZX-AY version with screwholes, the one with ‘pcb-case’.
ZX-AY interface is not included!
Here is a link to the STL file, to print the case yourself, for free!
Head over to our ByteDelight 3D Print Designs page to grab ‘m!
Screw size: 2.6 x 12mm
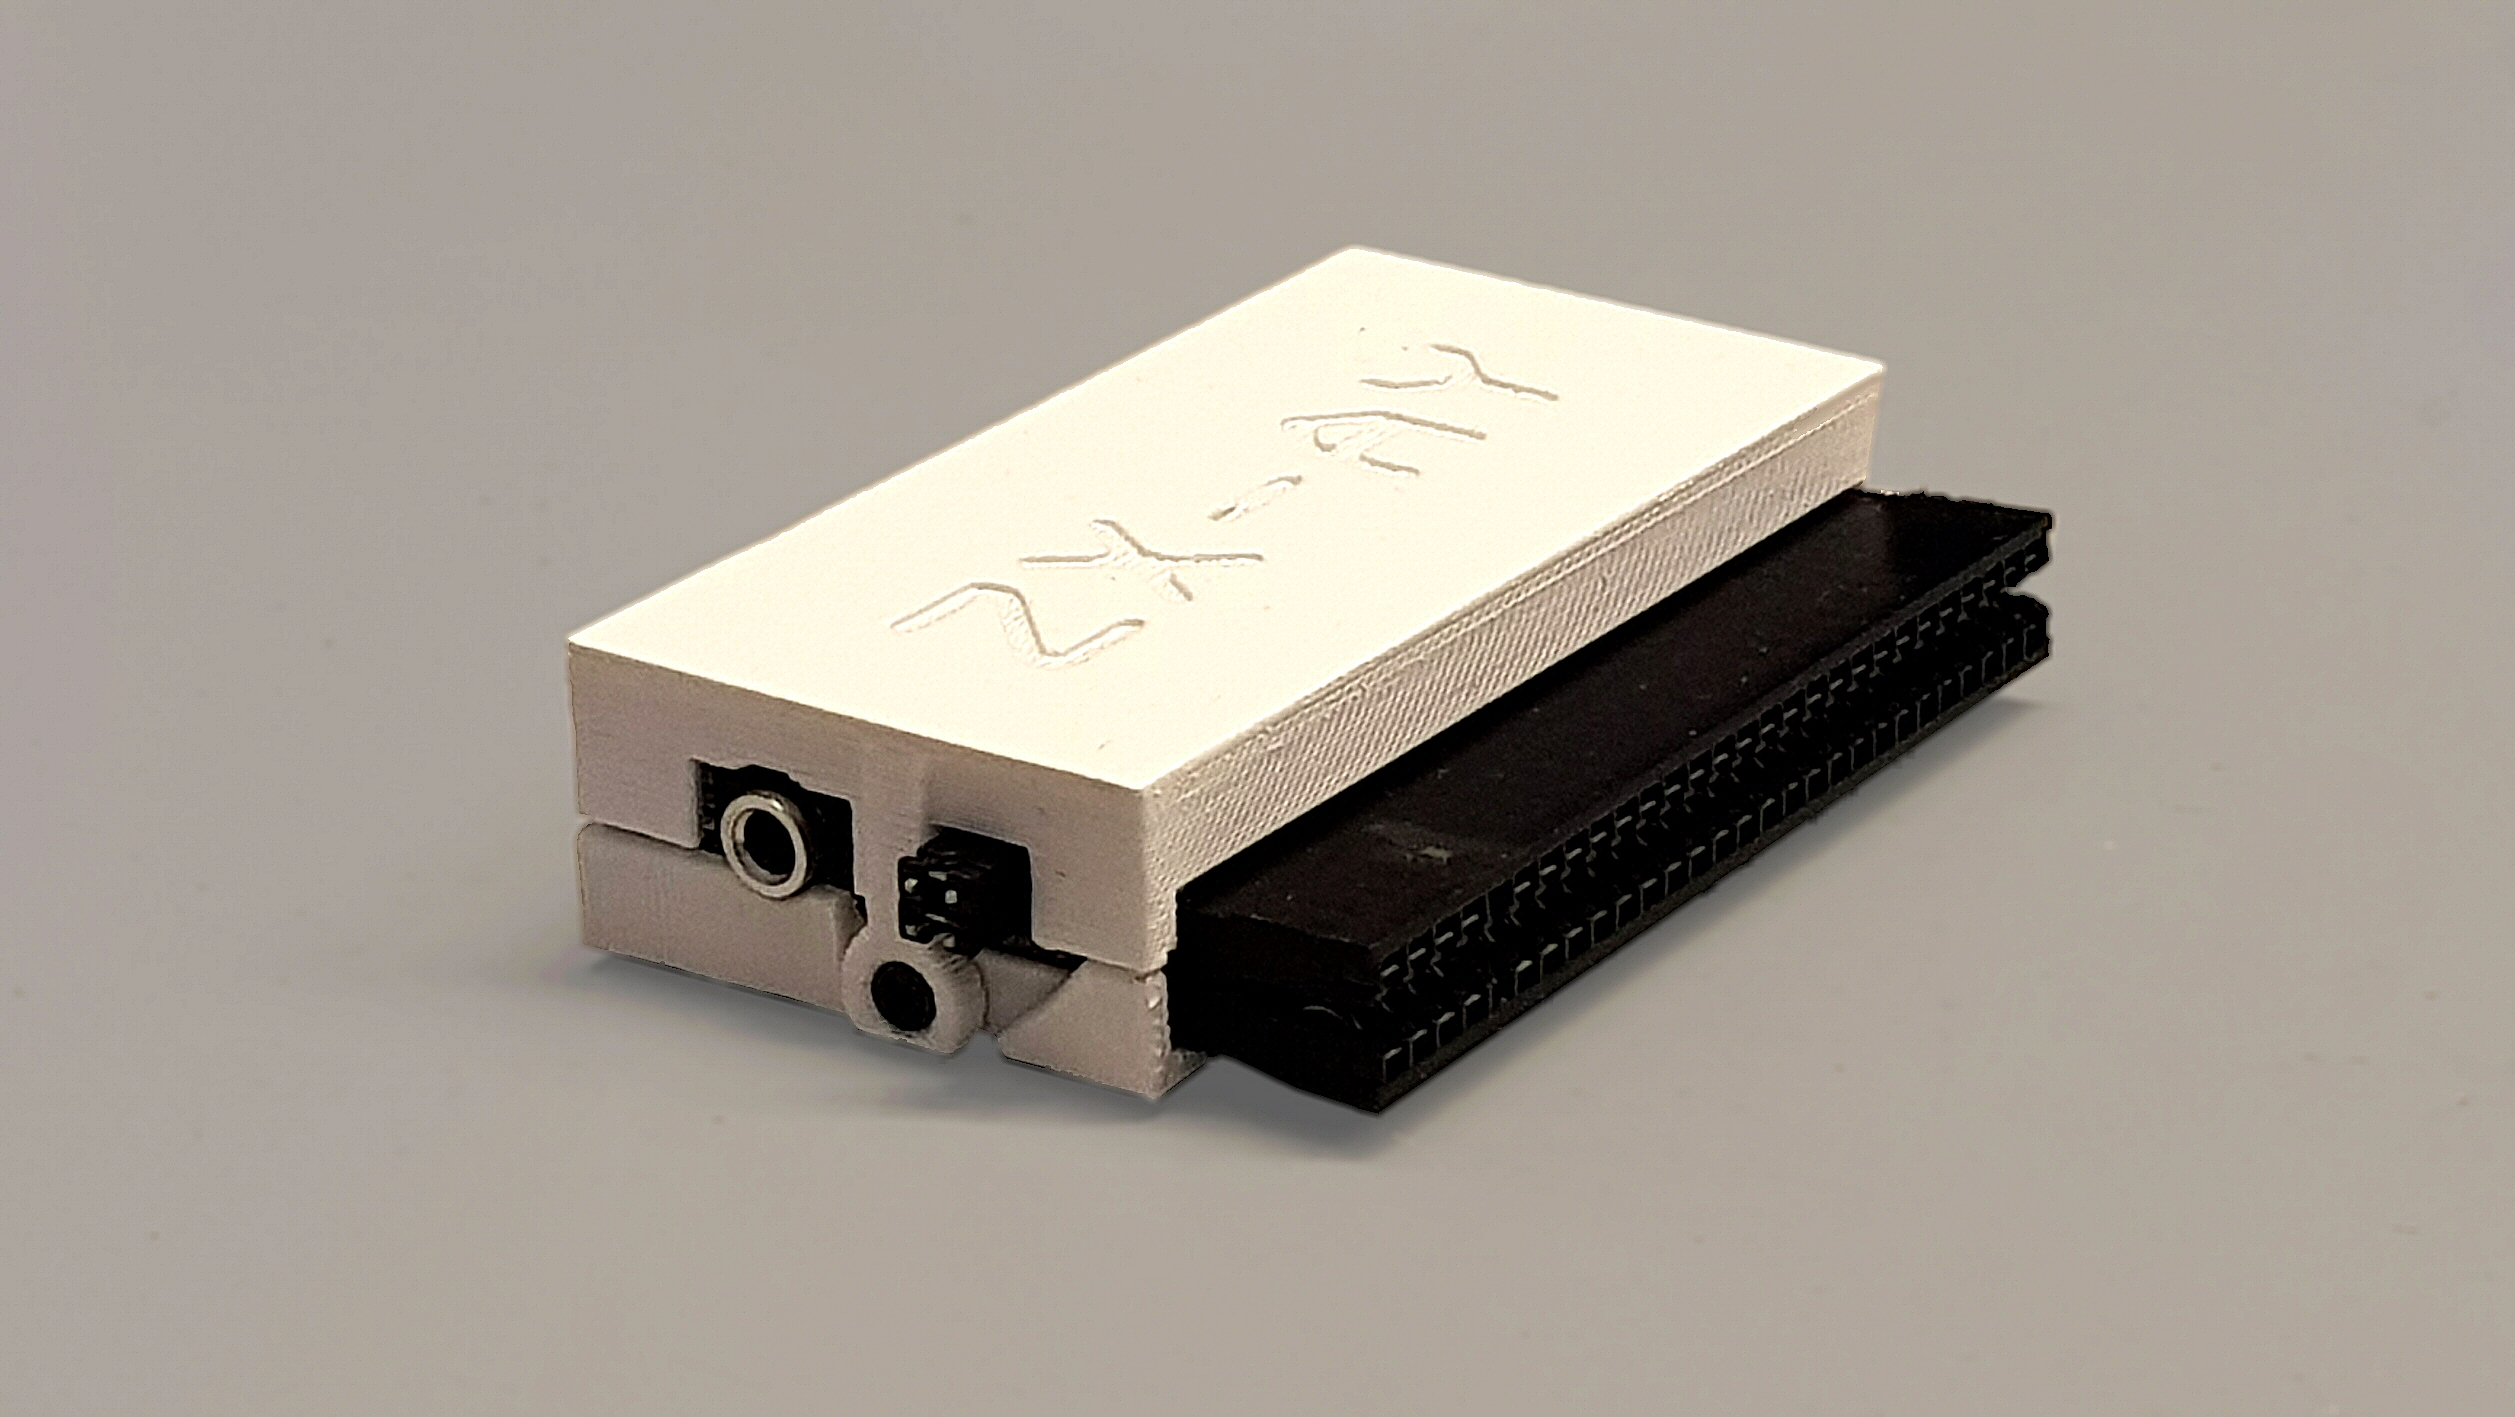
We print the case ourselves on a PEI plate, for a grainy top finish. But you can print the case on any surface you prefer.
This ZX-AY Case Kit comes with:
– The ZX-AY ‘filament 3D printed’ Case, which exists of a top shell and a bottom shell
– 2 screws
The cases we offer will get a couple of layers of spray paint on the top shell. This creates a better surface finish, and removes some imperfections.
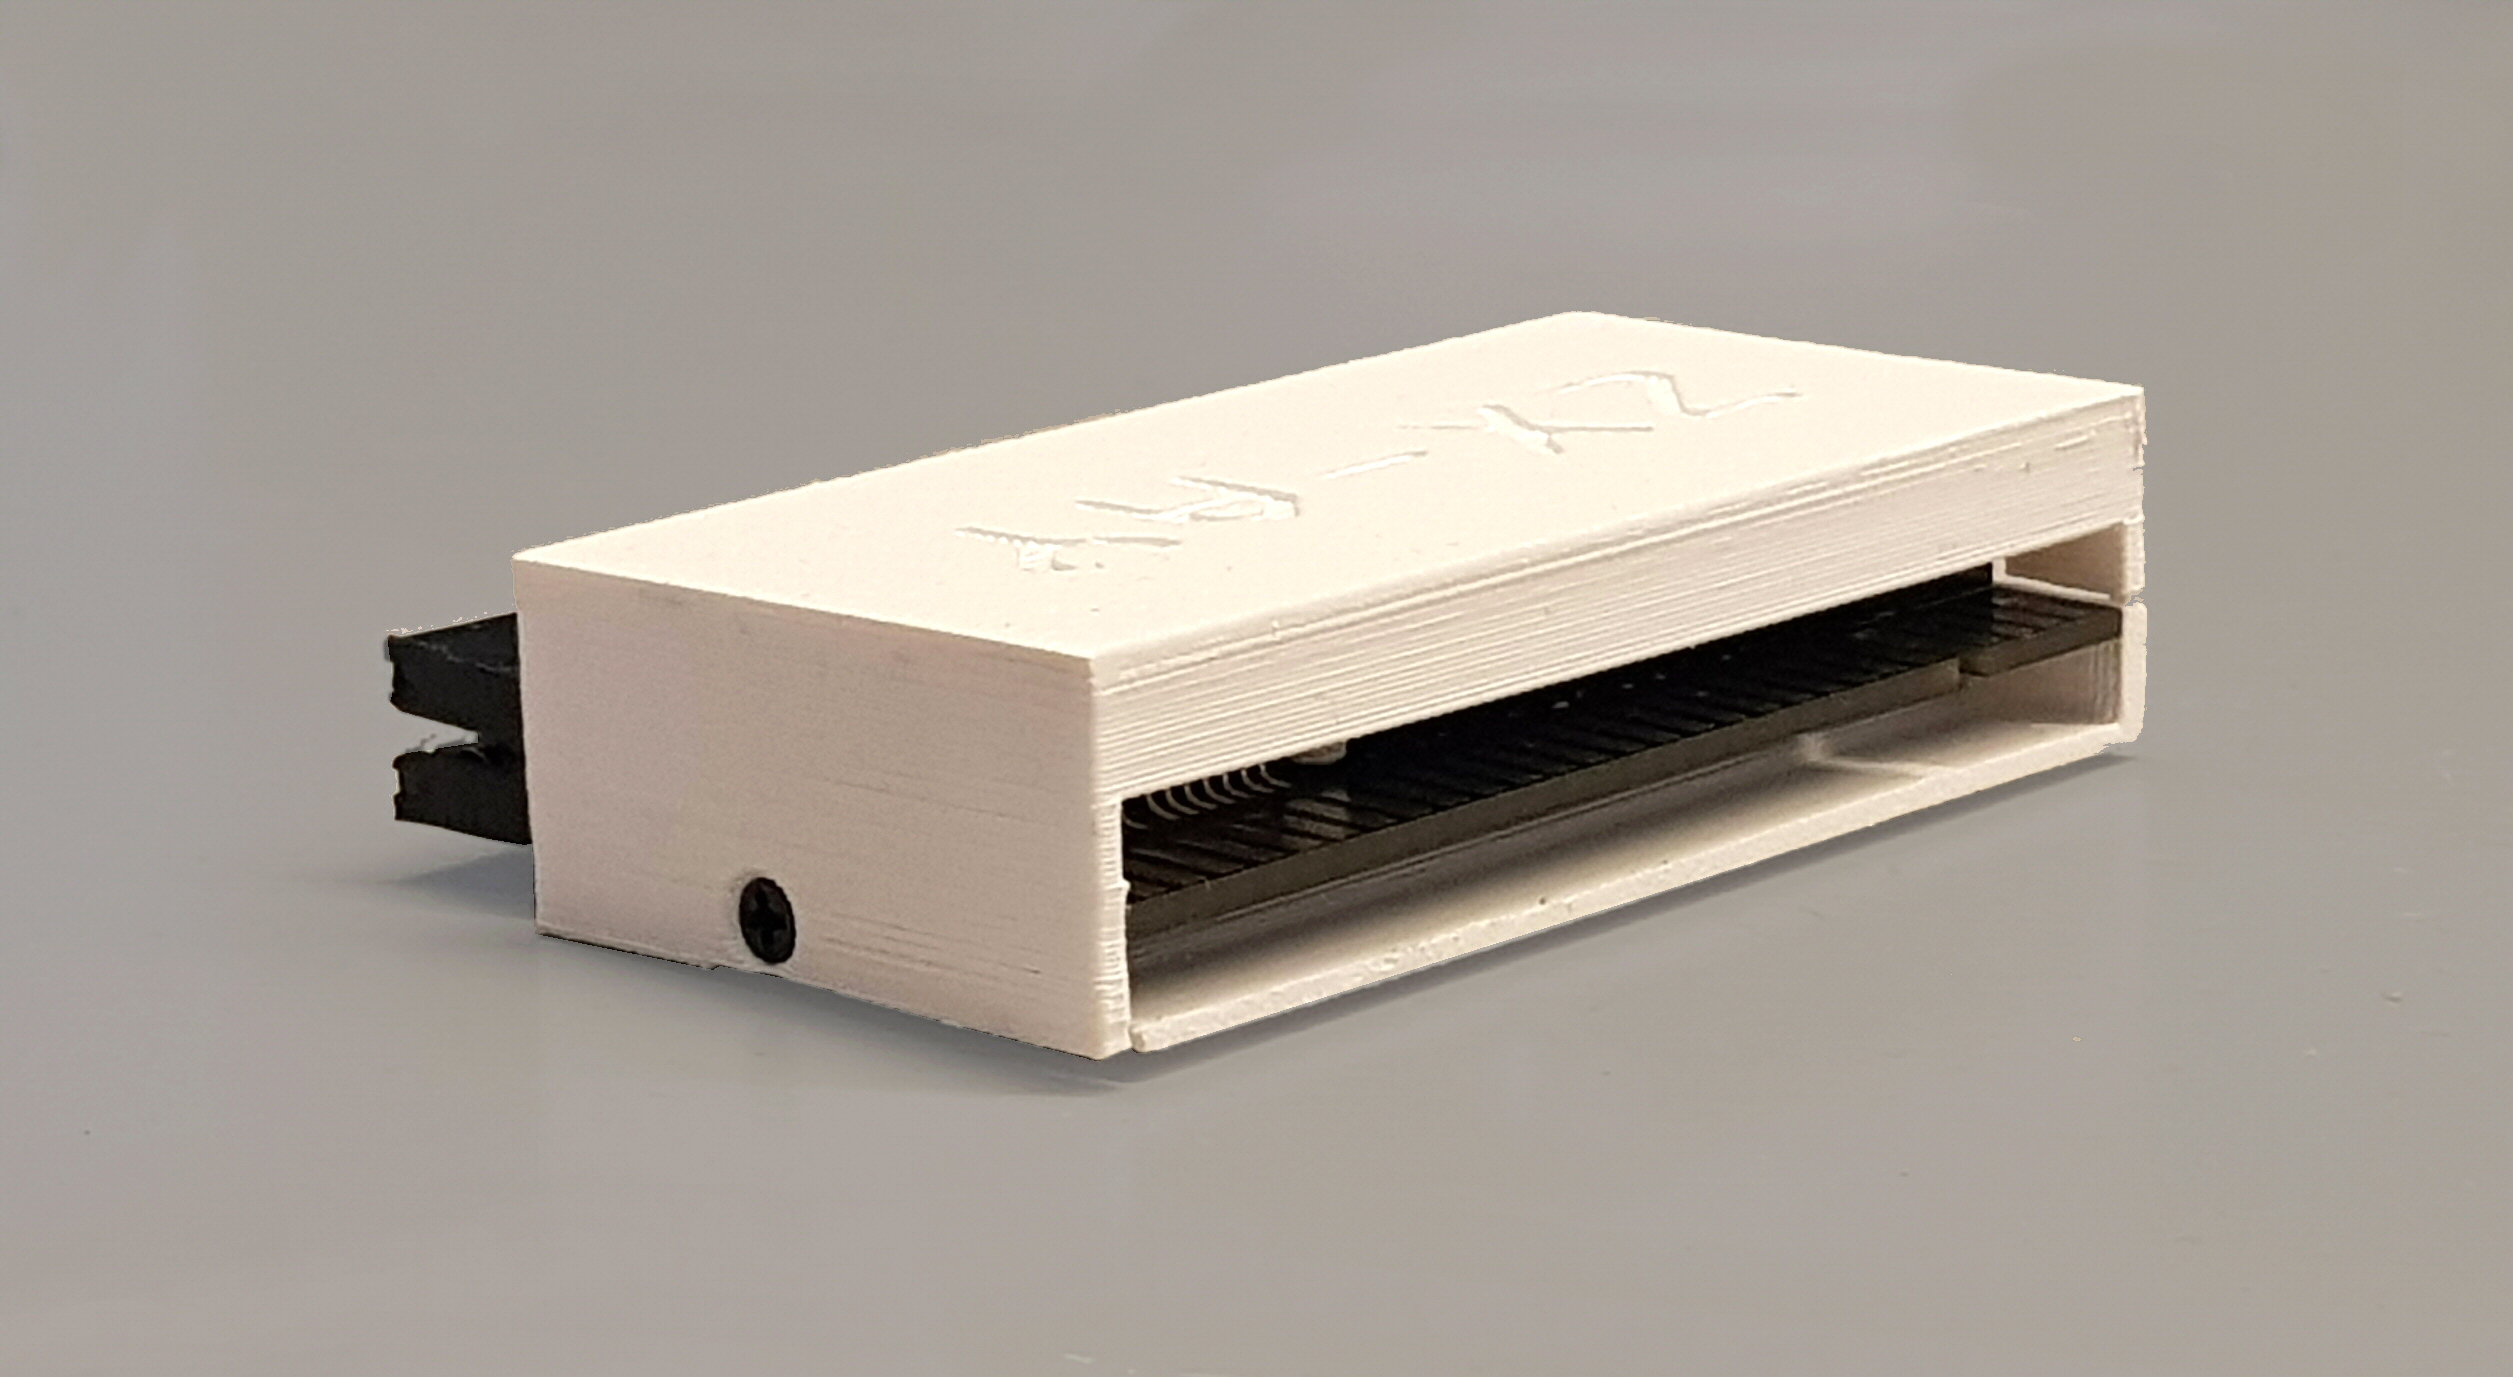
There is no assembly manual included, since it’s that easy to put together:
Just slide the top shell over the left stereo output connector and pin header block, put on the bottom shell, and screw in the 2 screws.
You can clearly see on the photos how it should be assembled.

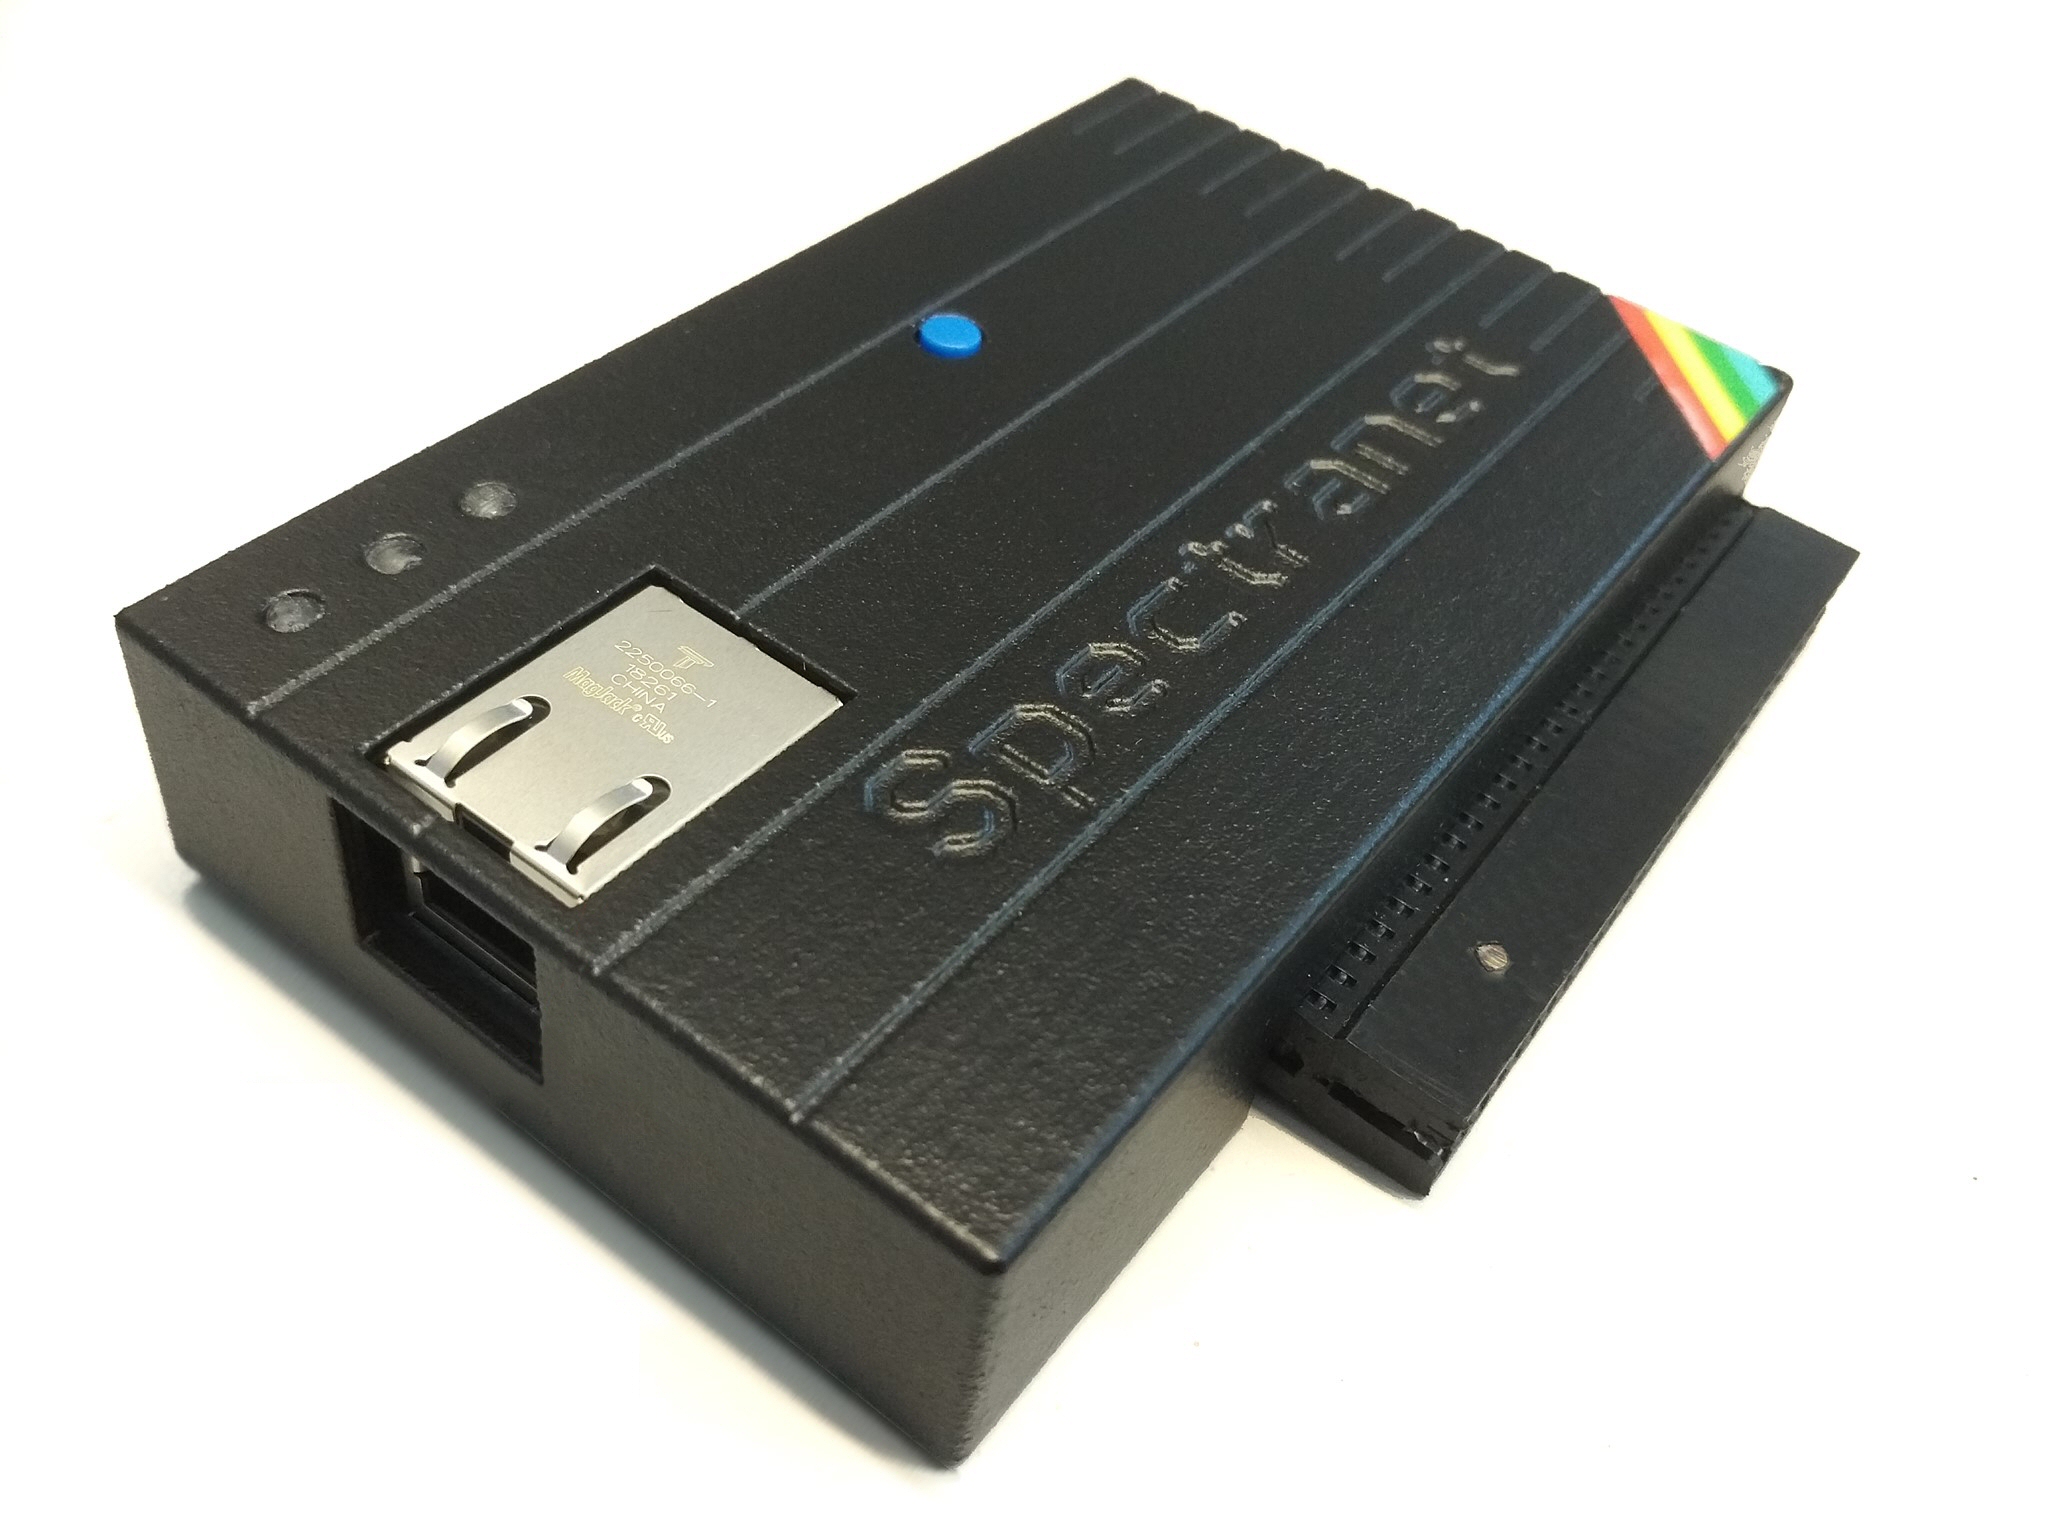
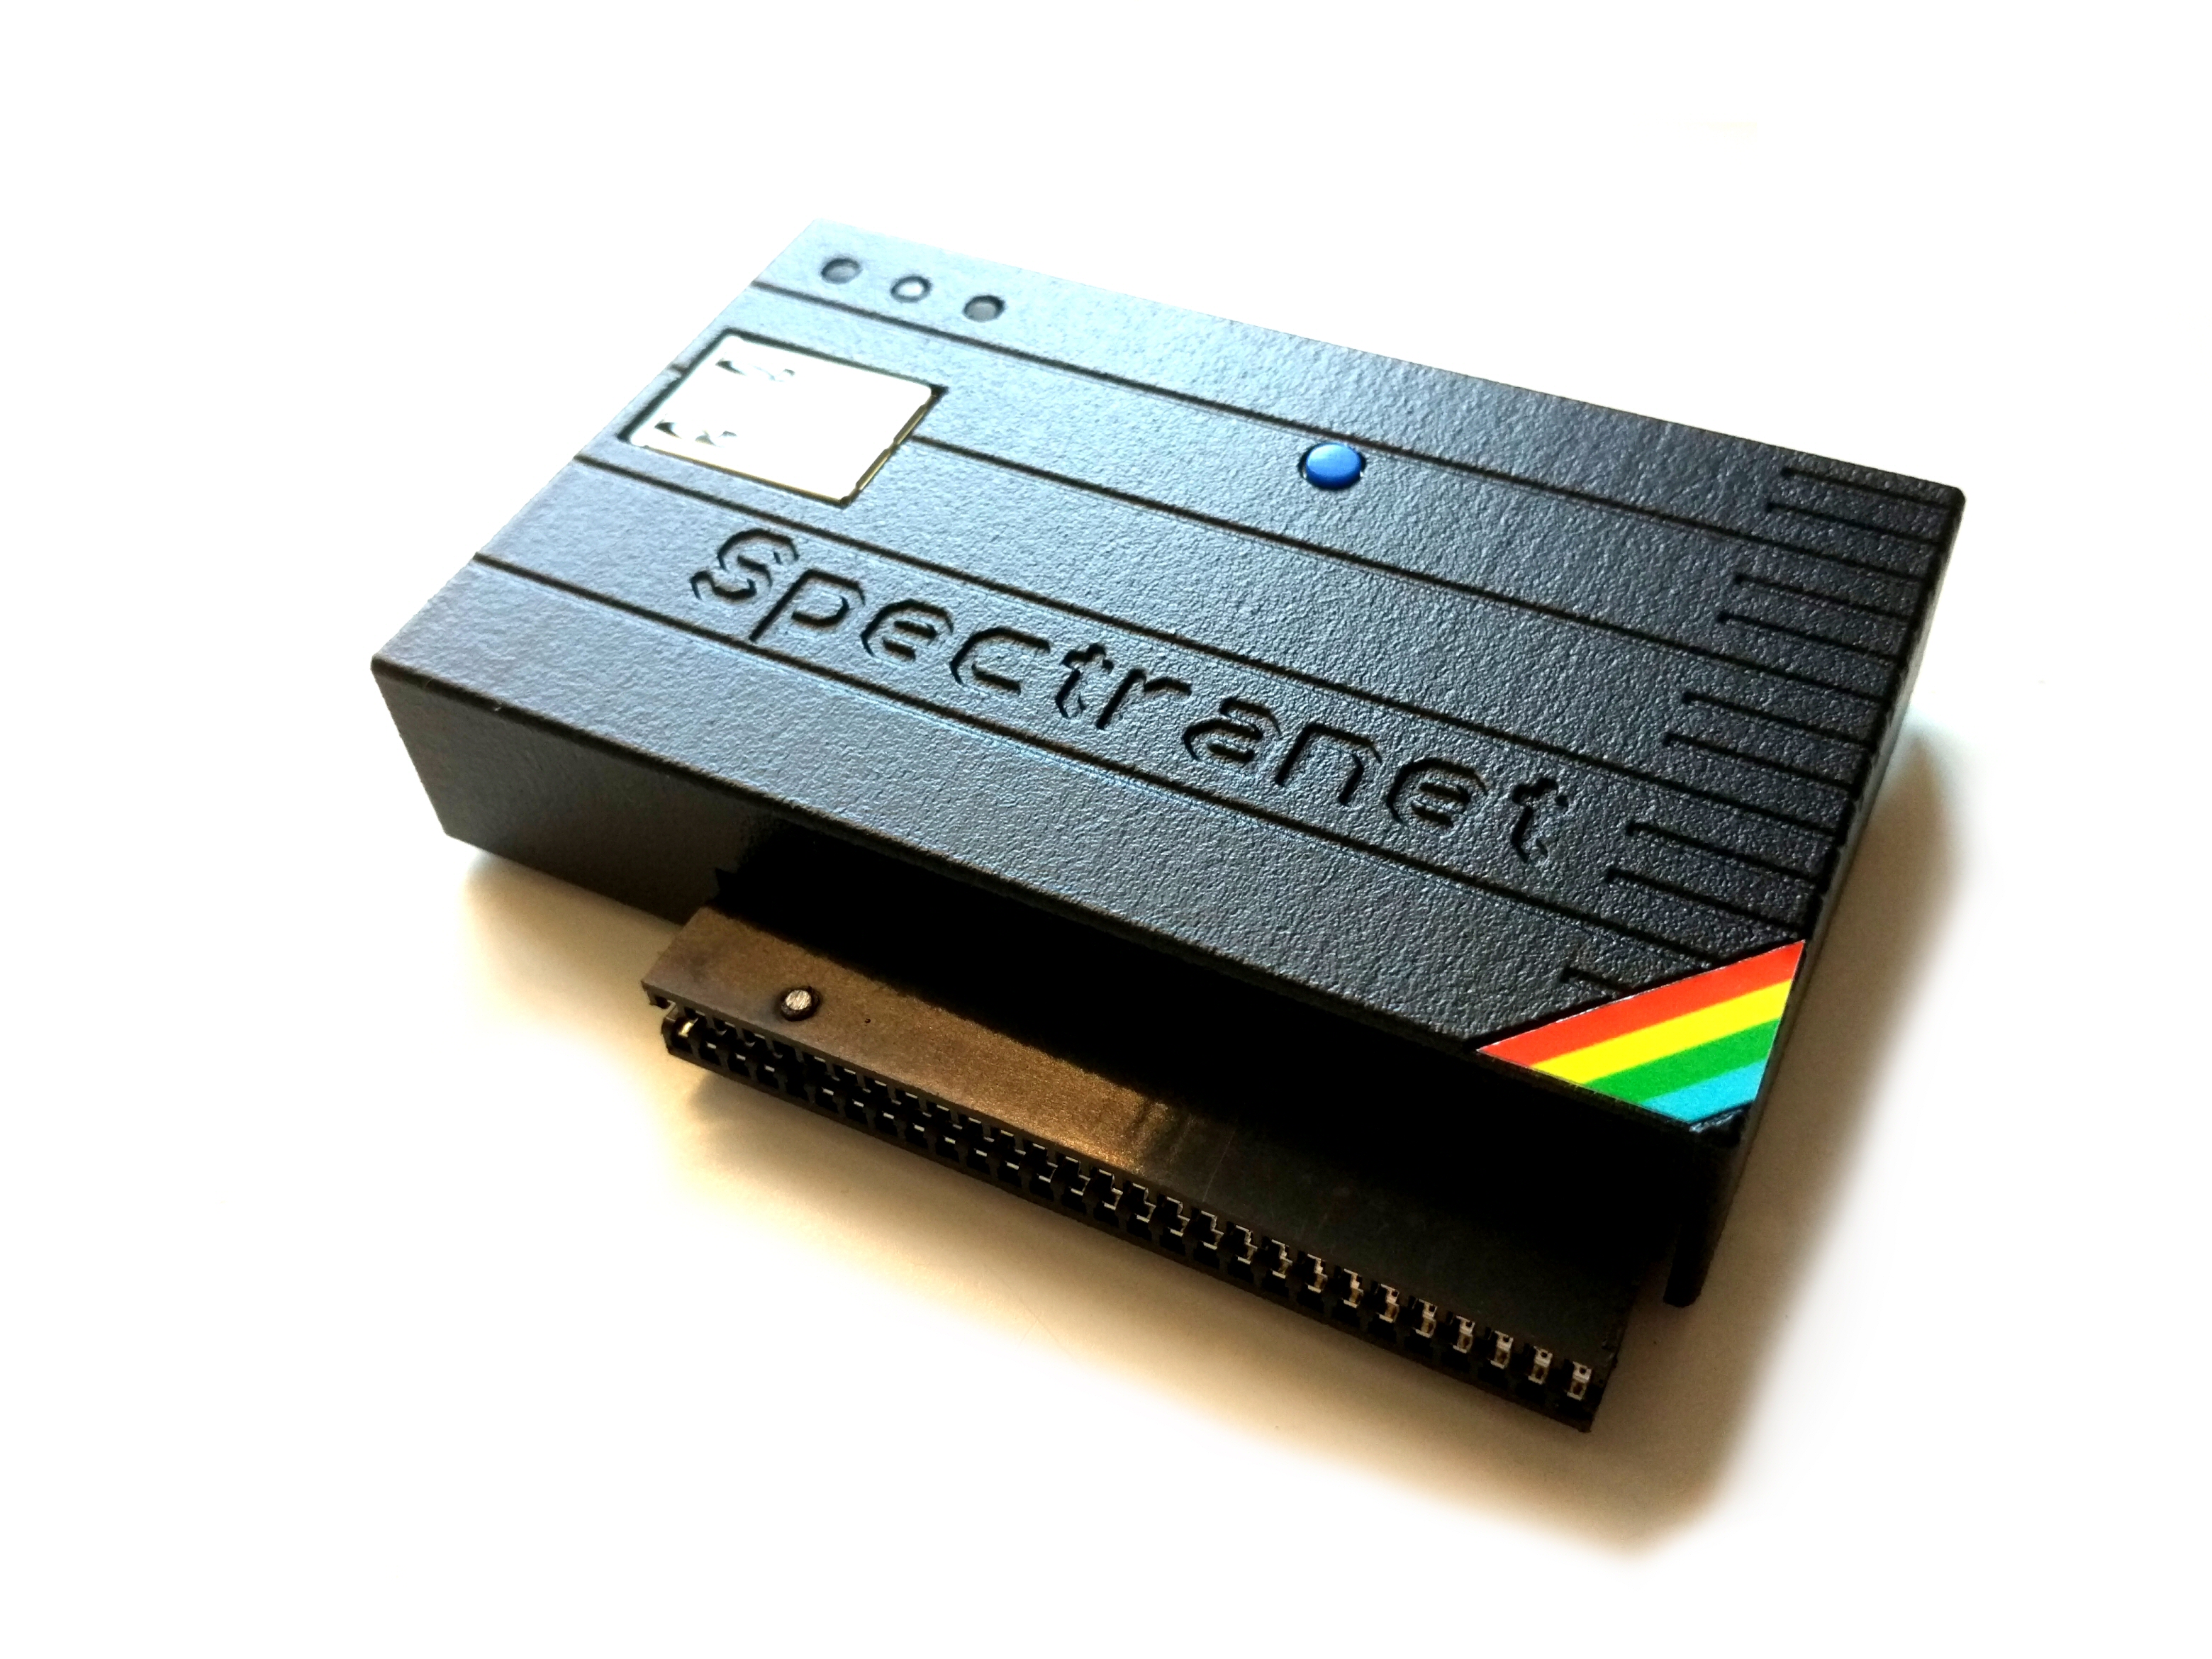
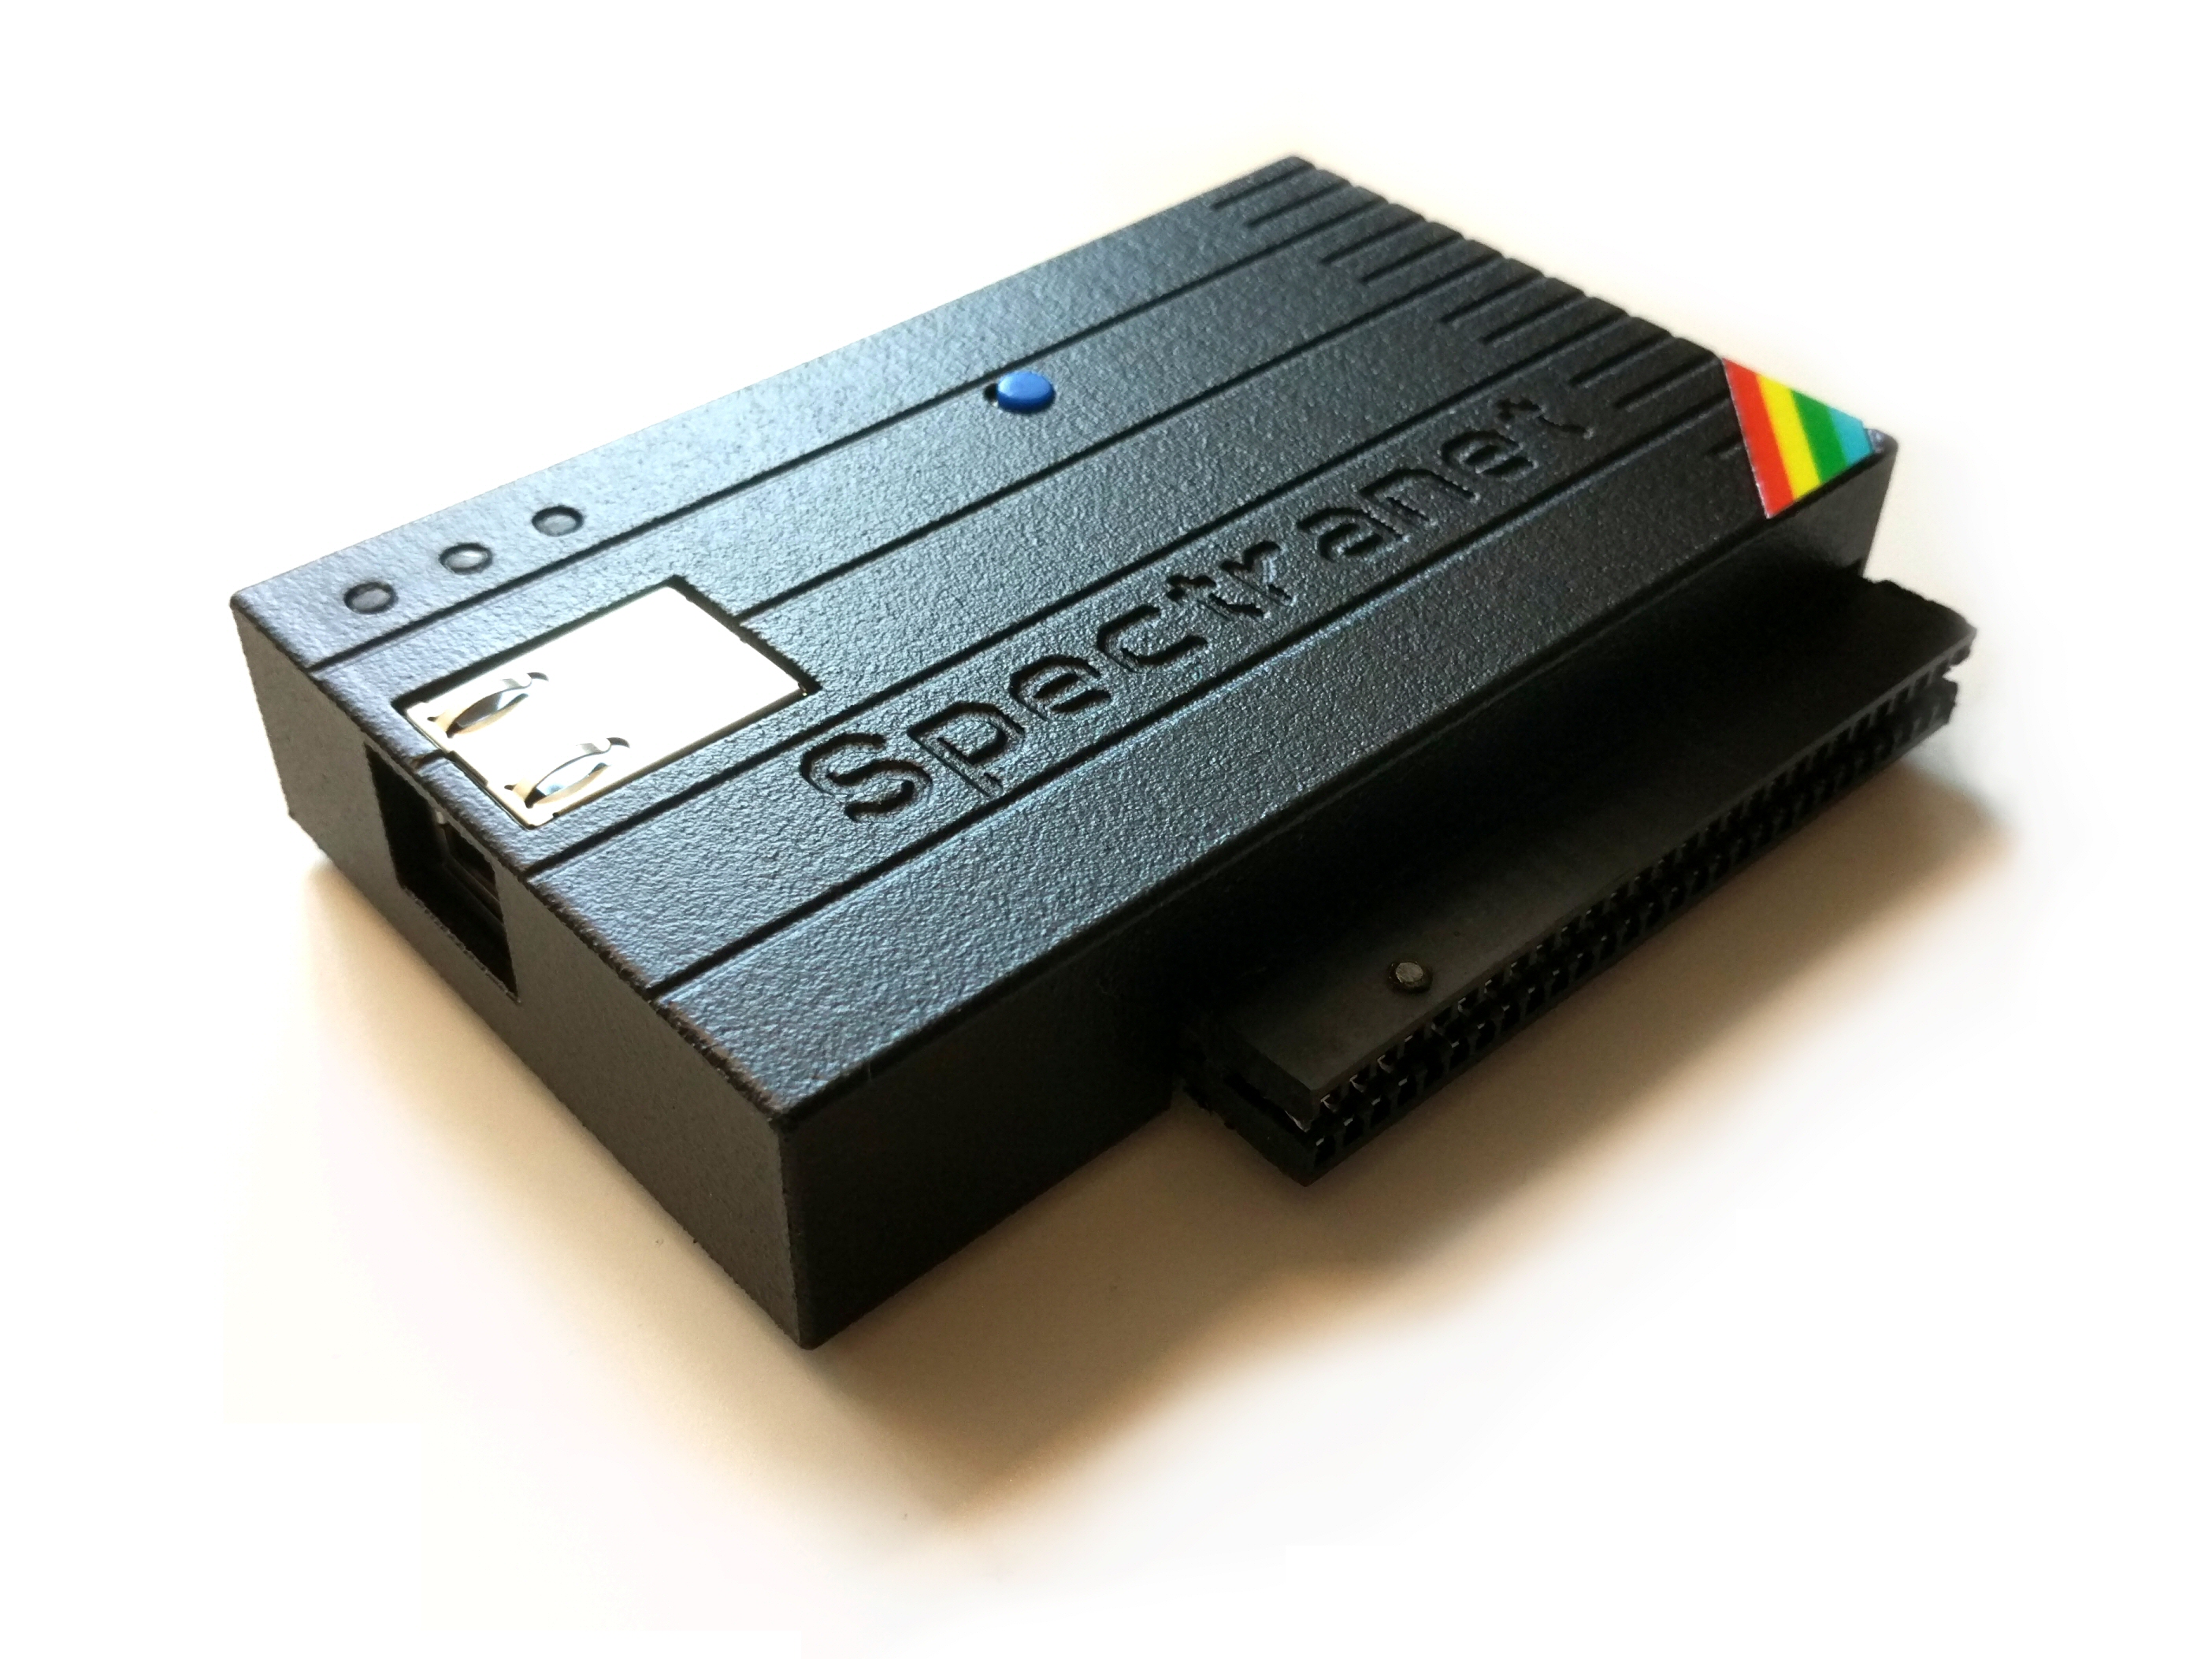
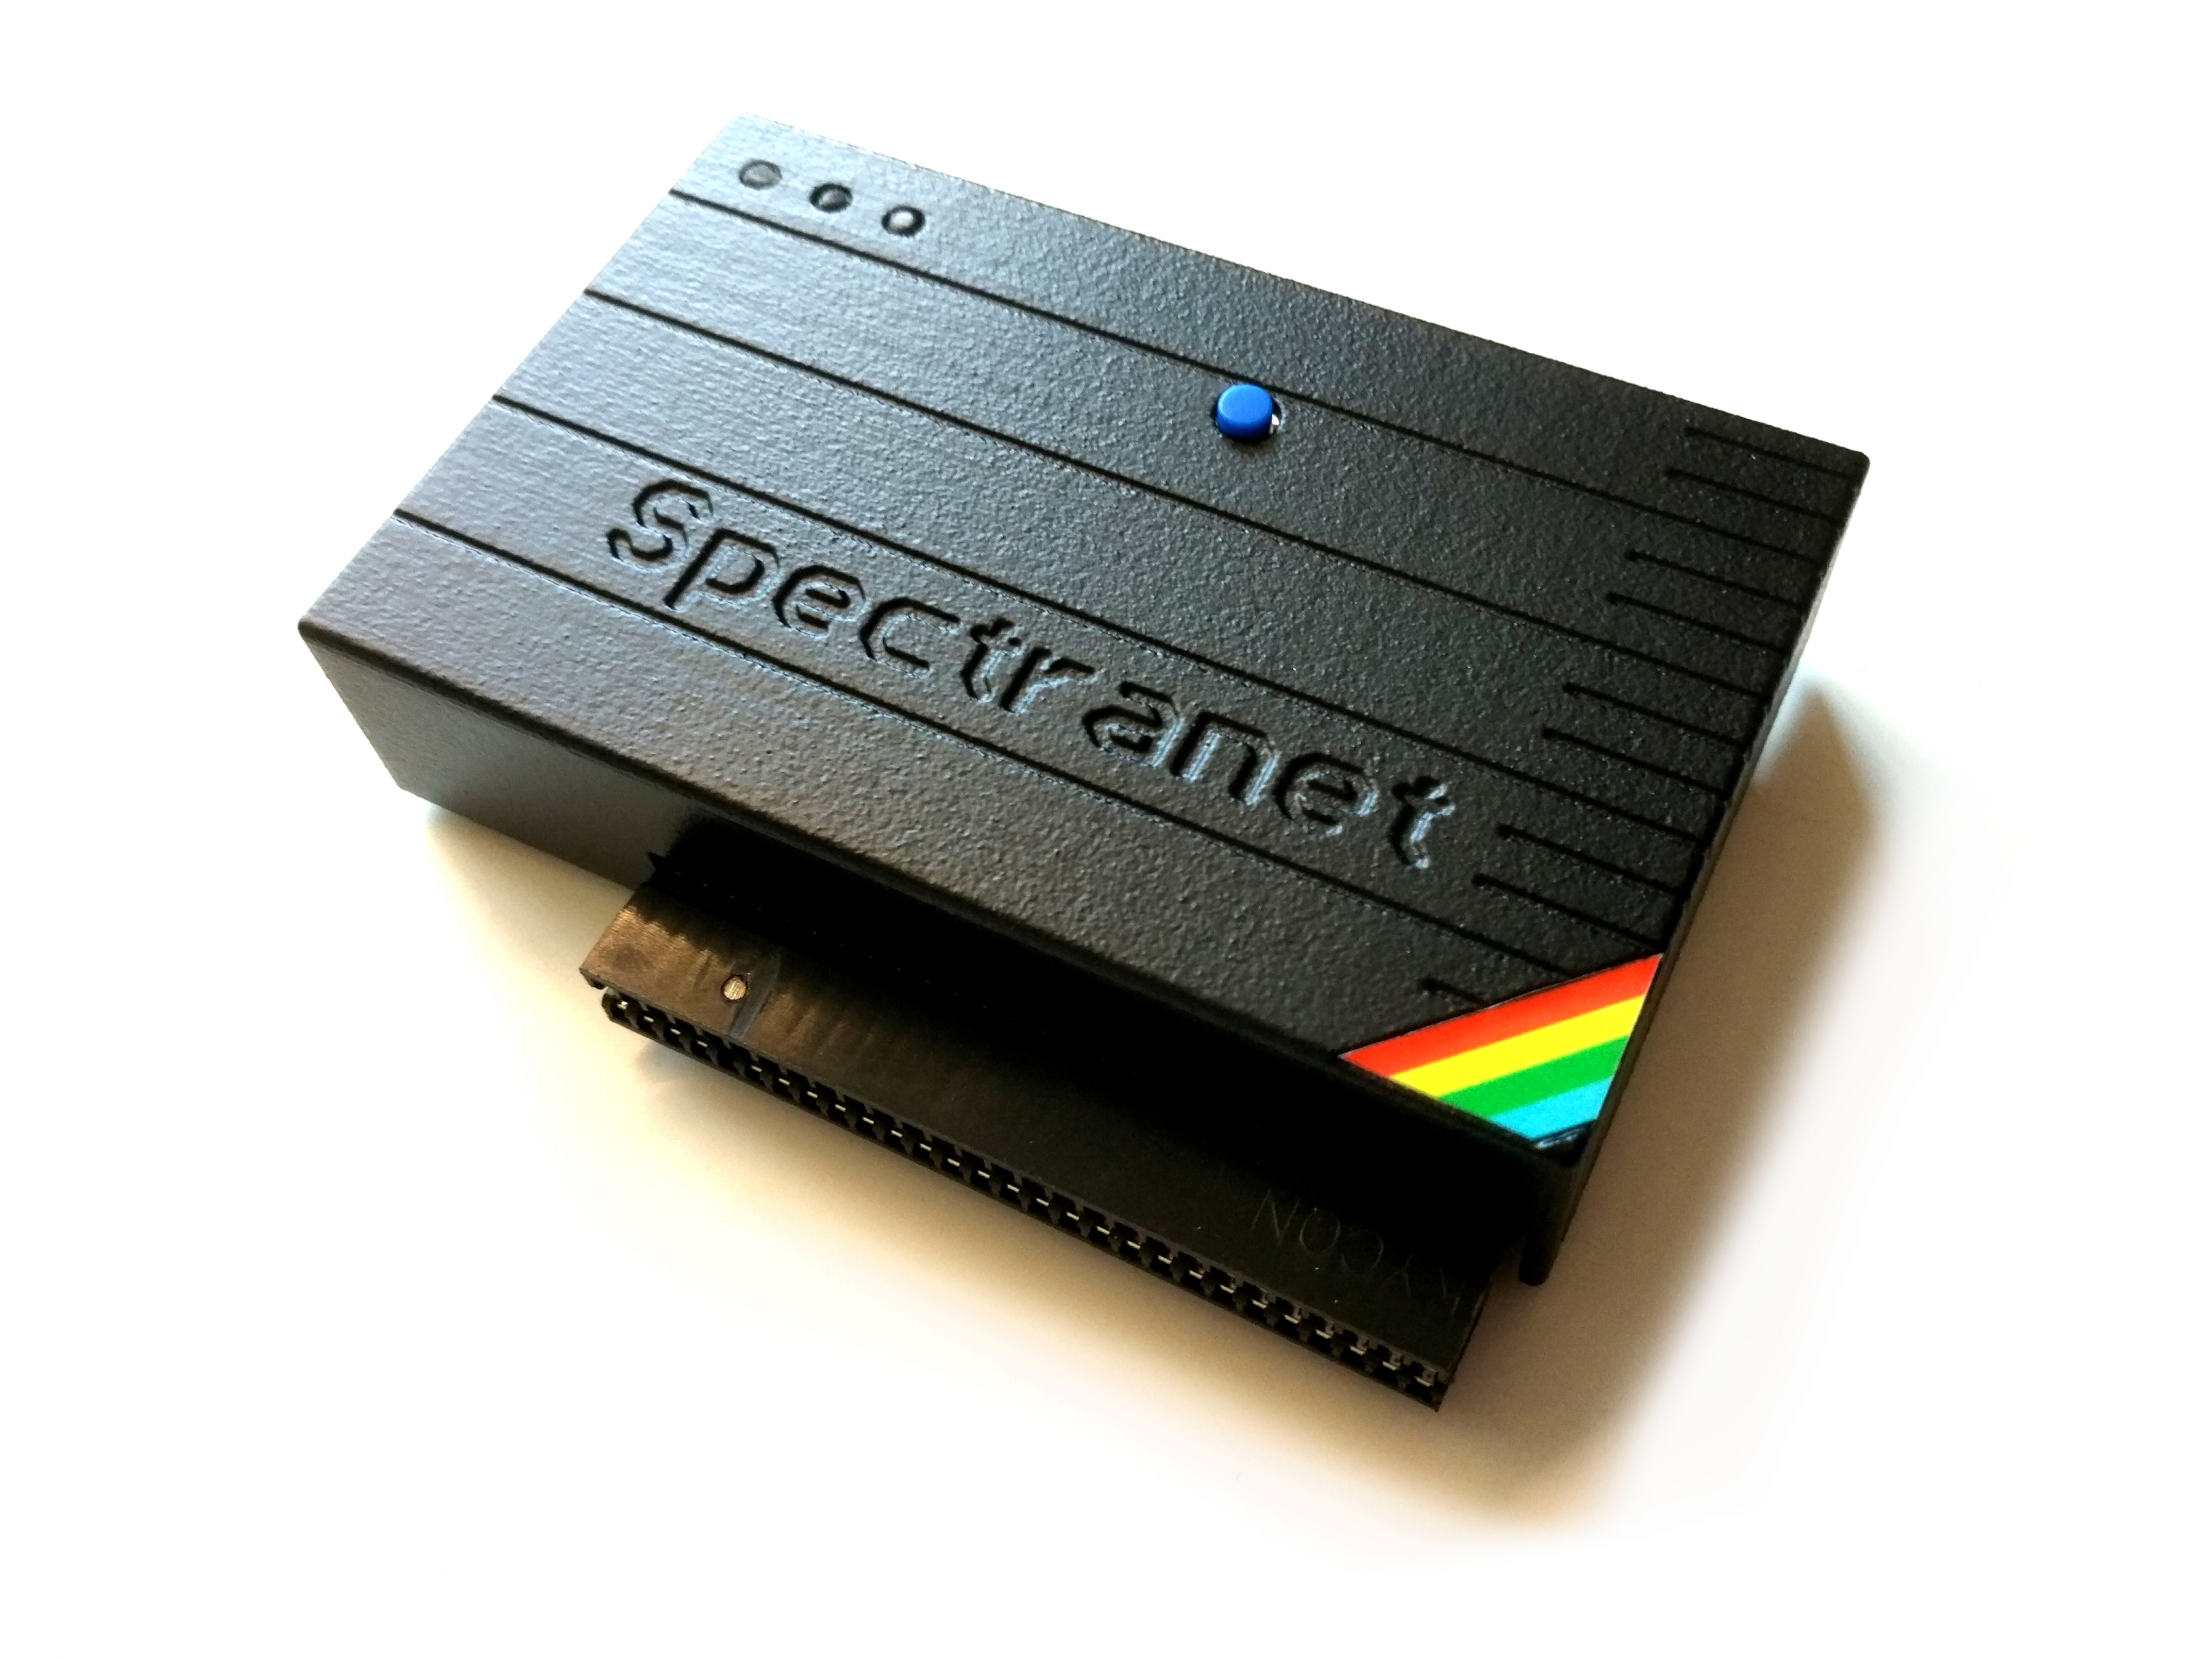
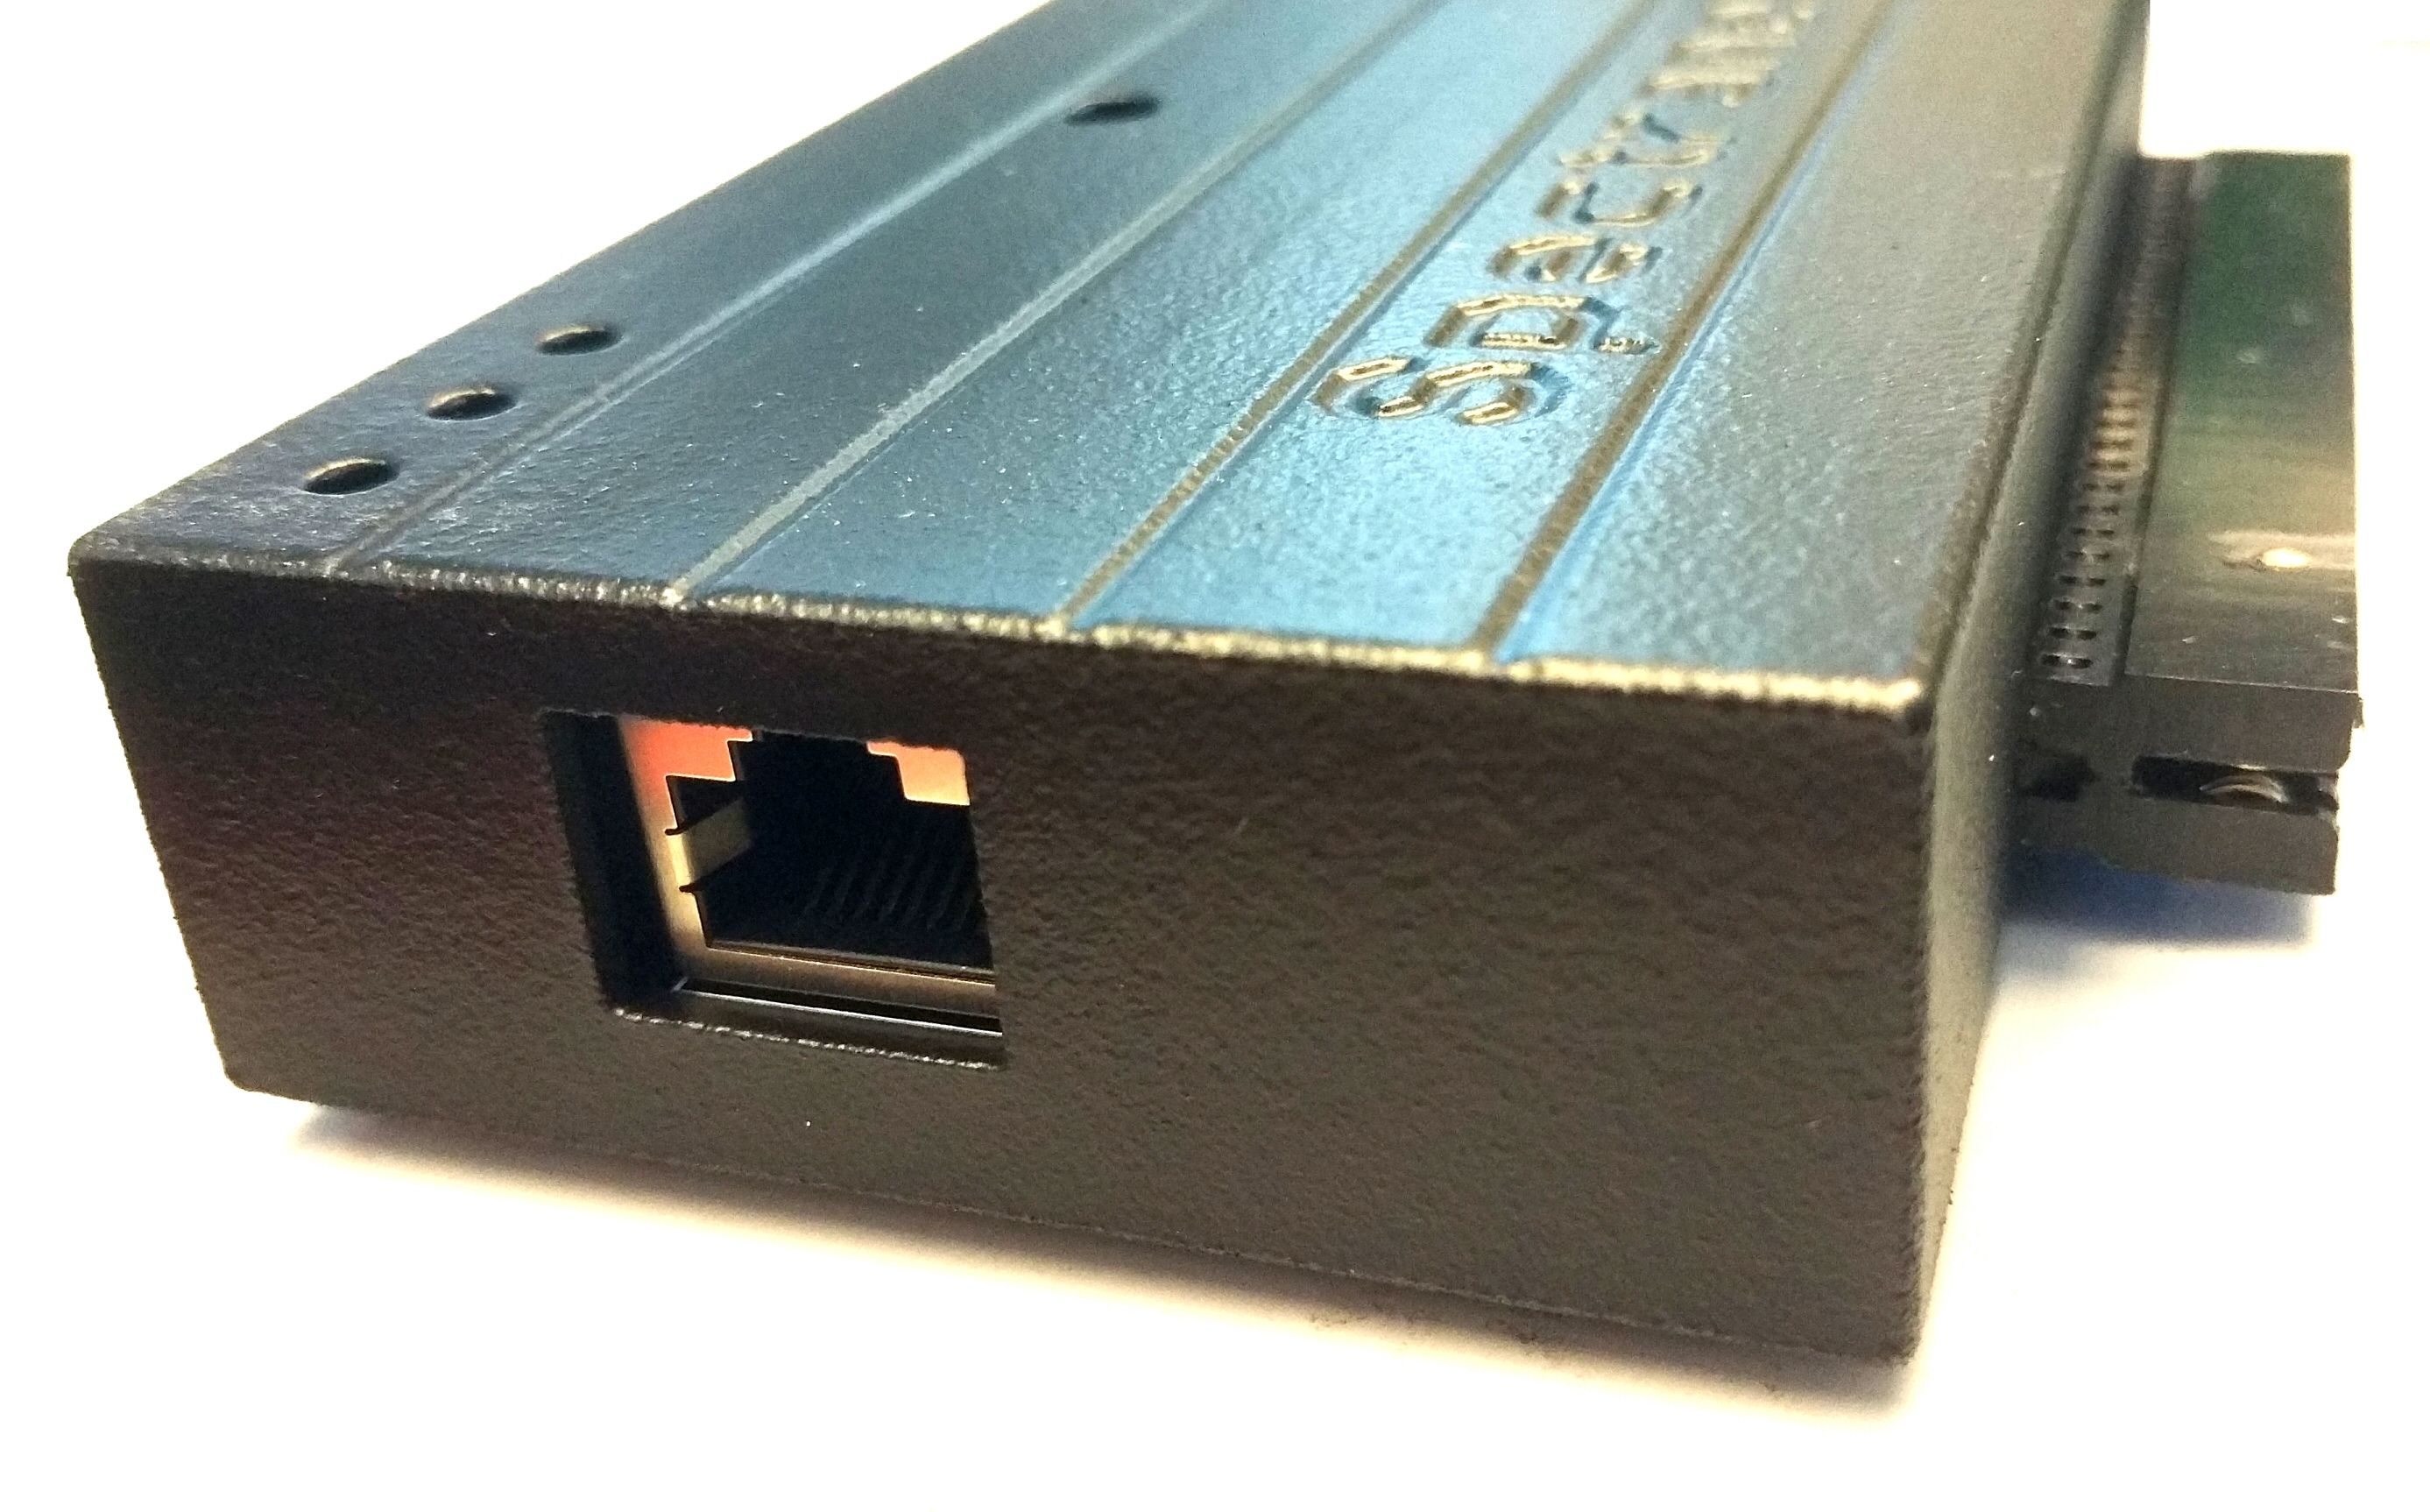
This Spectranet Case Kit comes with:
– The ‘RJ45 Top Cutout’ Spectranet Case, which exists of a top shell and a bottom plate
– 4 screws
– A tactile button, with blue button cap and rubber button cap adapter
– A slide switch
– A printed copy of the assembly manual
The Spectranet interface is not included with this case kit!
For more information, read the assembly manual found in the link underneath.
Please make sure to read the assembly manual, to make sure the Spectranet Case Kit is compatible with your Spectranet interface, and to make sure you are up to assembling the Spectranet Case Kit, which may require some basic soldering.
Read the Spectranet Case Kit assembly manual here!
A printed copy will be included with the case kit.
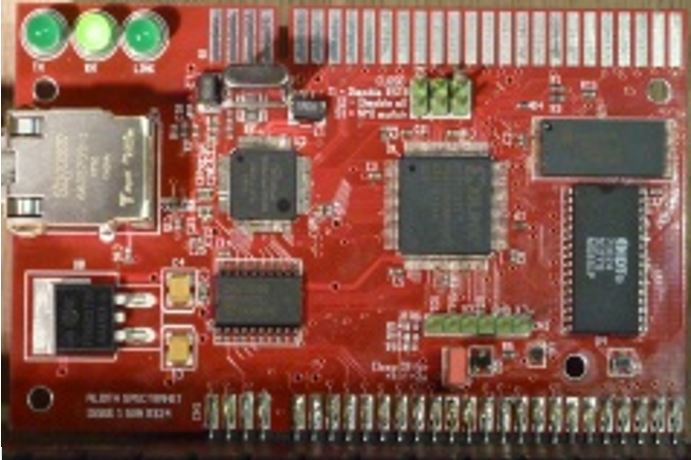
Unfortunately, this case is NOT COMPATIBLE with the first Spectranet version by Dylan Smith, without screw holes, as shown on the photo underneath.
NB: We haven’t verified if there is only a blue board without screw holes – there may be several board colours without screw holes!
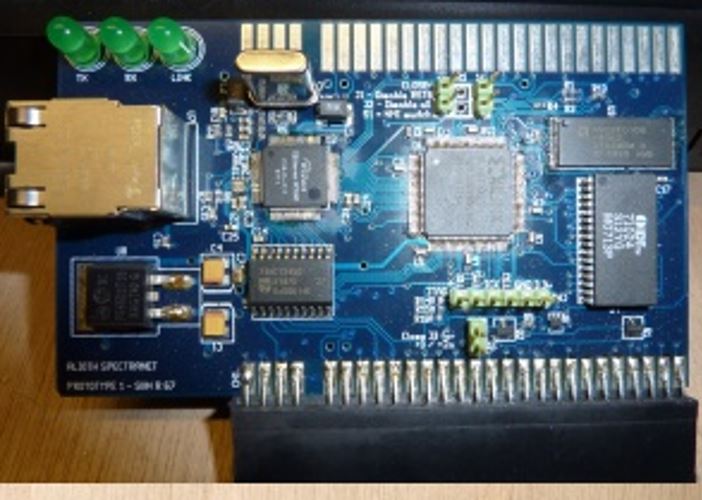
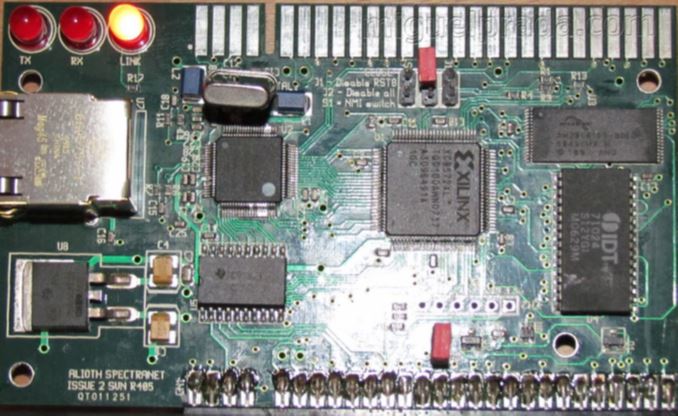
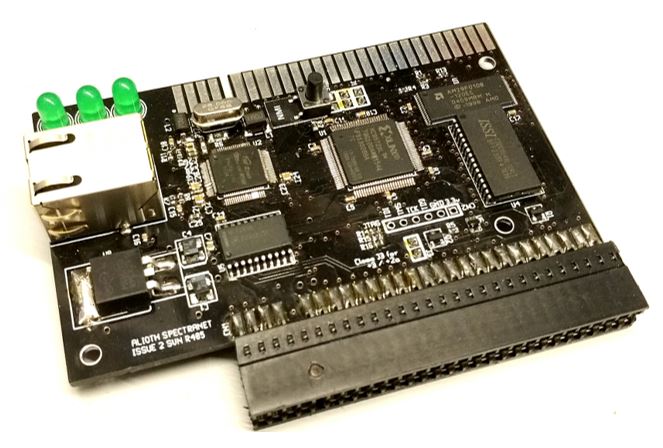
This case is compatible with the Spectranet boards from Dylan Smith, that have screw holes.
Please note: the full height crystal on these boards, might get in the way of the case!
If so, you will have to try to bend the crystal, which only works when the legs stick out enough.
If bending is not possible, you have to resolder the crystal to create enough space for the bend.
BEWARE FOR THE PARTS UNDERNEATH THE CRYSTAL!
Make sure the crystal, or its legs, does not make contact with any of the parts underneath!
Dylans boards came with pin header blocks and jumpers on top of the board, to configure the interface.
The Spectranet Case Kit however is designed for slide switches at the bottom of the board, and one tactile button on top.
To assemble the tactile button and slide switch, and potentially resolder a full height crystal if you have one of Dylan’s Spectranet boards, you will need some basic soldering skills.
It’s not mandatory to assemble the tactile button and slide switch (the case will fit without).
But not assembling the tactile button, will make it impossible to reach the NMI button from outside the case (the NMI menu is only needed for initial configuration of the Spectranet interface).
The slide switch will let you configure the Spectranet interface for ZX Spectrum 16K / 48K / 128K ‘toastrack’, or +2A, +2B or +3.
If you do not assemble this slide switch, you need to open up the case when you need to change this setting by the original jumpers.
That said, it may still require some soldering to be able to bend the full height crystal.
For more information, read the assembly manual found in the link above.
This case is compatible with the Spectranet boards from Ben Versteeg / ByteDelight, that have screw holes.
NB: ByteDelight used only low profile crystals, so the remark about full height crystals, does not apply here.
There have been a handful of ByteDelight Spectranet interfaces, that do not have the tactile button and slide switches, but most of the ByteDelight Spectranet interfaces have these assembled already.
Though several models of tactile buttons have been used, so you may have to replace the tactile button when it does not have the correct length.
To potentially replace the tactile button, you will need some basic soldering skills.
It’s not mandatory to get in the correct size tactile button, but not doing so will probably make it impossible to use blue cap with rubber cap adapter, and thus reach the NMI button from outside the case (the NMI menu is only needed for initial configuration of the Spectranet interface).
So if you’re not up to soldering the parts, you could still use the case.
For more information, read the assembly manual found in the link above.

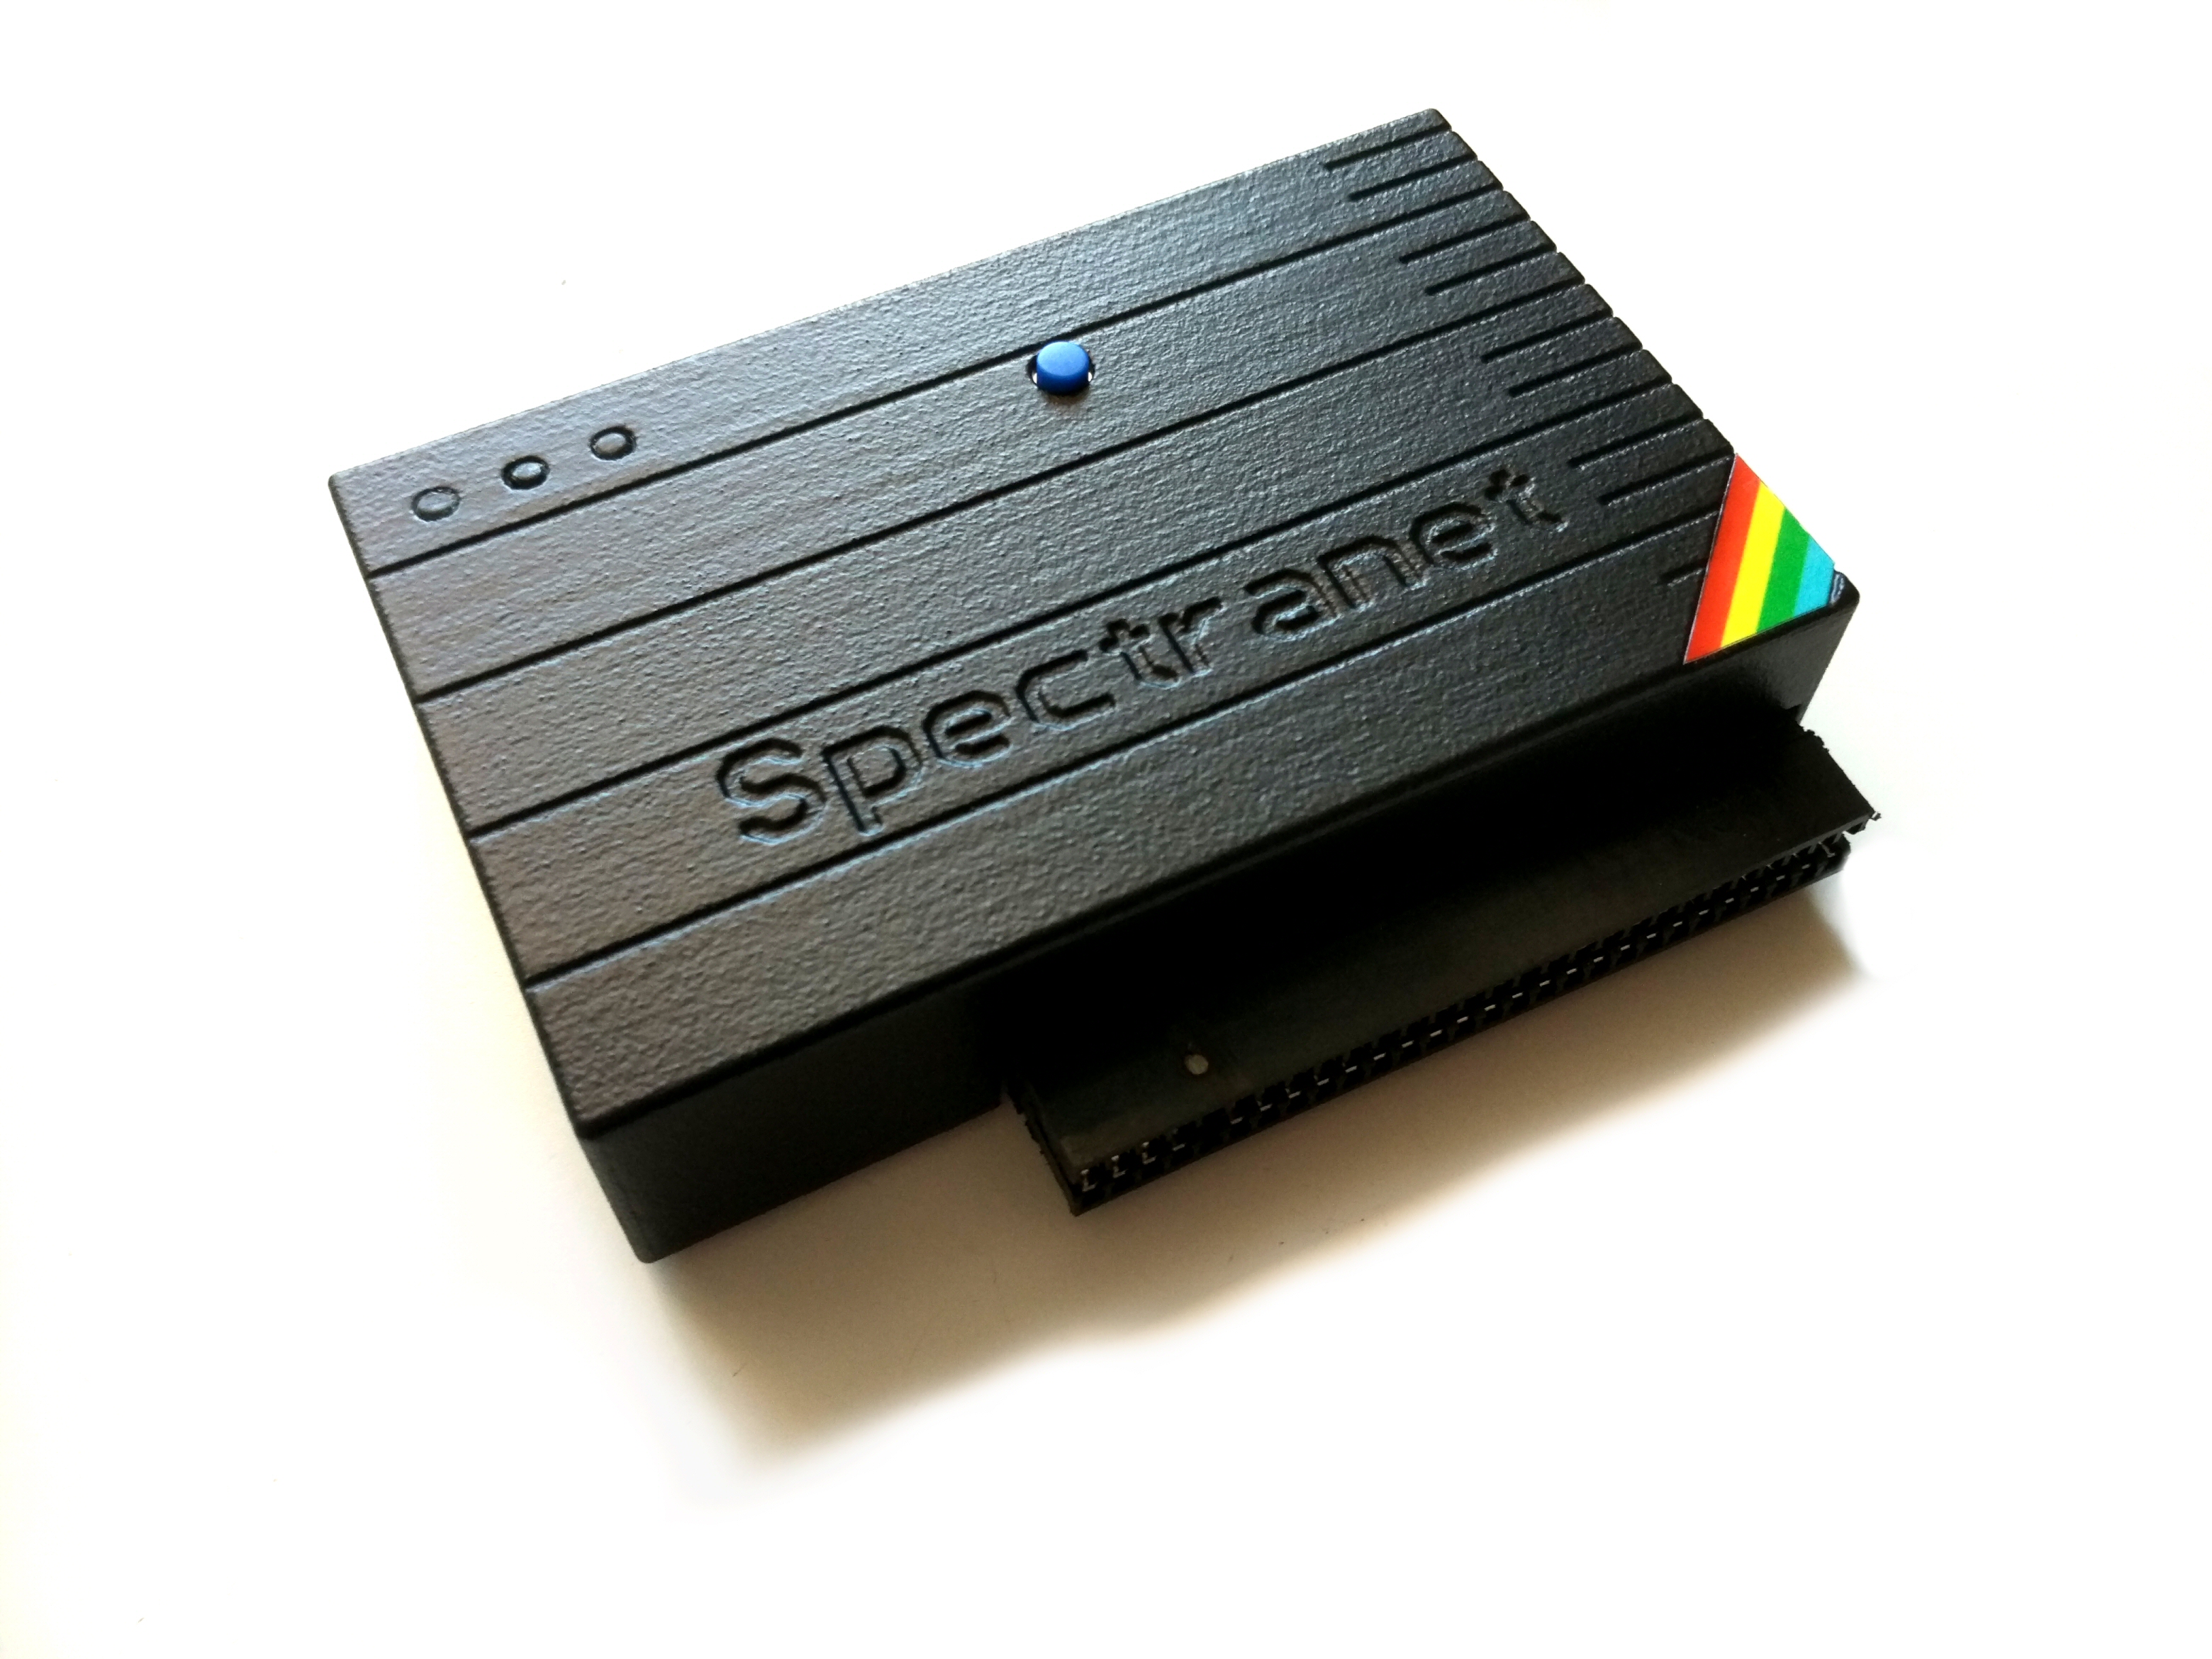
This Spectranet Case Kit comes with:
– The ‘Closed top’ Spectranet Case, which exists of a top shell and a bottom plate
– 4 screws
– A tactile button, with blue button cap and rubber button cap adapter
– A slide switch
– A printed copy of the assembly manual
The Spectranet interface is not included with this case kit!
For more information, read the assembly manual found in the link underneath.
Please make sure to read the assembly manual, to make sure the Spectranet Case Kit is compatible with your Spectranet interface, and to make sure you are up to assembling the Spectranet Case Kit, which may require some basic soldering.
Read the Spectranet Case Kit assembly manual here!
A printed copy will be included with the case kit.
Unfortunately, this case is NOT COMPATIBLE with the first Spectranet version by Dylan Smith, without screw holes, as shown on the photo underneath.
NB: We haven’t verified if there is only a blue board without screw holes – there may be several board colours without screw holes!
This case is compatible with the Spectranet boards from Dylan Smith, that have screw holes.
Please note: the full height crystal on these boards, might get in the way of the case!
If so, you will have to try to bend the crystal, which only works when the legs stick out enough.
If bending is not possible, you have to resolder the crystal to create enough space for the bend.
BEWARE FOR THE PARTS UNDERNEATH THE CRYSTAL!
Make sure the crystal, or its legs, does not make contact with any of the parts underneath!
Dylans boards came with pin header blocks and jumpers on top of the board, to configure the interface.
The Spectranet Case Kit however is designed for slide switches at the bottom of the board, and one tactile button on top.
To assemble the tactile button and slide switch, and potentially resolder a full height crystal if you have one of Dylan’s Spectranet boards, you will need some basic soldering skills.
It’s not mandatory to assemble the tactile button and slide switch (the case will fit without).
But not assembling the tactile button, will make it impossible to reach the NMI button from outside the case (the NMI menu is only needed for initial configuration of the Spectranet interface).
The slide switch will let you configure the Spectranet interface for ZX Spectrum 16K / 48K / 128K ‘toastrack’, or +2A, +2B or +3.
If you do not assemble this slide switch, you need to open up the case when you need to change this setting by the original jumpers.
That said, it may still require some soldering to be able to bend the full height crystal.
For more information, read the assembly manual found in the link above.
This case is compatible with the Spectranet boards from Ben Versteeg / ByteDelight, that have screw holes.
NB: ByteDelight used only low profile crystals, so the remark about full height crystals, does not apply here.
There have been a handful of ByteDelight Spectranet interfaces, that do not have the tactile button and slide switches, but most of the ByteDelight Spectranet interfaces have these assembled already.
Though several models of tactile buttons have been used, so you may have to replace the tactile button when it does not have the correct length.
To potentially replace the tactile button, you will need some basic soldering skills.
It’s not mandatory to get in the correct size tactile button, but not doing so will probably make it impossible to use blue cap with rubber cap adapter, and thus reach the NMI button from outside the case (the NMI menu is only needed for initial configuration of the Spectranet interface).
So if you’re not up to soldering the parts, you could still use the case.
For more information, read the assembly manual found in the link above.


We offer this set of 10 + 2 free used 3.5″ double sided double density (800KB) Floppy Diskettes.
A set will contain 2 sets of 6 Floppies of the same type / brand or colour.
The floppies have been formatted and tested, and are properly cleaned: all old labels and writing are cleaned off.
A new white label is attached.
The disk have been properly tested and came out with no errors.
But because these are used (old) disks, we cannot garantuee their lifetime or sensitivity to errors.


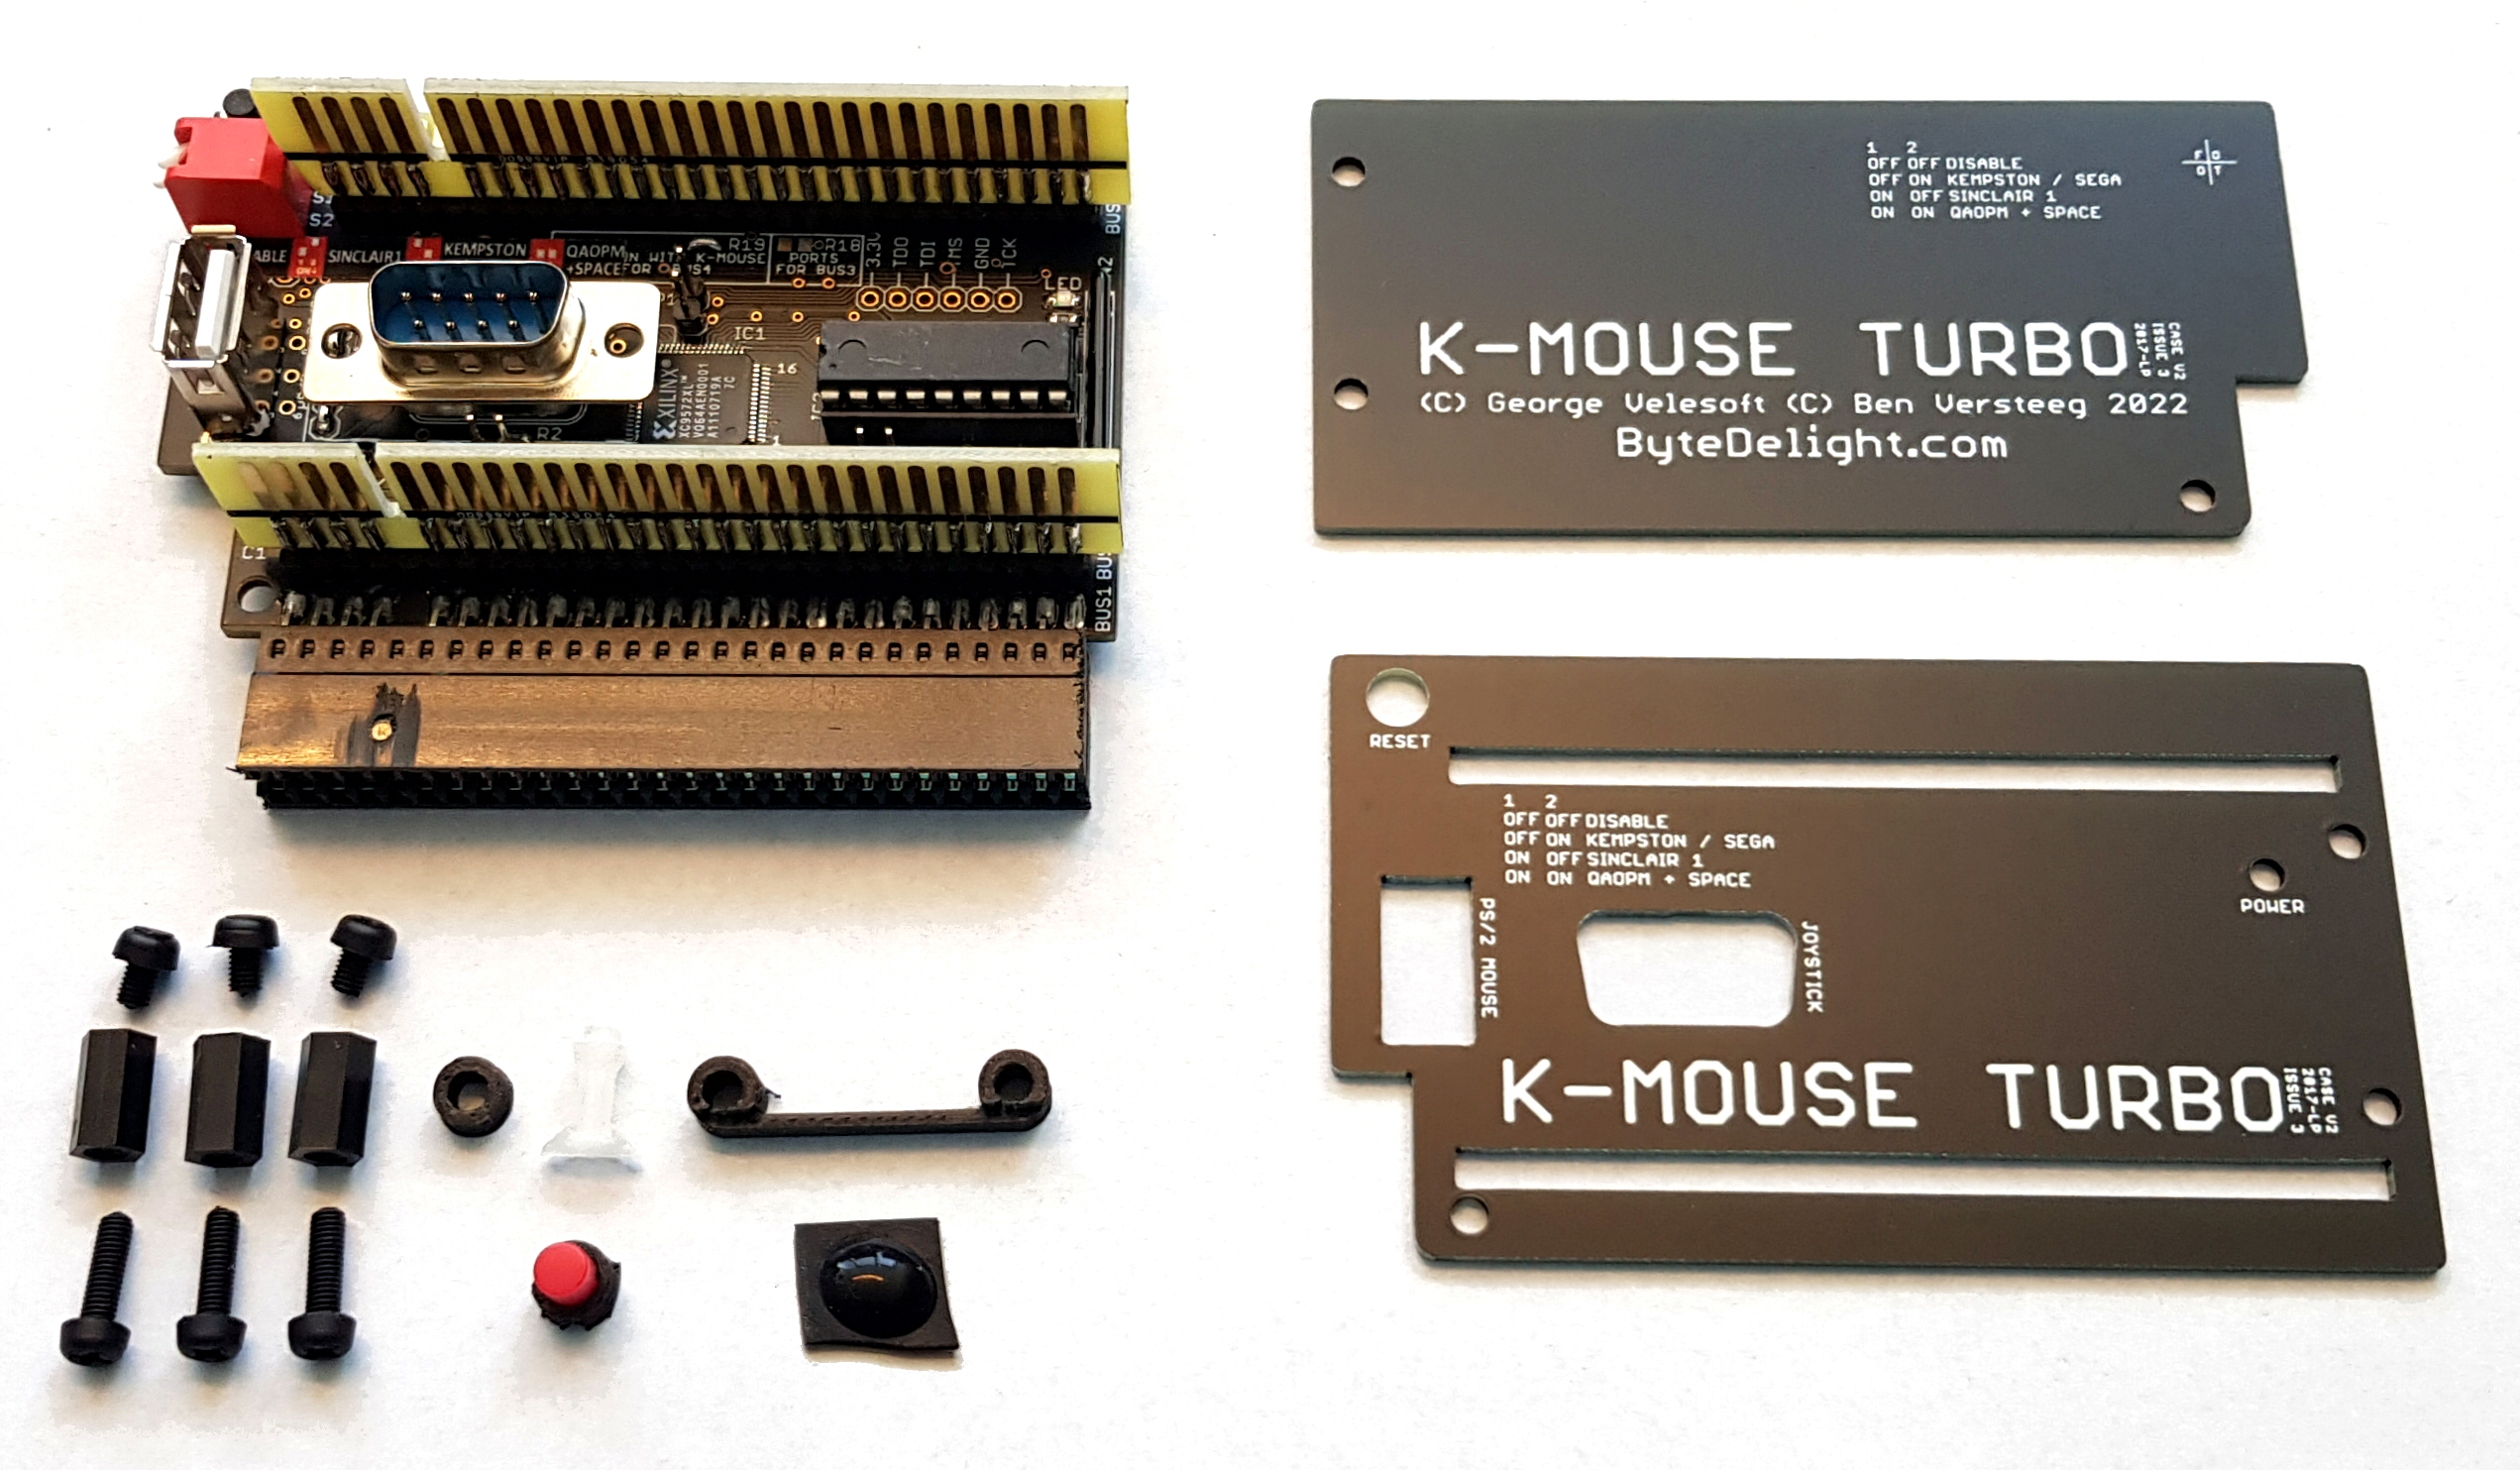
Comes with printed assembly manual! Read the manual here.

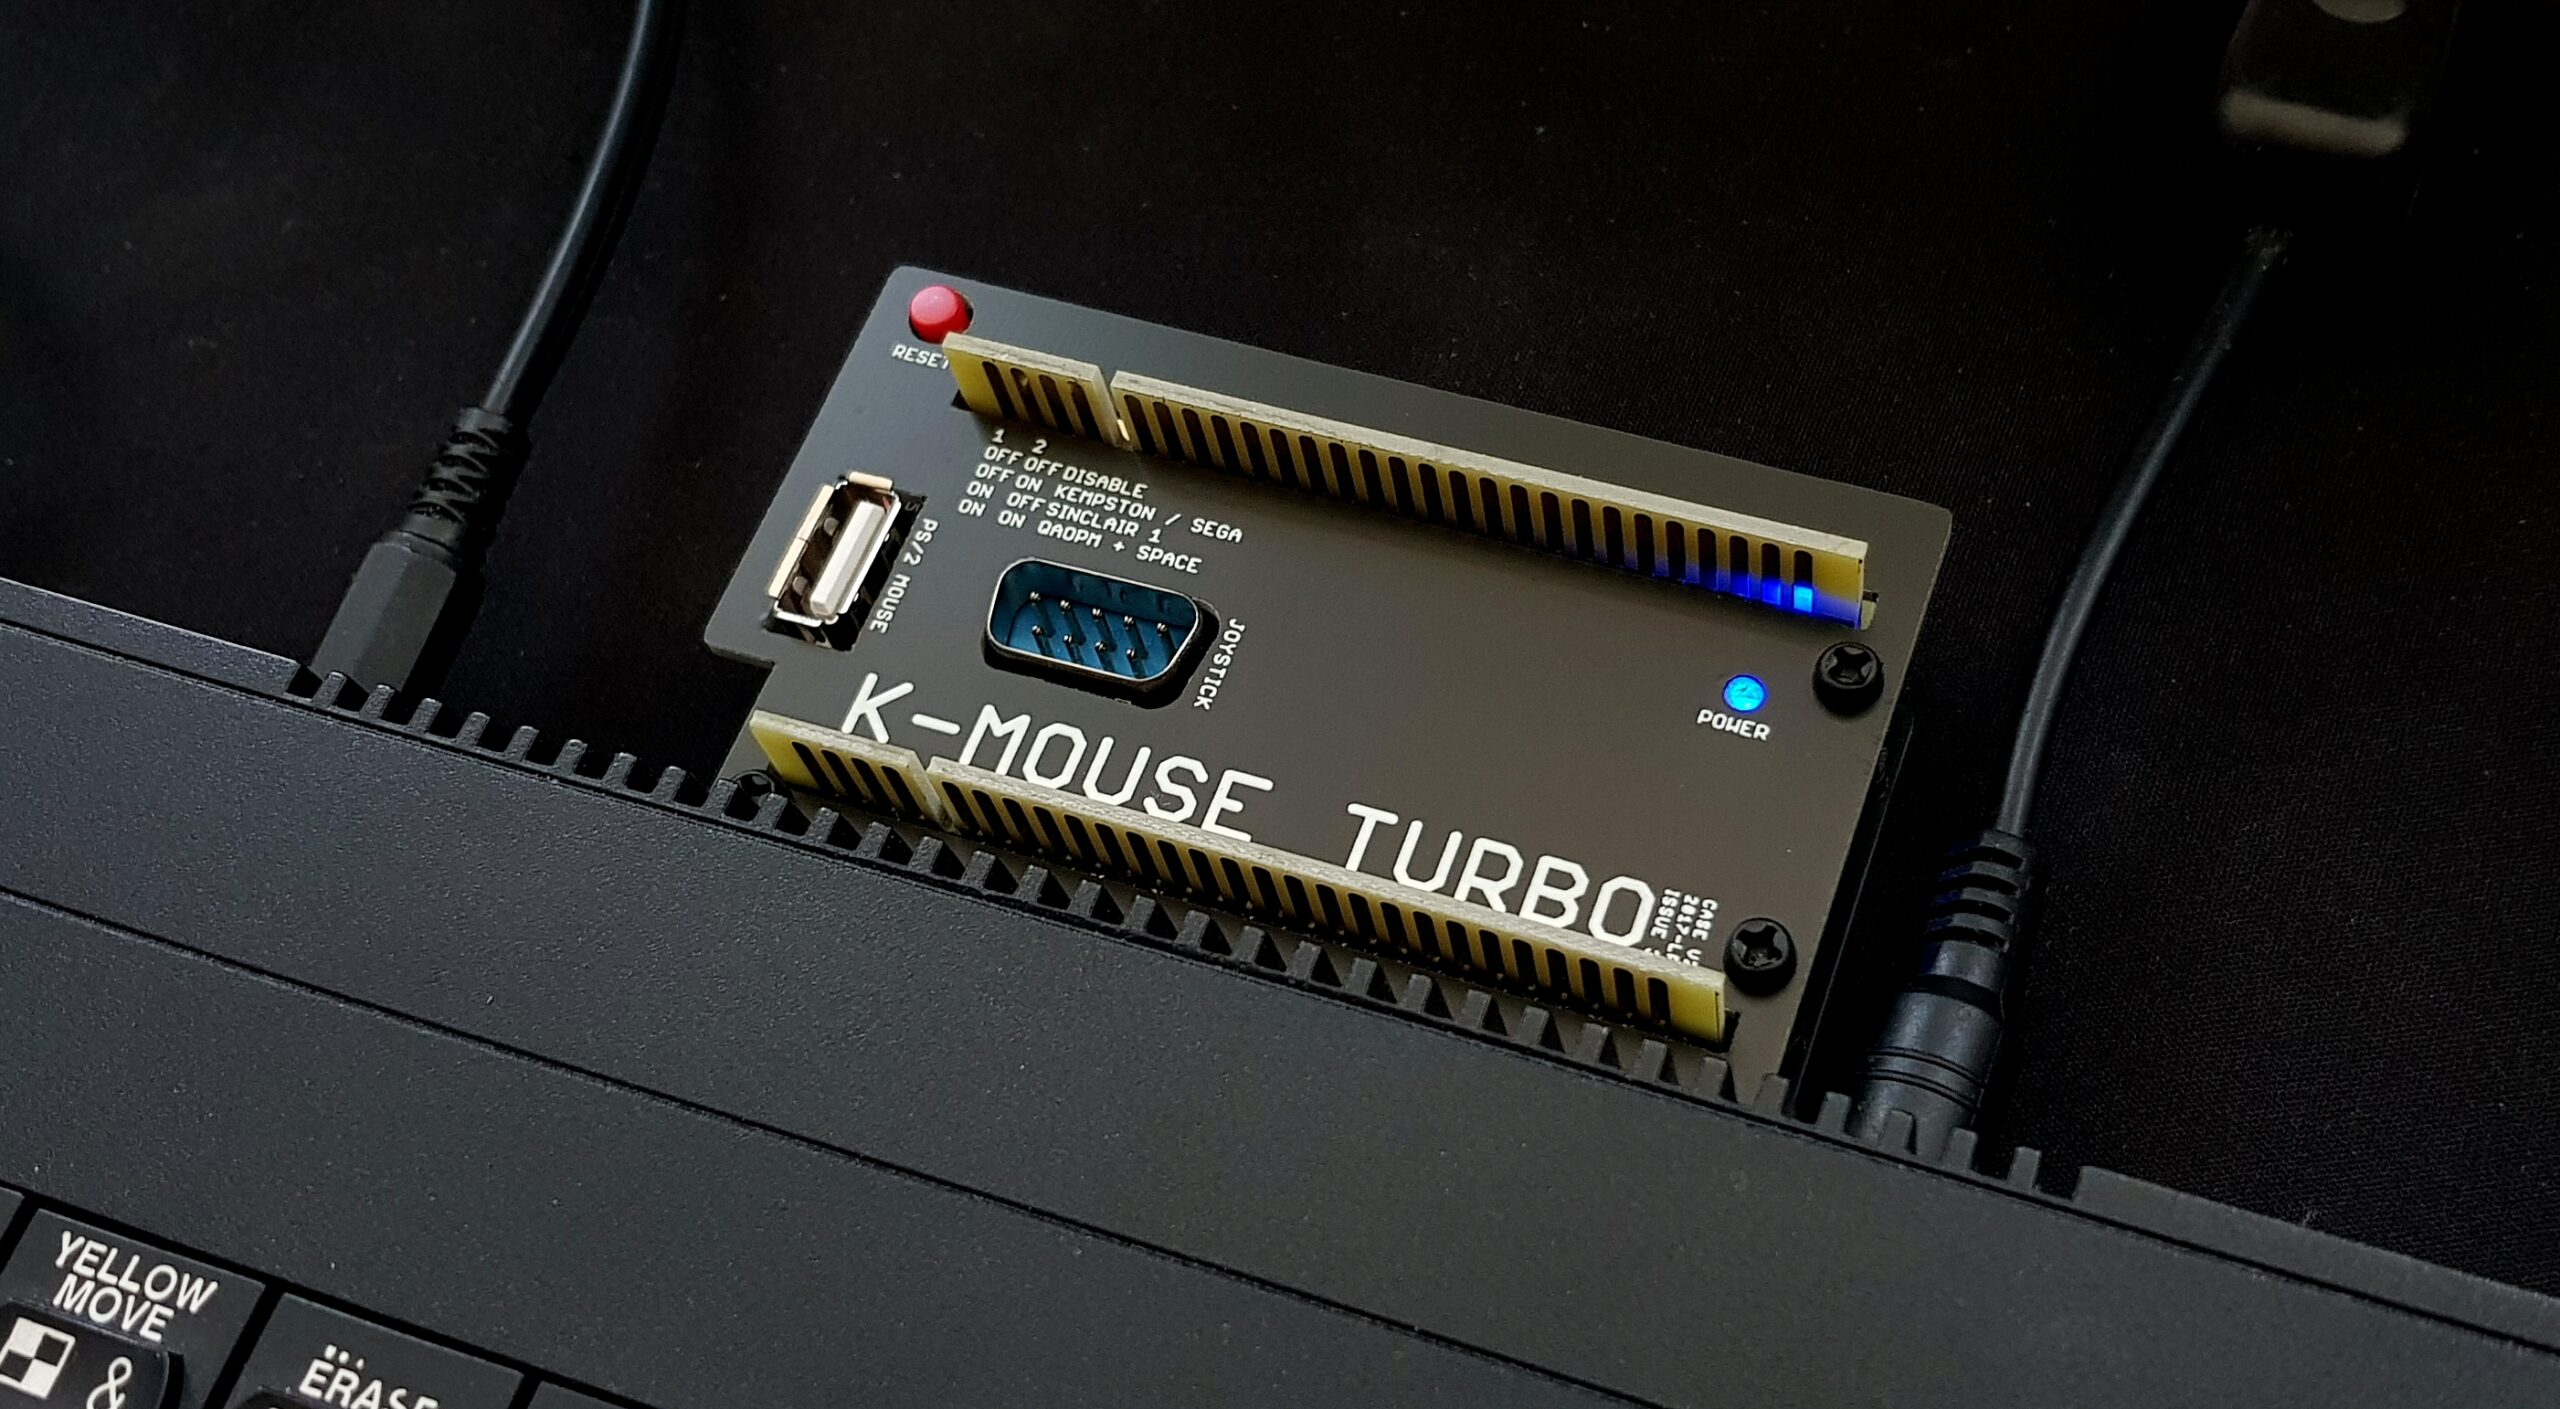

This version of the K-Mouse Turbo XL comes with the very good looking pcb case!
With non-scratching plastic screws.
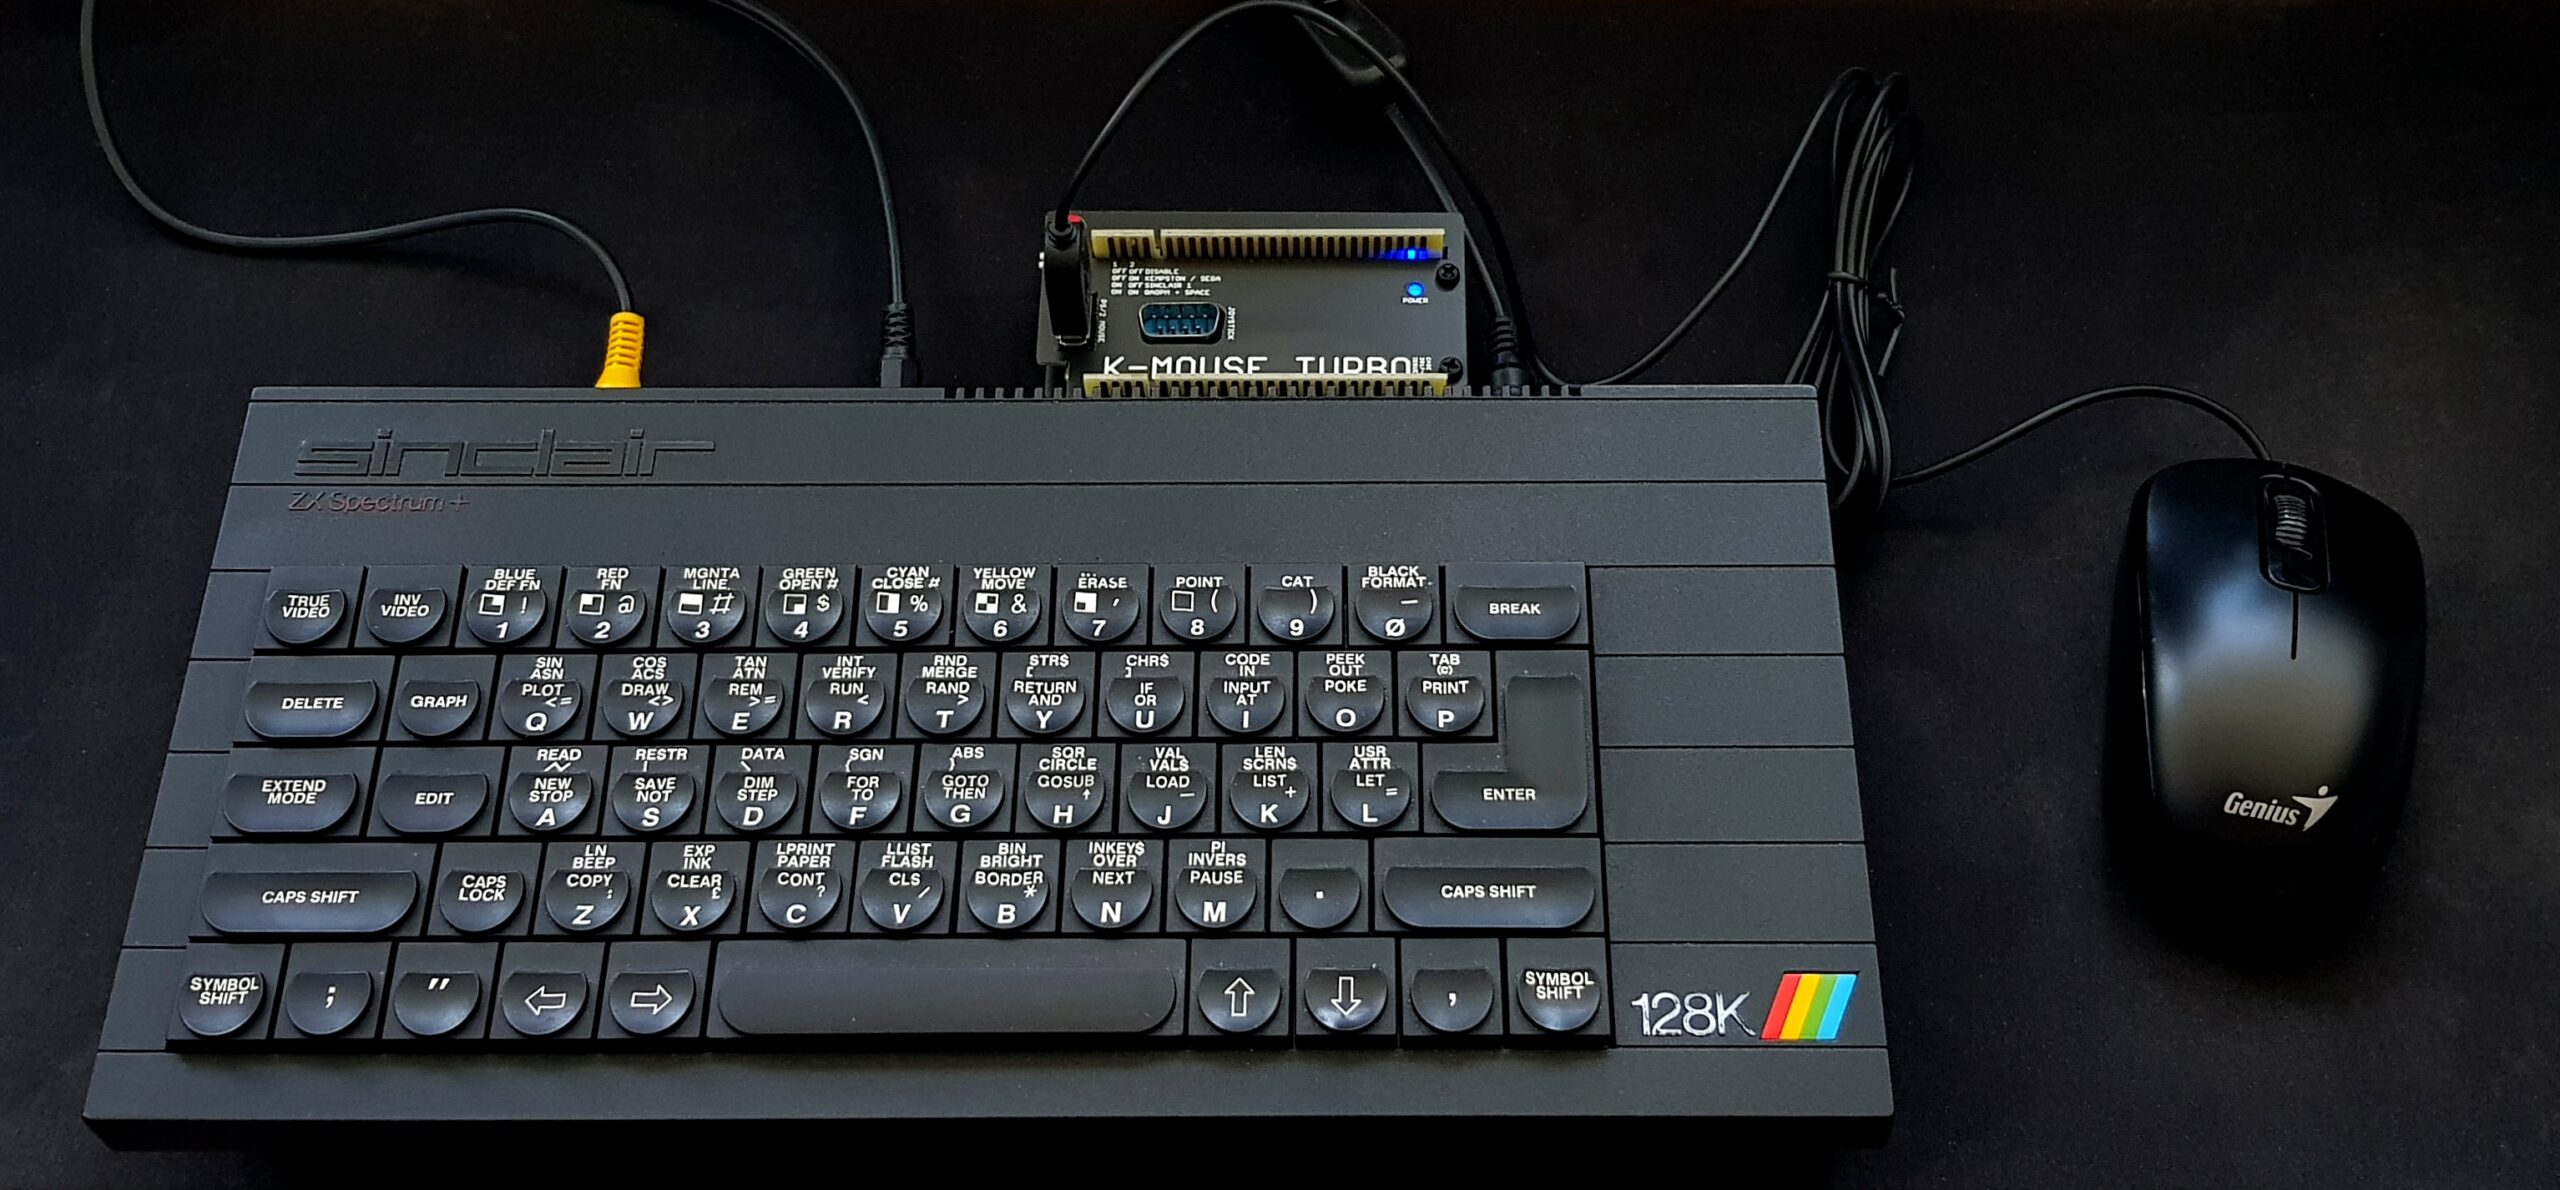
The K-Mouse Turbo v2017 is fully compatible with all Sinclair ZX Spectrum models:
ZX Spectrum 16K, 48K, 48K+, 128K, +2, +2A, +2B, +3.
Warning: only a USB mouse that supports the PS/2 protocol is supported!
You can use a PS/2 mouse as well, with a PS/2 to USB adapter.
We offer a compatible mouse in the webshop.
A 15 pin to 9 pin adapter / active converter for PC joysticks can cause damage to the K-Mouse Turbo interface, so do NOT use such!
Read this manual for all features of the K-Mouse 2017-LP interface: K-Mouse Turbo 2017-LP v3 manual
Many Kempston Mouse compatible games can be found at: https://velesoft.speccy.cz/kmsoft.htm
Professional looking pcb case:
To be used with PS/2 compatible USB mouse, like this one – available in our webshop:
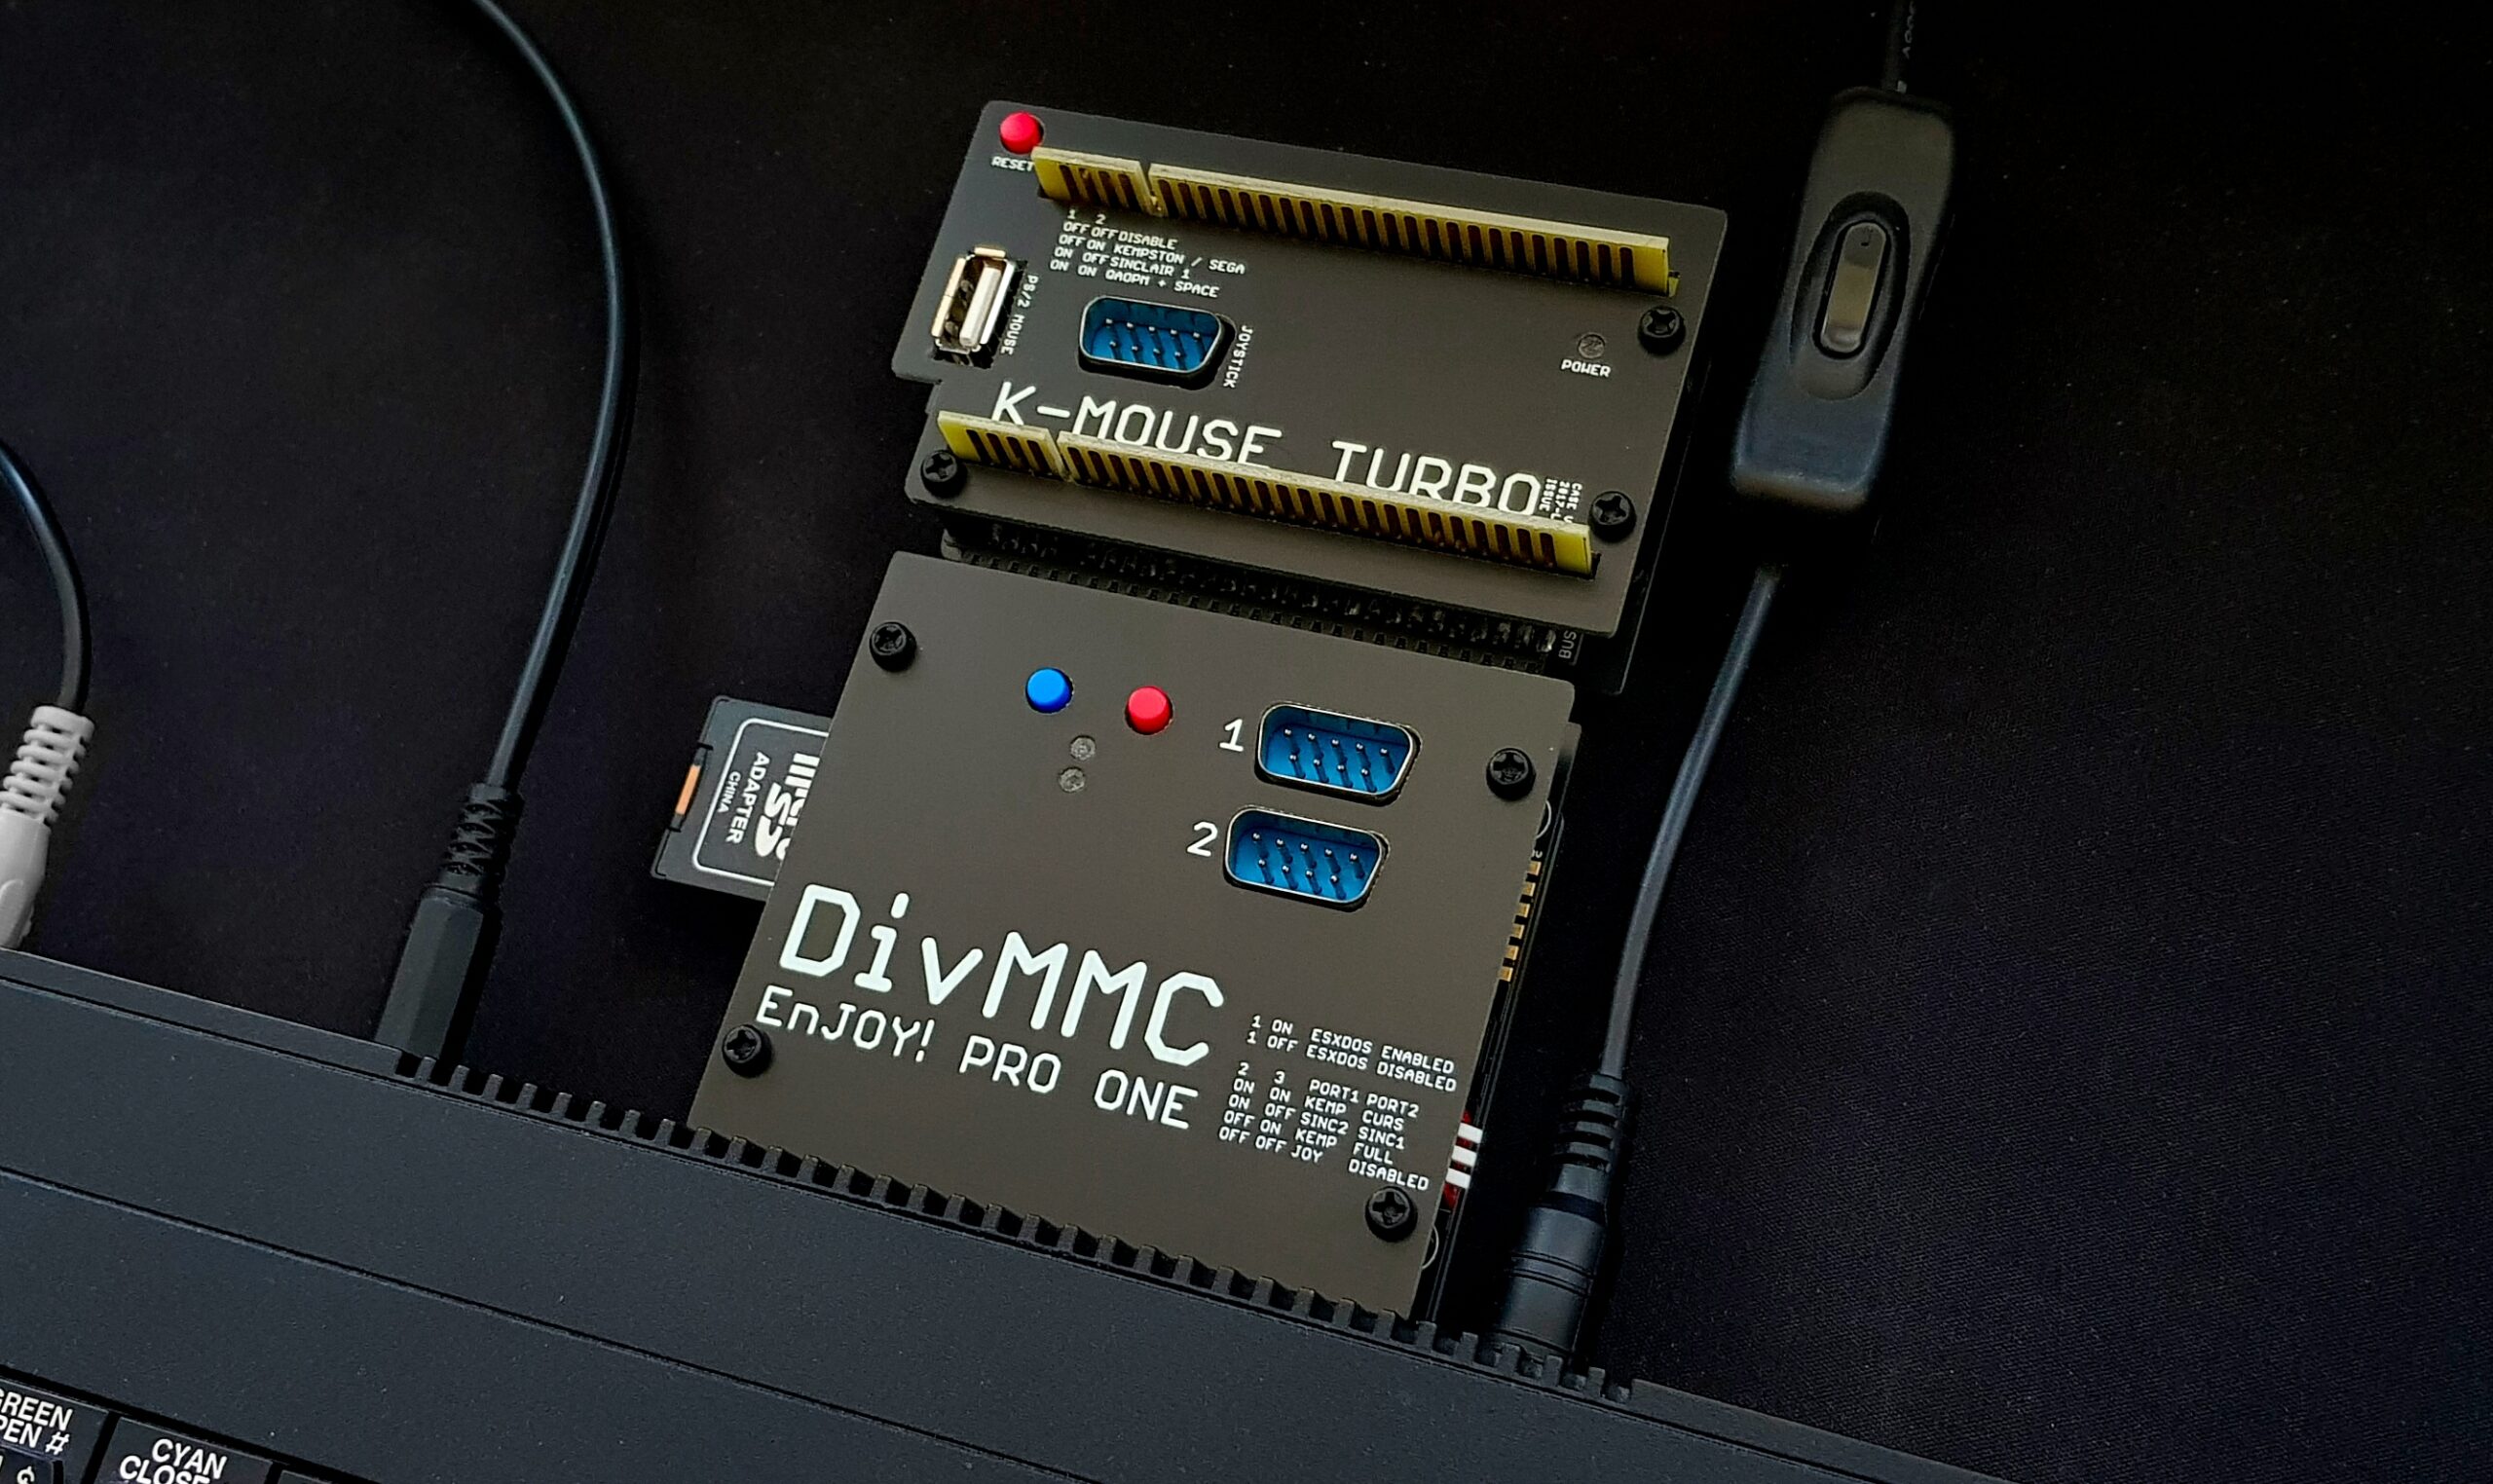
XL version with three throughput edge connectors for other add-ons:
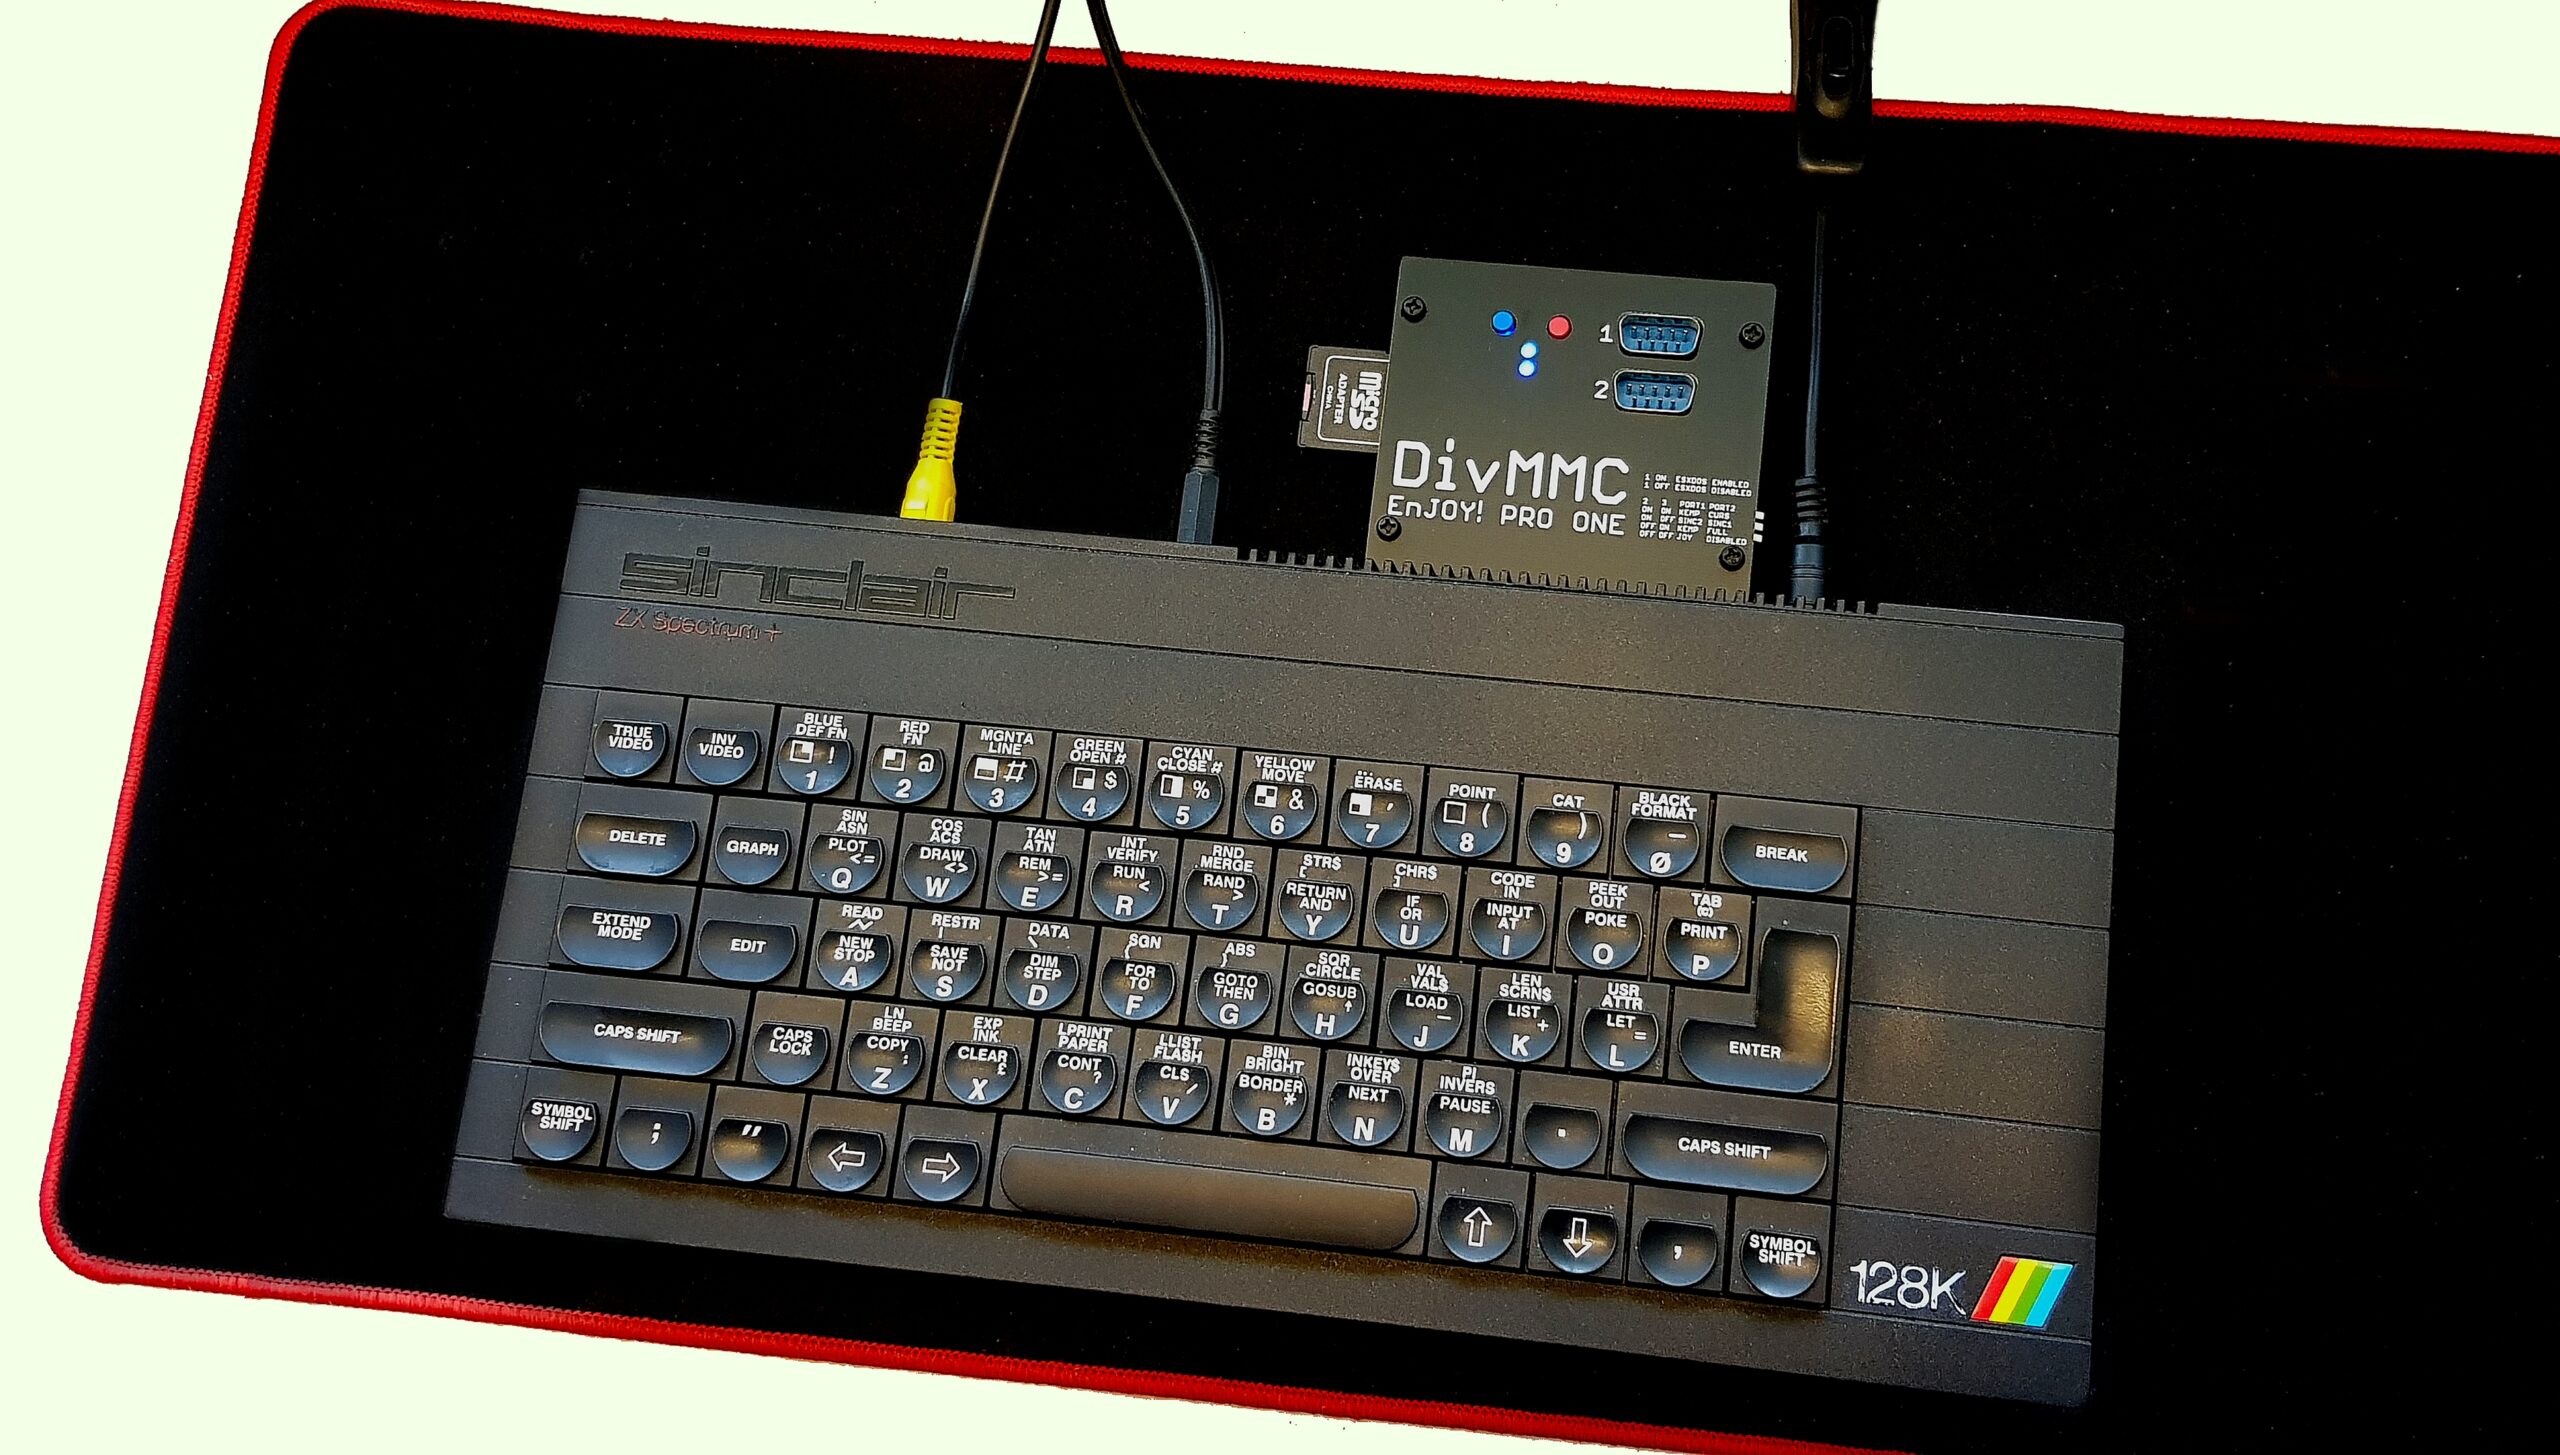
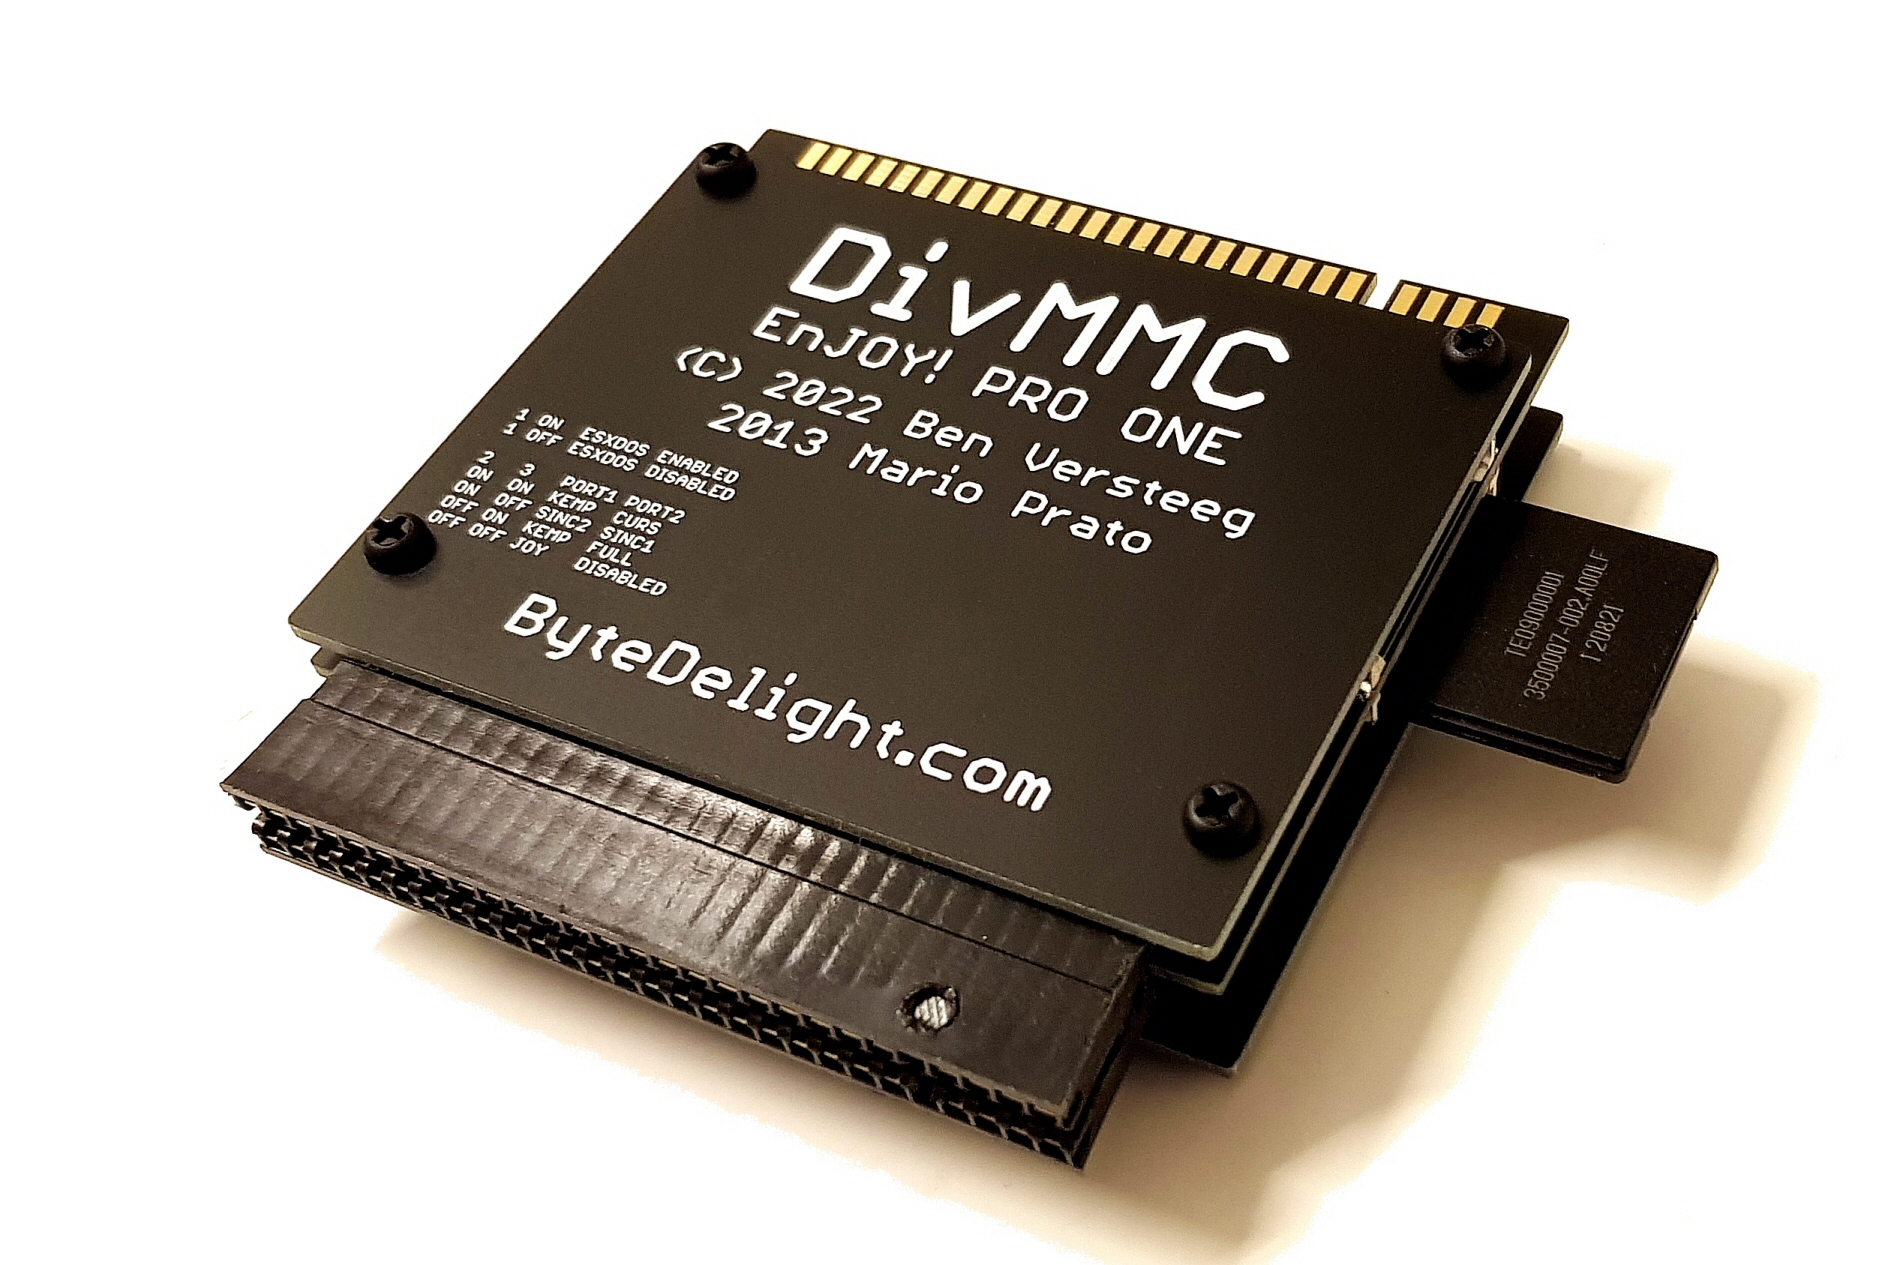
Can be combined with many other add-ons, like the DivMMC EnJOY! PRO ONE storage interface:
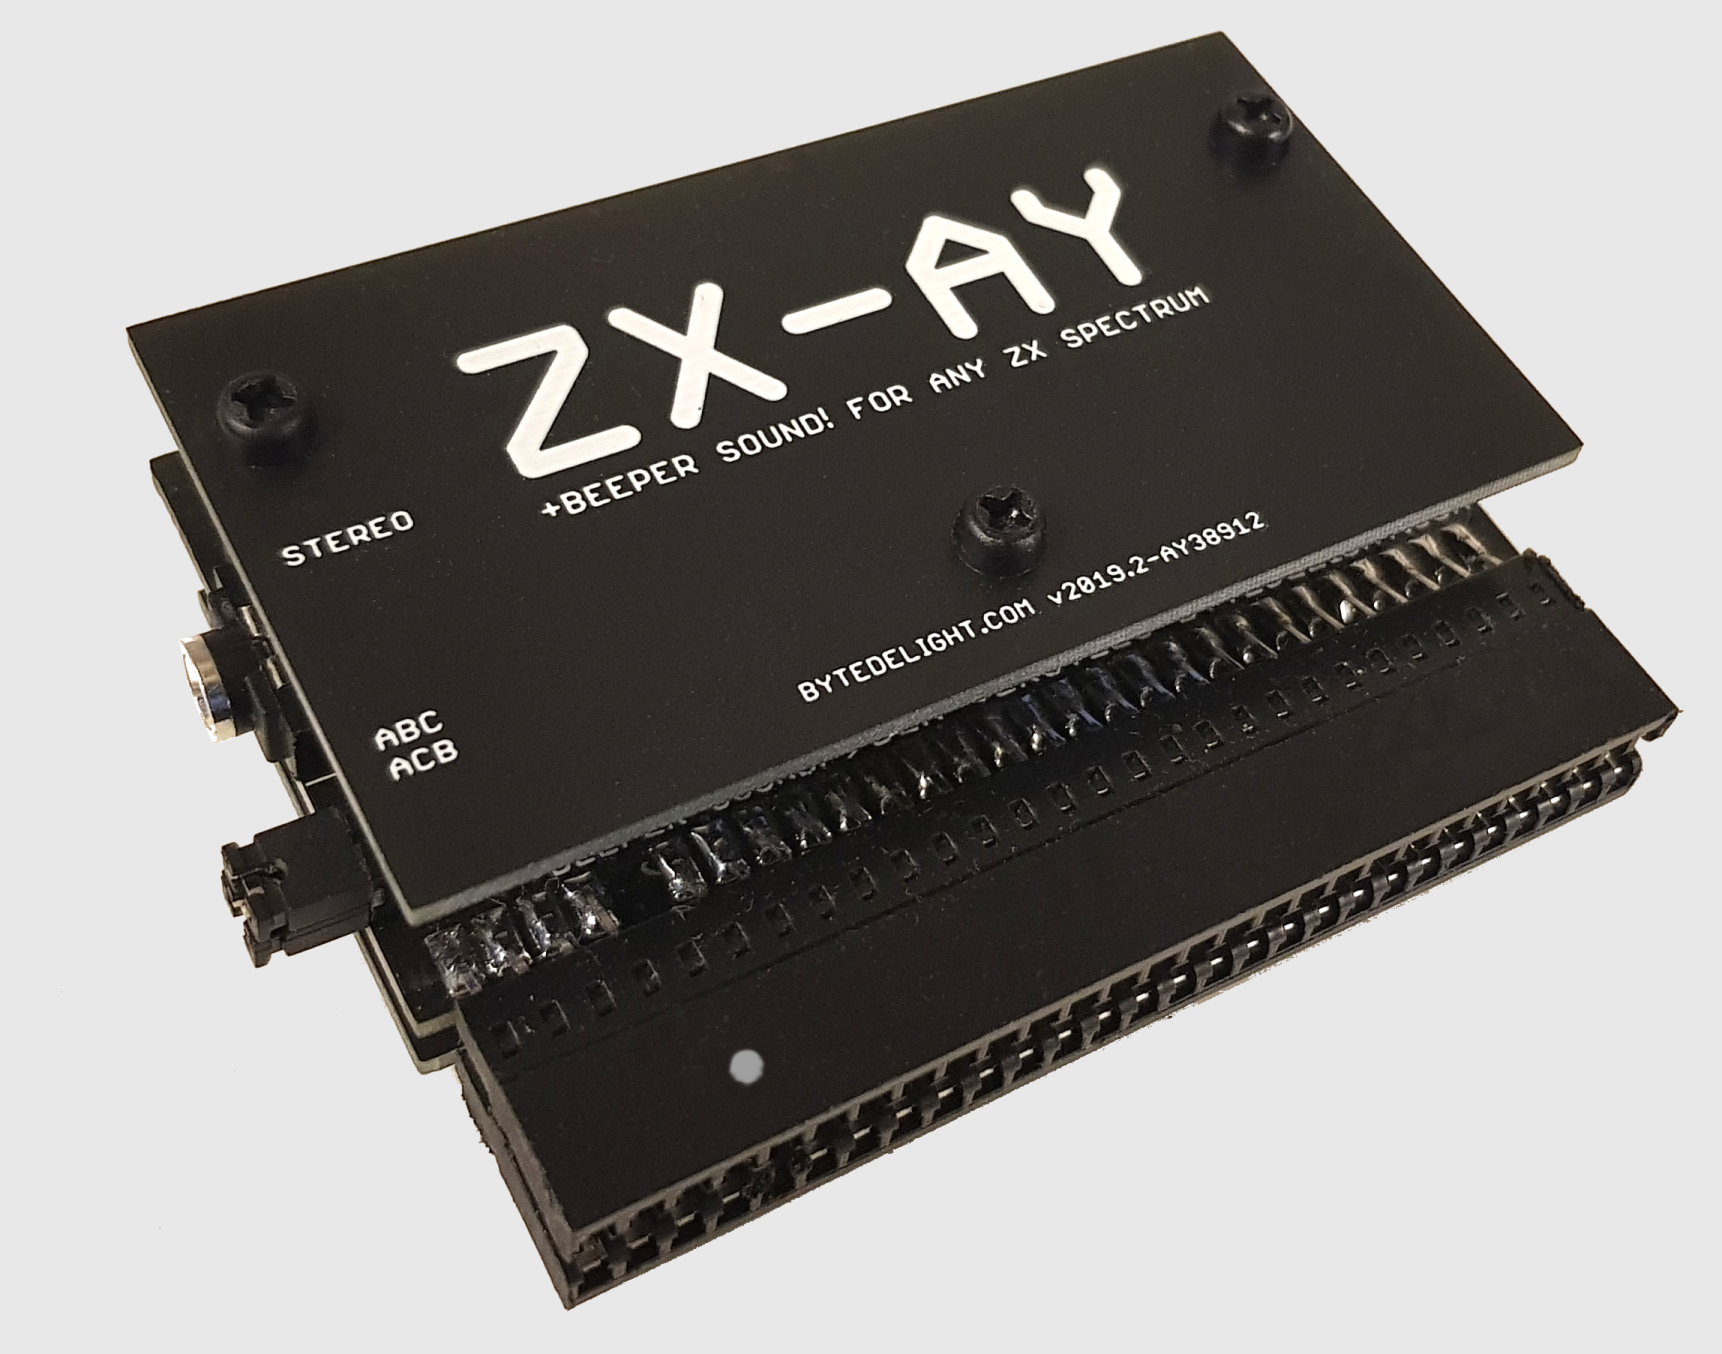
The ZX-AY has similar audio hardware as present inside any ZX Spectrum 128K model.
Which includes the AY-3-8912 sound chip and BEEPer sound circuitry, but adds all of the above benefits.
There is no need to modify your ZX Spectrum internally!
Plug in the interface (with the system powered off ), and enjoy crisp stereo 3 channel sound with many, may games!
Comes with printed manual – read the ZX-AY manual here!
The ZX-AY is fully compatible with all Sinclair ZX Spectrum models:
ZX Spectrum 16K, 48K, 48K+, 128K, +2, +2A, +2B, +3 and some clones.
The ZX-AY does not output the tape loading sound when loading games.
The ZX-AY stereo output socket does not support a mono plug.
Works great with any other add-on, such as the DivMMC EnJOY!, DivMMC EnJOY! *mini*, ZX-HD and many more!
Upgrade your ZX Spectrum 16K/48K with the ZX-AY, and enjoy games and demos that have 3 channel AY-3-8912 sound support and run on a ZX Spectrum 16K/48K (there are many!).
The first stop for obtaining ZX Spectrum games and demos is World of Spectrum:
There are hundreds of titles amongst the archives that support AY-3-8912 sound.
Another great resource of demos if Pouet.net:
Click on ‘Prods’ in the top menu and then select ‘ZX Spectrum’ in the platform list, then click ‘Submit’ and you will see an enormous list of awesome demo titles!
Many of them will also run on the ZX Spectrum 48K!
If you don’t like this external solution, ByteDelight also has available the internal stereo kit for any ZX Spectrum 128K model.
Check out the webshop at Bytedelight.com!
|
If you’re not sure, here are the differences between the available models (click to enlarge):

Visit this page to read about the development of this product.
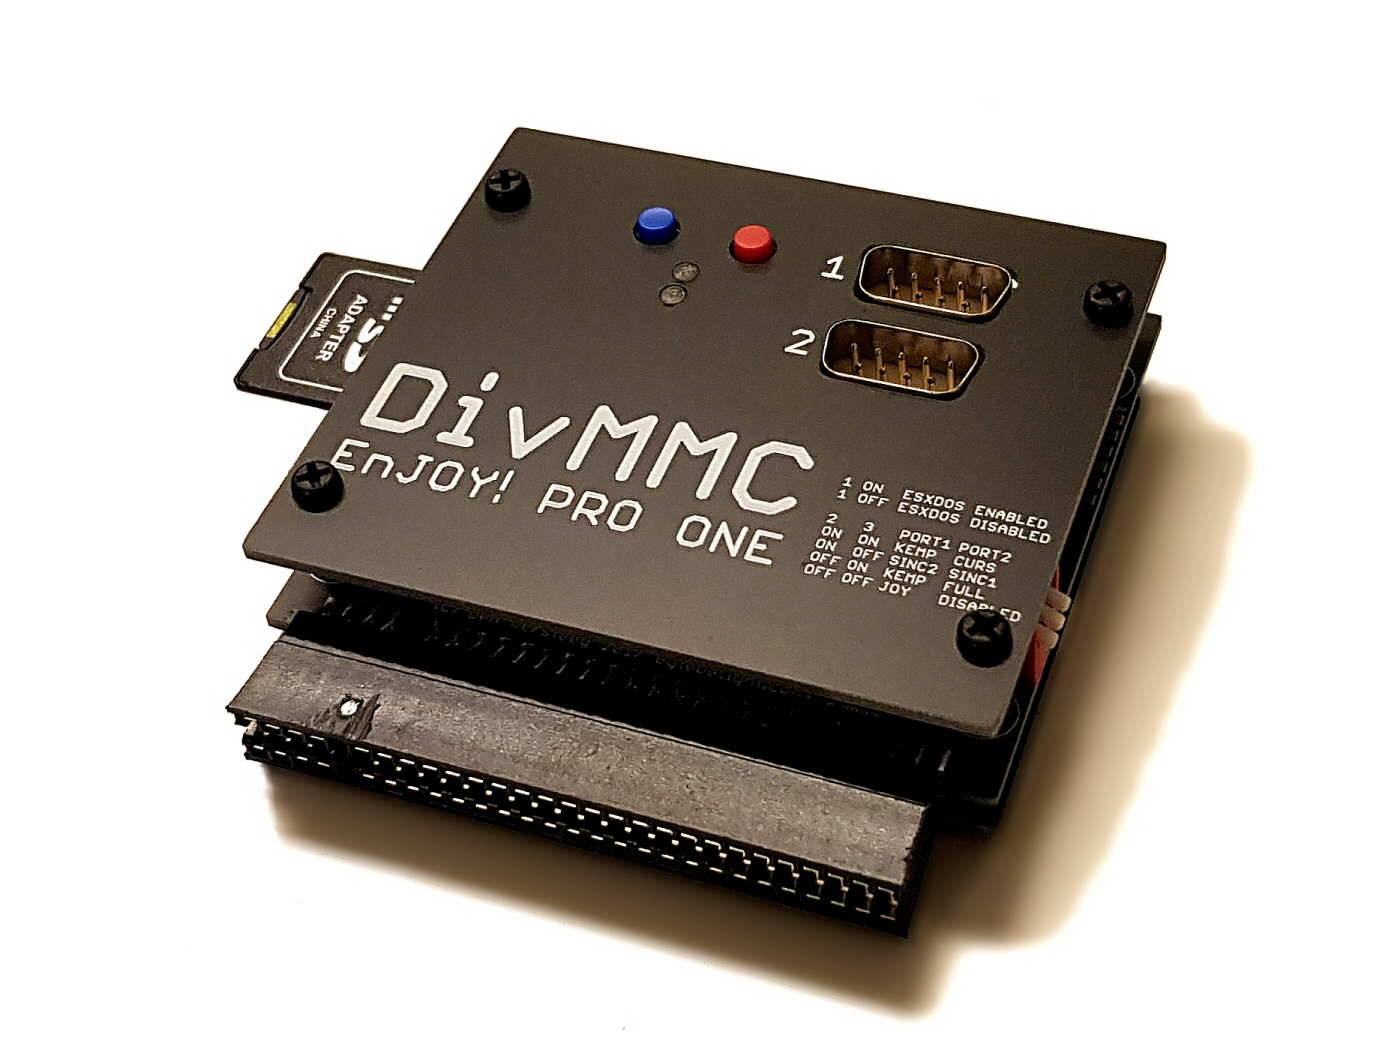
The most compatible DivMMC version ever!
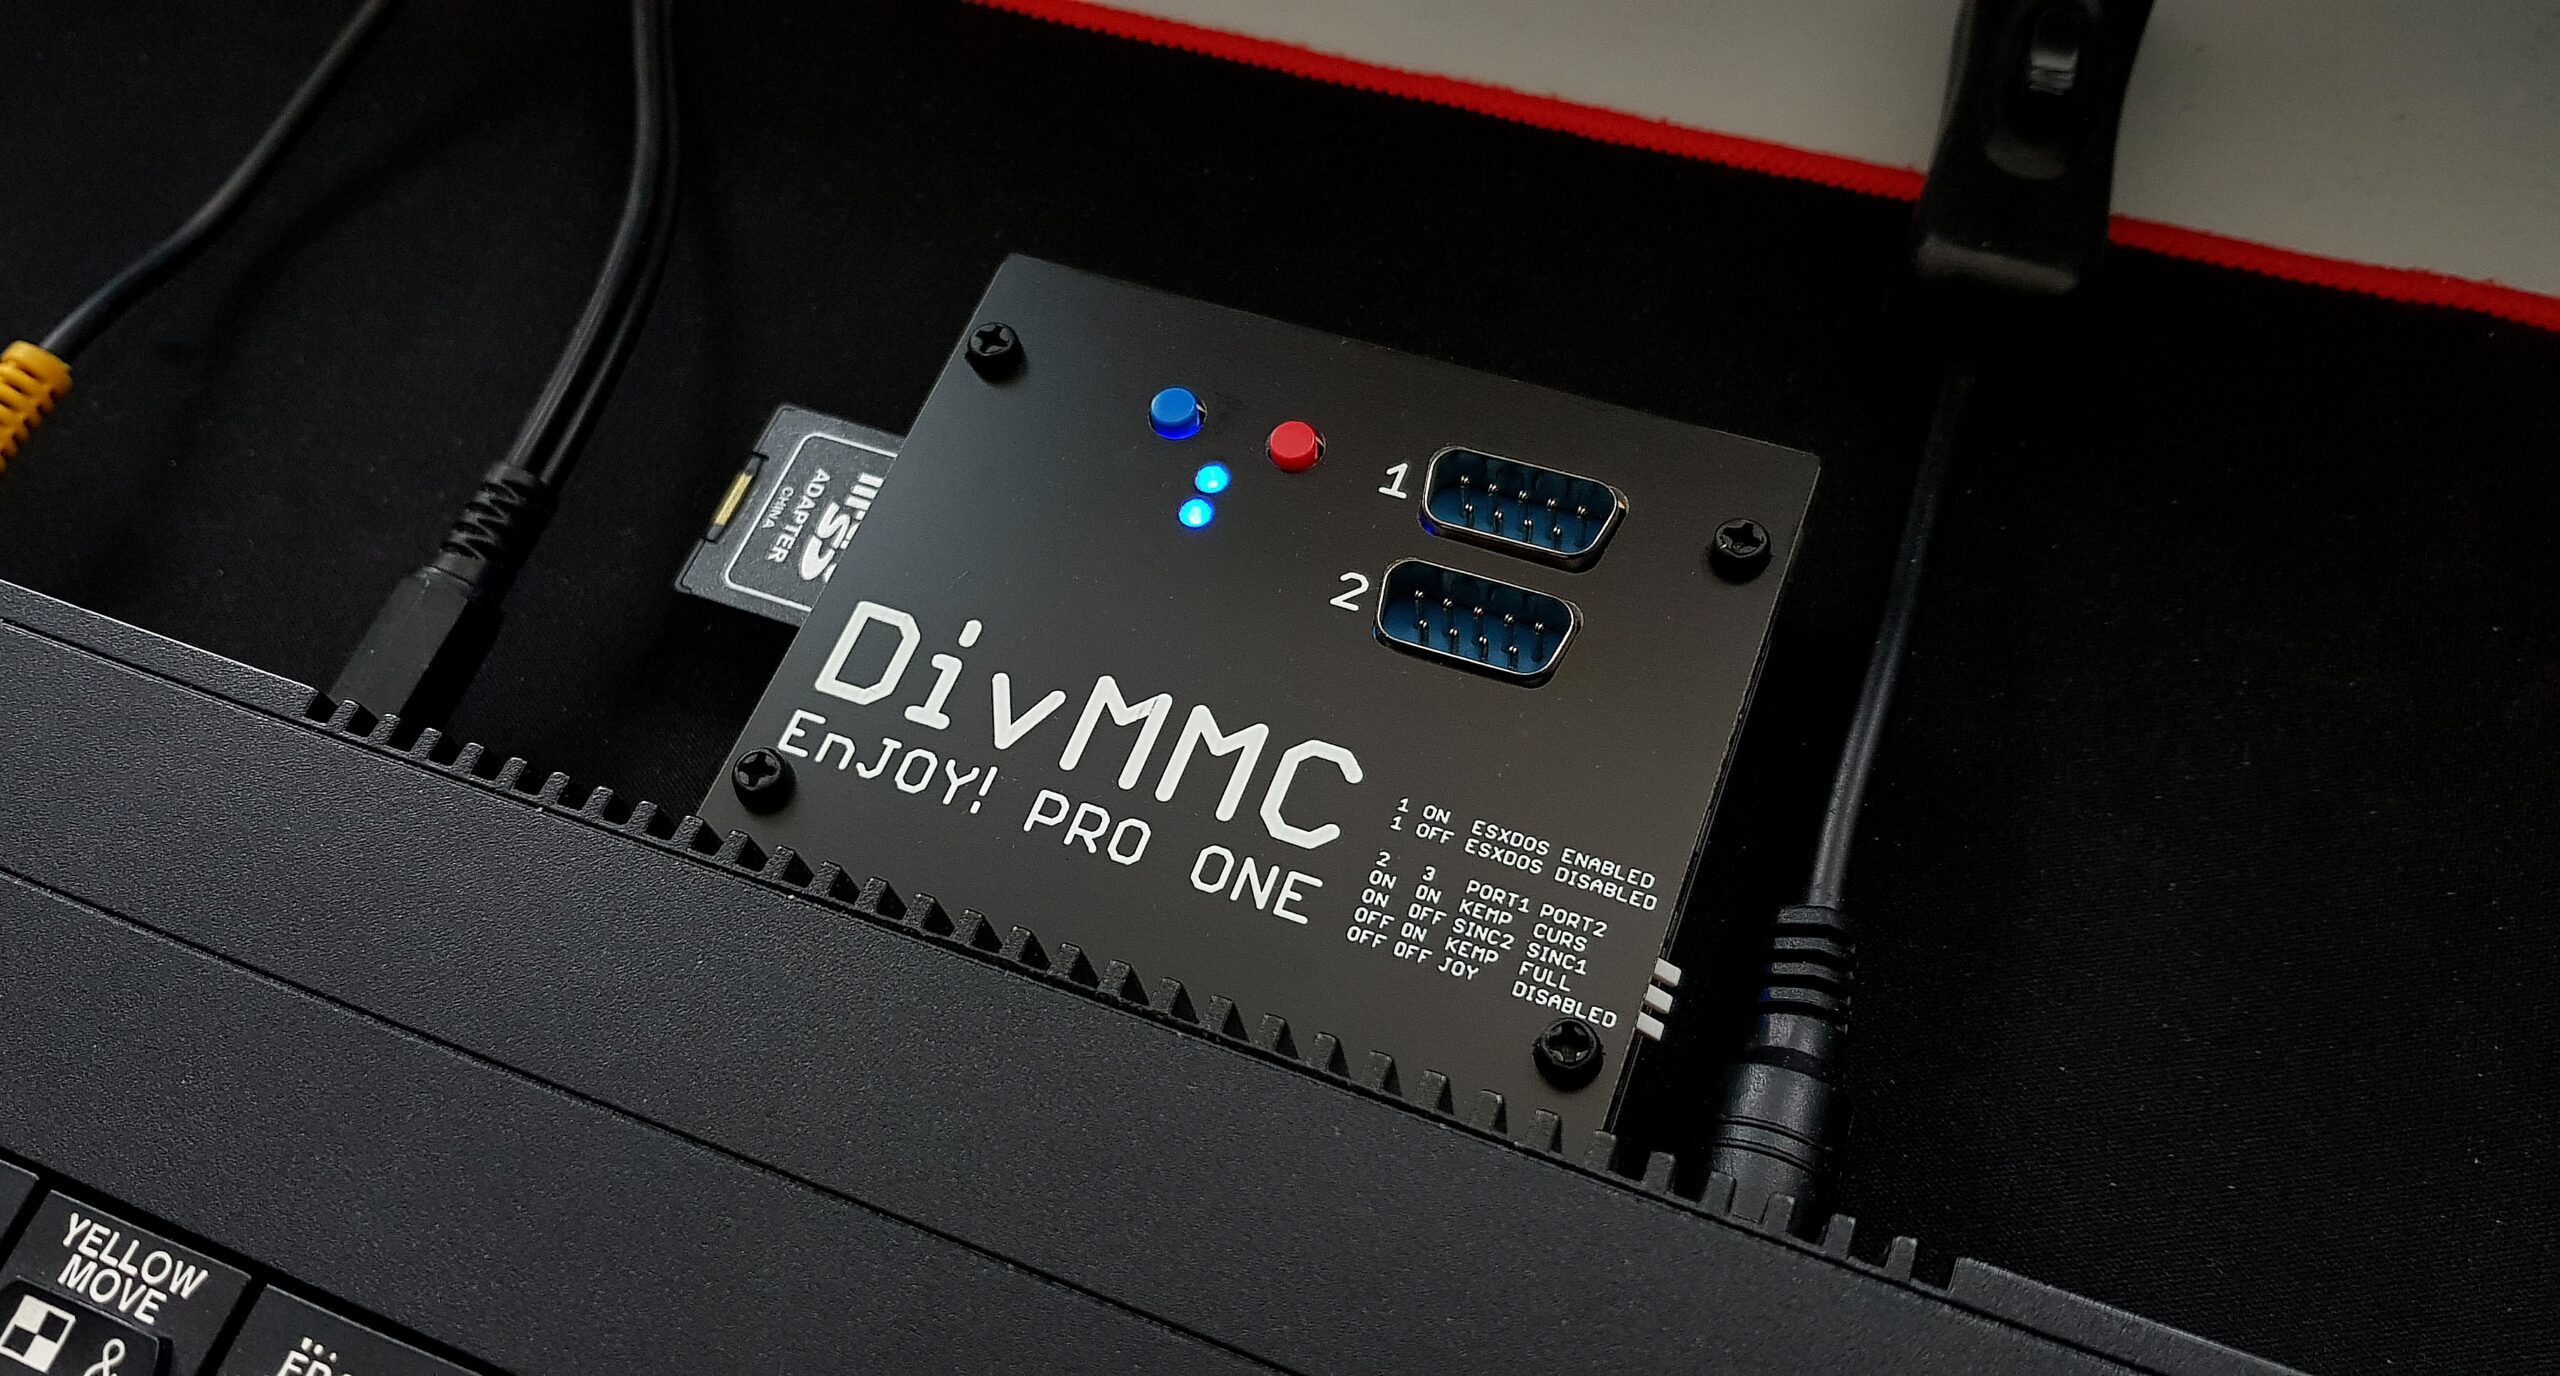
Autodetection of the ZX Spectrum model: no jumper or DIP switch needs to be set to a specific machine.
The DivMMC EnJOY! PRO ONE doesn’t need a proper clock signal of the ZX Spectrum, making it work on each and every model!
Works perfectly with:
Check out our compatibility chart for more info: https://www.bytedelight.com/?page_id=3605
Play games with your kids, wife, best friend, colleague or neighbour with 2 joysticks!
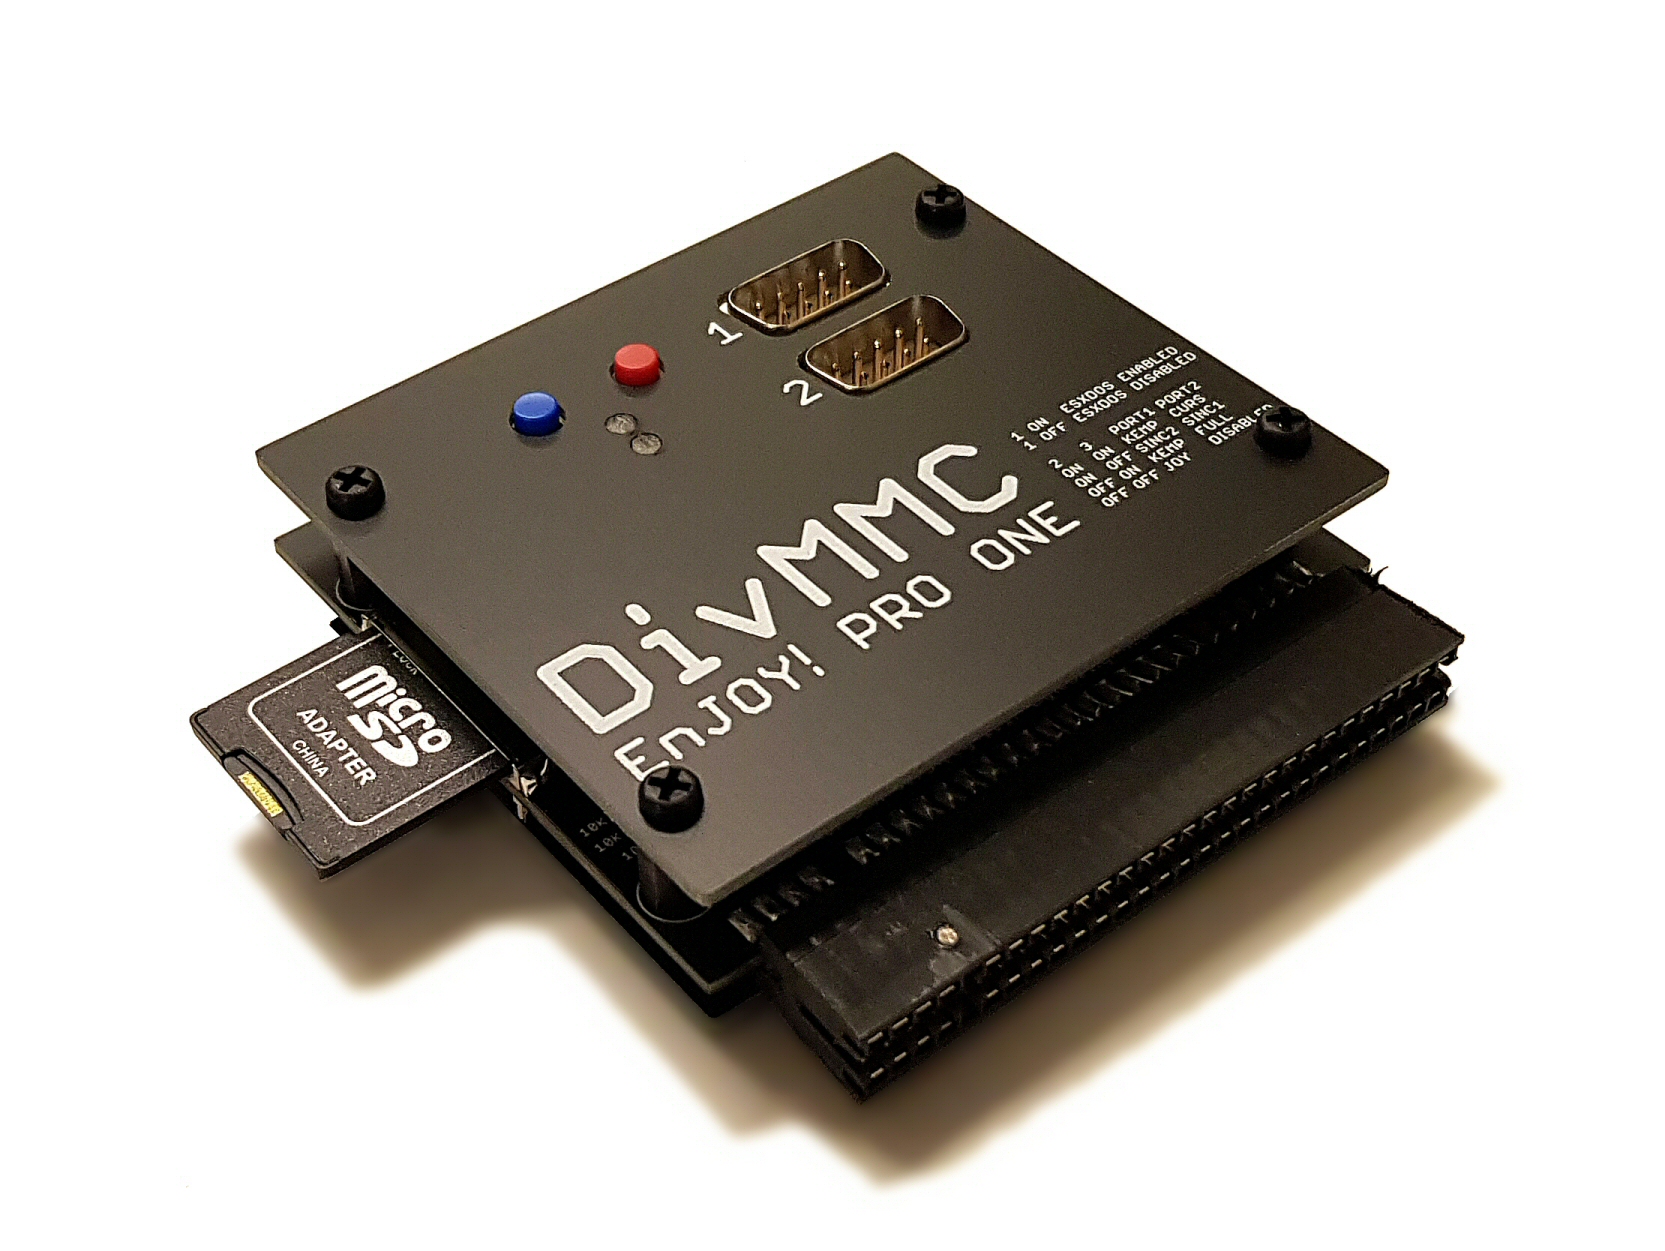
The DivMMC EnJOY! PRO ONE has not one but two joystick ports!
Out of the box the joystick ports act as Kempston joystick and Cursor joystick.
But you have the possibility to select one of these three sets:
Some examples when another configuration is useful:
If you are using another interface that has a Kempston joystick port, configure the DivMMC EnJOY! PRO ONE to Sinclair 1 joystick + Sinclair 2 joystick to avoid conflicting ports
Want to add another interface to your ZX Spectrum?
The DivMMC EnJOY! PRO ONE has a proper throughput edge connector for any device.
And that even with these small dimensions!
If you’re looking for the default SD card contents (because you lost them or so), visit this page.
If you want to update your ESXDOS version, visit this page.
If you want to use +3 BASIC and read/write support for SD cards, you can use the +3e ROMs.
For this it is possible to disable ESXDOS but still have the SD card available.